Beckys Bridal Formal Fabrics Uncategorized What is the Kitchen Color for 2024? A Guide for Mornington, Australia

What is the Kitchen Color for 2024? A Guide for Mornington, Australia

What is the Kitchen Color for 2024? A Guide for Mornington, Australia post thumbnail image

The kitchen is often considered the heart of the home, and in 2024, kitchen color trends are embracing a balance of modern sophistication and timeless warmth. If you’re planning a kitchen renovation in Mornington, Australia, or simply looking to refresh your space, understanding the latest color trends can help you make the right choice.

an old style cabinet

From earthy tones to bold accents, the kitchen colors for 2024 cater to a variety of styles, whether you prefer a coastal aesthetic, a contemporary urban look, or a classic Hamptons feel. With Mornington Cabinet Makers, let’s dive into the top trending kitchen colors for 2024 and how they align with Mornington’s unique coastal charm.

## 2024 Kitchen Color Trends: What to Expect

The kitchen color trends for 2024 highlight a move toward nature-inspired palettes, with an emphasis on serenity and depth. Here are some of the top color trends shaping modern kitchens:

1. Earthy Greens and Olive Hues

Shades of green have taken over modern kitchen designs, reflecting a renewed interest in sustainability and a desire to bring natural elements indoors. Whether it’s a muted sage green, a deep olive hue, or a forest-inspired shade, green pairs beautifully with wood accents, stone countertops, and brushed gold hardware.

💡 Perfect for homes in Mornington, green kitchens harmonize with the lush landscapes of the Mornington Peninsula and the natural beauty of coastal surroundings.

2. Warm Neutrals and Soft Beiges

The shift away from stark white kitchens has led to the rise of warm neutrals. Shades like taupe, beige, sand, and mushroom add depth and versatility, making them a great choice for Mornington homeowners who want an inviting and elegant space.

💡 Pair warm neutrals with natural textures like oak cabinetry, rattan pendants, and marble benchtops to create a relaxed yet luxurious kitchen feel.

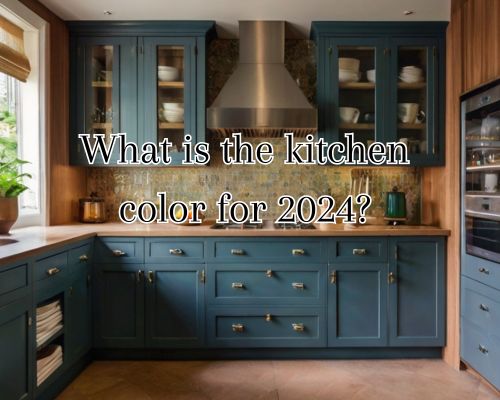
3. Deep Navy and Coastal Blues

With Mornington’s proximity to the ocean, coastal-inspired kitchens are a popular choice. Deep navy blue, sky blue, and seafoam green bring a refreshing yet sophisticated touch to modern kitchens. Whether used on cabinetry, islands, or splashbacks, blue hues work well in both classic and contemporary settings.

💡 Complement blue cabinetry with brass or matte black fixtures, natural wood flooring, and white quartz countertops for a polished coastal look.

4. Charcoal, Graphite, and Dark Hues

Dark kitchens are making a bold statement in 2024, especially in luxury kitchens. Shades of charcoal, graphite, and deep espresso create a striking contrast against lighter materials like marble and timber. These colors are particularly effective in large, open-plan kitchens, where they add depth and drama.

💡 For a Mornington home, balance dark cabinetry with light-toned flooring and large windows to maintain an airy coastal feel.

5. Earthy Terracottas and Rustic Reds

With the rise of Mediterranean aesthetics, earthy tones like terracotta, clay, and burnt sienna are trending in Australian kitchens. These warm, natural colors evoke a sense of coziness and work beautifully with textured tiles, open shelving, and handcrafted ceramics.

💡 A terracotta-inspired backsplash or a rustic red feature wall can give your Mornington kitchen a warm, sun-kissed ambiance.

How to Choose the Right Kitchen Color for Your Mornington Home

Selecting the perfect kitchen color involves considering your home’s style, natural lighting, and local influences. Here are some key factors to help you decide:

✅ Consider Your Home’s Aesthetic

Mornington has a mix of modern beachside homes, classic Victorian houses, and contemporary residences. Choose a color palette that complements your interior style. For example:

  • Coastal homes: Blues, seafoam greens, and sandy neutrals.
  • Contemporary homes: Charcoal, navy, and deep greens.
  • Classic heritage homes: Warm neutrals, sage green, and rustic reds.

✅ Factor in Natural Lighting

Natural light plays a significant role in how colors appear in your kitchen. Mornington enjoys abundant sunlight, making it ideal for darker colors that might otherwise feel too heavy in low-light spaces.

  • Well-lit kitchens: Can handle bold hues like charcoal, navy, or deep green.
  • Dimly lit kitchens: Benefit from lighter shades like warm whites, beiges, or soft pastels.

✅ Pair with Timeless Materials

To ensure your kitchen remains stylish for years, pair trendy colors with timeless materials like:

  • Marble or quartz countertops
  • Natural timber cabinetry
  • Brushed brass or matte black hardware
  • Handmade ceramic tiles for splashbacks

Local Insights: Kitchen Colors in Mornington, Australia

Mornington homeowners often look for practical yet stylish kitchen designs that blend well with the coastal environment. Here are a few local design tips:

  • Incorporate nature-inspired colors: Use soft greens, blues, and neutrals to reflect the natural beauty of Mornington Peninsula.
  • Choose durable materials: With high humidity and coastal exposure, opt for moisture-resistant cabinetry finishes and stone benchtops.
  • Consider open-plan layouts: Many Mornington homes embrace indoor-outdoor living, so selecting versatile colors that transition well between kitchen and outdoor spaces is key.

Final Thoughts: What is the Kitchen Color for 2024?

The kitchen colors for 2024 celebrate nature, warmth, and sophistication, making them perfect for Mornington homeowners looking to update their space. Whether you choose earthy greens, deep blues, warm neutrals, or bold charcoals, the key is to select a shade that complements your home’s style and enhances its functionality.

If you’re planning a kitchen renovation in Mornington, consider working with local kitchen designers and cabinet makers who specialize in modern Australian aesthetics, see Mornington Cabinet Makers. A well-thought-out color scheme can increase the value of your home while creating a kitchen that feels both trendy and timeless.

Need Expert Advice?

For personalized kitchen design consultations in Mornington, reach out to a local interior designer or kitchen renovation specialist to bring your vision to life. Whether you’re aiming for a coastal retreat, a modern sanctuary, or a bold statement kitchen, 2024’s color trends offer plenty of inspiration!

Related Post

a-gutter-with-overflowing-water

Why Cleaning Your Gutters Before Rain is Essential: Preventing Water Damage and Maintaining Your HomeWhy Cleaning Your Gutters Before Rain is Essential: Preventing Water Damage and Maintaining Your Home

Cleaning your gutters before it rains may not be the most exciting task, but it is an essential one. Neglecting to do so can result in serious damage to your property and end up costing you a lot of money in repairs.

a gutter with overflowing water

In this article, we will explain why it is important to clean your gutters before it rains and what can happen if you don’t.

Gutters are designed to collect rainwater and direct it away from your property. However, when they become clogged with leaves, twigs, and other debris, they can no longer do their job effectively. For cleaning services, look for Gutter Cleaning near me.

This can lead to water overflowing from the gutters and pooling around the base of your property. Over time, this can cause water damage to your foundation, walls, and roof, which can be expensive to repair. Additionally, clogged gutters can become heavy and pull away from the roofline, causing further damage.

The Importance of Regular Gutter Maintenance

To prevent water damage and leaks, protect your roof and foundation, and reduce the risk of pests and mould, it is important to regularly maintain your gutters.

Regular gutter maintenance involves a few simple steps that can save you time, money, and headaches down the road.

Preventing Water Damage and Leaks

Blocked gutters can lead to water overflow, which can damage your home’s exterior and foundation. Water can seep into the walls and cause structural damage, leading to costly repairs.

Regular cleaning of your gutters can prevent water damage and leaks, and ensure that water flows freely through your gutters and downspouts.

Protecting Your Roof and Foundation

Clean gutters can also protect your roof and foundation. When gutters are clogged, water can build up and seep into the roof, causing rot and damage. Water can also pool around the foundation, causing it to crack and shift.

Regular gutter maintenance can help prevent these problems and extend the life of your roof and foundation. See Gutter Cleaning near me.

Reducing the Risk of Pests and Mould

Blocked gutters can create a breeding ground for pests, such as mosquitoes and rodents. The standing water can also lead to mould growth, which can cause health problems for you and your family.

Regular gutter maintenance can reduce the risk of pests and mould, and ensure that your home is a healthy and safe environment.

How to Clean Your Gutters Effectively

Cleaning your gutters is an important task that should be done regularly to ensure that they function properly. Here’s how to clean your gutters effectively:

Choosing the Right Tools and Equipment

Before you begin cleaning your gutters, you need to make sure you have the right tools and equipment. Here’s a list of what you’ll need:

  • Ladder: Make sure it’s sturdy and tall enough to reach your gutters.
  • Gloves: Protect your hands from debris and sharp edges.
  • Bucket: Use it to collect debris and prevent it from falling on the ground.
  • Gutter scoop: Use it to remove debris from your gutters.
  • Gutter cleaning attachments: Use them to clean hard-to-reach areas.
  • Leaf blower or pressure washer: Use them to remove stubborn debris.

Step-By-Step Guide to Gutter Cleaning

Follow these steps to clean your gutters effectively:

  1. Set up your ladder securely near your gutters.
  2. Put on your gloves and use your gutter scoop to remove any large debris from your gutters.
  3. Use your gutter cleaning attachments to clean hard-to-reach areas.
  4. Use your leaf blower or pressure washer to remove any remaining debris.
  5. Use your bucket to collect debris and dispose of it properly.
A detailed overhead view of the plumbing layout in a modern, spacious home with multiple interconnected pipes and fixtures

What is the Plumbing Layout? Understanding Home Water SystemsWhat is the Plumbing Layout? Understanding Home Water Systems

A plumbing layout is a detailed diagram that displays the arrangement and connection of pipes, fixtures, and other plumbing components within a building.

This layout is crucial for ensuring your plumbing system functions efficiently and complies with the relevant plumbing codes.

Whether considering a kitchen, bathroom, or entire house, a comprehensive plumbing layout helps avoid potential problems and ensures all fixtures, drains, and vent systems are correctly installed.

A detailed overhead view of the plumbing layout in a modern, spacious home with multiple interconnected pipes and fixtures

When planning a bathroom plumbing layout, codes like the International Plumbing Code specify clearances and fixture placements to ensure safety and functionality.

Knowing these guidelines can help you design a bathroom that maximises space while ensuring all plumbing elements are accessible and effective.

“It is important to note that all plumbing layouts should be meticulously planned to avoid surprises during the actual installation.” said Dean Owens from Plumber Warragul.

A well-designed plumbing layout not only assists in the initial setup but also facilitates future maintenance and upgrades.

For a complex system such as plumbing, having a clear and precise layout can be a lifesaver when it comes to troubleshooting or enhancing existing setups.

A detailed plumbing diagram serves as a blueprint for your entire domestic water system, making it an indispensable tool for any homeowner or professional plumber.

Understanding Plumbing Systems

Plumbing systems are essential for both water supply and waste removal in any residential or commercial building. This section covers the main components and the interaction between water supply and drainage.

Components of a Plumbing System

A typical plumbing system consists of various pipes, fittings, and fixtures.

Pipes can be made from different materials like PVC, copper, and PEX.

  • PVC pipes: Common for drainage due to their durability and ease of installation.
  • Copper pipes: Often used for hot and cold water supply lines due to their heat resistance and longevity.
  • PEX pipes: Flexible and easy to install, suitable for various applications.

Plumbing fixtures such as sinks, toilets, bathtubs, and showers are connected to the system via valves and fittings. These components manage water flow and pressure within your home.

Each plumbing fixture typically includes a P-trap to prevent foul gases from entering.

Additionally, vent pipes help maintain proper air pressure in the drainage system.

Water Supply and Drainage

The water supply system begins at the main water line which brings cold water into your property. From here, the water is divided into hot and cold lines.

  • Hot water systems often include a water heater.
  • Cold water supply lines directly connect to fixtures like sinks and toilets.

In comparison, the drainage system handles waste removal.

Drain pipes transport waste from fixtures to the sewage line or septic tank.

Toilet drains, sink drains, and bathtub drains all connect to larger drain lines.

To ensure efficient drainage, proper installation of vent pipes is critical. These pipes allow air flow and prevent vacuum locks that can disrupt the drainage process.

Efficient plumbing systems also feature shut-off valves which allow you to control water flow for maintenance or emergencies.

Proper planning and installation ensure optimal water pressure and effective drainage.

Design and Installation Techniques

Effective design and installation techniques are critical for ensuring a functional plumbing system. With Dean Owens from Plumber Warragul, here, we’ll address essential strategies for layout planning and compliance with codes and regulations to achieve an efficient and leak-free system.

Layout and Venting Strategies

When planning a bathroom plumbing layout, accurate placement of fixtures such as the toilet, shower head, and vanity is essential.

Water supply lines should be organised to minimise water waste and travel distance.

Using a bathroom plumbing diagram can help visualise the system, ensuring that all connections and centerlines are aligned correctly.

Slope plays a crucial role in drainage.

Pipes must be angled correctly to ensure smooth water flow.

For instance, a general rule for household drainage pipes is a slope of 1/4 inch per foot.

Additionally, incorporating cleanout plugs and venting systems is vital to avoid bad odours and allow for maintenance access.

Incorporate DWV fittings in your design to seamlessly connect pipes, and ensure the proper use of a closet flange for toilets and vanity units.

This will facilitate effective water flow and proper ventilation.

Always use a diagram to guide your installation steps and double-check all connections to avoid leaks.

Codes and Regulations

Adhering to plumbing codes and regulations is essential to ensure your system meets legal and safety standards. The International Plumbing Code (IPC) is one of these codes.

These codes dictate the minimum requirements for pipe sizing, fixture placement, and venting. This is to prevent leaks and ensure proper ventilation.

Plumbing symbols and clear labelling on plumbing diagrams are essential for both professional plumbers and DIYers. This includes documenting slope requirements, vent stack placement, and specific fittings like flush bushing and closet bends.

Make sure you consult local building codes, as requirements might vary by jurisdiction. Maintaining these standards guarantees that your plumbing system is safe, efficient, and durable.

Proper rough-in measurements and consistent checks against the codes will help avoid costly errors and reworks.

a roofing under work and maintenance

How to Get a Roof Estimate in New Jersey: A Comprehensive GuideHow to Get a Roof Estimate in New Jersey: A Comprehensive Guide

When it comes to maintaining your home or business, one of the most crucial aspects is ensuring the roof is in top condition. Whether you’re dealing with a leaky roof, considering a roof replacement, or simply need an assessment of its current state, knowing how to get an accurate roof estimate is essential. With CJ Commercial Roofing NJ, we will provide a detailed guide on how to get a roof estimate in New Jersey, highlighting what to expect, what factors influence the cost, and how to make sure you’re getting the best deal for your property.

a roofing under work and maintenance

What is a Roof Estimate?

A roof estimate is an assessment provided by a roofing contractor that details the potential cost of repairing or replacing your roof. The estimate typically includes the cost of labor, materials, and other associated expenses, such as permits or additional services. It gives homeowners a clear idea of the financial investment required for roof work, and helps in decision-making.

Why Do You Need a Roof Estimate in New Jersey?

In New Jersey, unpredictable weather conditions can take a toll on your roof. From harsh winters with heavy snow to summer storms with high winds, your roof is constantly exposed to the elements. If your roof is damaged or aging, it’s important to act quickly before minor issues become major problems. Getting a roof estimate will help you assess the damage and understand the scope of work required for repairs or replacement.

How to Get a Roof Estimate: Step-by-Step Process

1. Research Local Roofing Contractors in New Jersey

To begin the process of getting a roof estimate, you’ll first need to find reputable roofing contractors in your area. Whether you’re in bustling cities like Newark or quiet suburban areas like Princeton, it’s important to choose a contractor with experience working in New Jersey’s diverse climate.

Start by checking online reviews, asking for recommendations from neighbors or friends, and reviewing the contractor’s portfolio. Ensure they are licensed, insured, and have a good track record in the local community. Local expertise is crucial as New Jersey roofs need to withstand specific weather challenges.

2. Schedule an In-Person Roof Inspection

Once you’ve found a few contractors that meet your criteria, reach out to schedule an inspection. Most reputable roofing contractors in New Jersey will offer a free roof inspection to assess the current condition of your roof and identify any potential issues. During the inspection, the contractor will look for signs of damage such as leaks, missing shingles, or structural problems.

They may also inspect the attic and ventilation systems to check for mold, poor insulation, or other hidden problems. Having a detailed roof inspection ensures that the estimate you receive is accurate and comprehensive.

3. Discuss Your Roof Estimate and Expectations

After the inspection, the contractor will provide you with an estimate. This will outline the costs for materials, labor, and any additional services. Depending on the scope of work, the estimate may include options for different types of roofing materials, such as asphalt shingles, metal roofing, or tile roofing, each varying in price.

Be sure to ask about any factors that might influence the price of the job, such as the roof’s size, pitch, or the need for special equipment. The contractor may also discuss the timing of the work, potential weather delays, and how they plan to ensure the job is completed to your satisfaction.

4. Get Multiple Estimates for Comparison

It’s always a good idea to get estimates from at least three different contractors. This gives you a better understanding of the average price range for roof repairs or replacement in New Jersey. Be cautious if one contractor’s estimate is significantly lower or higher than the others, as this could indicate they may be cutting corners or inflating their costs.

When comparing estimates, don’t just look at the price. Pay attention to the quality of materials, warranties, and customer service provided. Sometimes, the cheapest estimate may not offer the best value in the long run.

5. Verify the Estimate and Contract Details

Before agreeing to any work, make sure to verify that the estimate includes all necessary details, including:

  • A breakdown of materials and costs
  • The timeline for the project’s completion
  • Payment terms and conditions
  • Insurance and warranty information
  • Safety measures and cleanup procedures

Ensure the contractor is transparent about any potential extra charges or unforeseen circumstances that may arise during the job. Once you’re comfortable with the terms, you can move forward with signing the contract.

For professional needs, just visit https://cjcommercialroofingnj.com/.

Key Factors That Affect Roof Estimates in New Jersey

Several factors influence the cost of your roof estimate. Understanding these elements can help you make an informed decision when hiring a contractor.

1. Roof Size and Complexity

The size of your roof is one of the biggest factors in determining the cost of your estimate. Larger roofs require more materials and labor, which increases the overall price. Additionally, roofs with complex designs, steep slopes, or multiple levels may require special equipment or additional labor, which can add to the cost.

2. Type of Roofing Materials

Different types of roofing materials come at different price points. For instance, asphalt shingles are among the most affordable options, while materials like slate, metal, or clay tiles can significantly raise the cost of the estimate. The lifespan and durability of the materials you choose will also affect long-term costs, so be sure to consider both immediate and future expenses.

3. Roof Condition and Existing Damage

If your roof has extensive damage, such as water leaks, mold, or rot, the contractor may need to replace the decking or structural components, which can increase the cost of the estimate. Proper maintenance is key to keeping roof repair costs low in New Jersey.

4. Seasonal Considerations

The time of year you get your roof estimate can affect the price. Roofing companies in New Jersey tend to be busiest during the warmer months, and prices may be slightly higher during peak season. However, winter months might offer discounted rates, though the weather conditions could delay work.

What to Expect After Getting a Roof Estimate

Once you’ve reviewed and accepted a roof estimate in New Jersey, the next step is scheduling the work. Depending on the type of project, roofing work can take anywhere from a few days to several weeks. It’s essential to stay in close communication with your contractor during this time and address any concerns promptly to ensure smooth project completion.

Conclusion

Getting a roof estimate in New Jersey is an essential step in ensuring your home remains protected from the elements. By following the steps outlined in this guide—researching contractors, scheduling an inspection, comparing estimates, and understanding the factors that affect cost—you’ll be well-equipped to make an informed decision about your roof’s needs. Remember, a good roof is an investment in your home’s future, so take your time to choose a reputable contractor who can provide quality service and fair pricing.

For New Jersey homeowners, whether in cities like Jersey City or suburban areas like Cherry Hill, it’s important to understand the specifics of your roof and what it requires to keep your property secure. Take action today by getting a roof estimate and safeguarding your home for years to come.

By covering all the essential points—roof estimate process, factors influencing pricing, and advice on contractor selection—this article ensures you’re not just informed, but well-equipped to handle the roofing process in New Jersey. Remember, local expertise matters, so always opt for contractors familiar with the area’s specific weather challenges and building codes.