Beckys Bridal Formal Fabrics Uncategorized What Are the Least Expensive Cabinet Styles?

What Are the Least Expensive Cabinet Styles?

What Are the Least Expensive Cabinet Styles? post thumbnail image

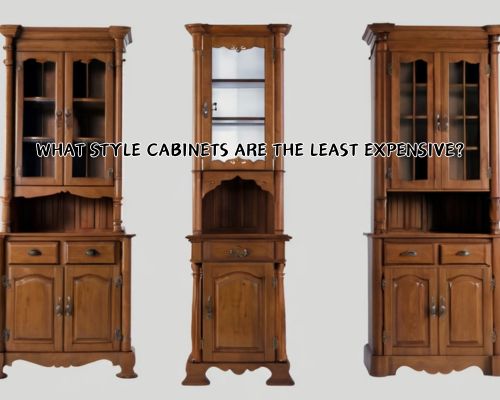
If you’re considering a kitchen renovation, cabinets are likely to be one of the most significant expenses. You may be wondering what style of cabinets is the least expensive, see cabinet maker near me.

different cabinet styles

The answer to this question is not straightforward. The cost of cabinets depends on several factors, including the materials, the design, and the size of your kitchen. However, there are some styles of cabinets that tend to be more affordable than others.

One of the least expensive cabinet styles is the flat-front cabinet. These cabinets have a simple, streamlined design with no raised or recessed panels. Flat-front cabinets are typically made from less expensive materials like plywood or MDF, and they can be painted or stained to match any design style.

Another affordable option is the Shaker-style cabinet, which features a simple, clean design with a recessed panel and square edges. Shaker-style cabinets are often made from solid wood or a wood veneer, and they can be painted or stained to match your design preferences.

Understanding Cabinet Materials and Costs

When choosing cabinets for your home, you want to make sure you’re getting the best quality for your budget. Understanding the different materials and finish options available can help you make an informed decision.

Common Materials and Finish Options

Cabinets can be made from a variety of materials, including solid wood, plywood, MDF, particleboard, and melamine. Solid wood cabinets are typically the most expensive, while melamine and particleboard are the most budget-friendly options (see cabinet maker near me).

Finish options include paint, stain, and veneer. Painted cabinets are a popular choice for a clean, modern look, while stained cabinets can provide a warm and natural feel. Veneer cabinets are made from a thin layer of wood that is applied to a less expensive base material, such as MDF or particleboard.

Comparing Stock, Semi-Custom, and Custom Cabinets

When it comes to cabinet costs, there are three main options: stock, semi-custom, and custom cabinets. Stock cabinets are mass-produced and typically the most budget-friendly option.

Semi-custom cabinets are pre-manufactured but offer some customization options, such as size and finish. Meanwhile, custom cabinets are made to order and offer the most flexibility in terms of design and materials.

It’s important to keep in mind that the quality of the cabinets can vary greatly, even within the same category. Look for reputable manufacturers and ask for references before making a decision.

Selecting Budget-Friendly Cabinet Styles

When selecting budget-friendly cabinet styles, there are a few options to consider.

Ready-to-Assemble (RTA) cabinets are a popular choice for those looking to save on costs. These cabinets are shipped in pieces and can be assembled on-site, which reduces transportation costs and labour fees. Some popular RTA cabinet brands include IKEA, KraftMaid, and Cabinets To Go.

Ready-to-Assemble (RTA) Cabinets

RTA cabinets are available in a variety of styles, including Shaker, flat-front, and beadboard. They can be made from a range of materials, including plywood and solid wood.

While RTA cabinets are generally less expensive than assembled cabinets, they do require some DIY skills to assemble and install. However, with the right tools and a little patience, RTA cabinets can be a great option for those looking to save on costs.

Where to Find Affordable Cabinet Options

In addition to RTA cabinets, there are other affordable cabinet options to consider. Secondhand cabinets can be a great option for those on a tight budget, as they are often available at a fraction of the cost of new cabinets.

Open shelving is another budget-friendly option that can add a modern touch to your kitchen. By removing cabinet doors and displaying your dishes and cookware, you can create a unique and functional space without breaking the bank.

Tips for Maximising Value

When selecting budget-friendly cabinets, consider factors beyond just price.

Look for cabinets that offer ample storage space and functionality, as well as design flexibility.

Pull-out shelves and other accessories can help maximise your storage space and make your kitchen more functional.

Consider the size and layout of your kitchen when selecting cabinets, and choose configurations that work well with your space.

Finally, don’t forget about hardware! Upgrading your hinges, pulls, and knobs can add a stylish touch to your cabinets without breaking the bank. Brushed brass is a popular choice for a modern look.

Related Post

A person using a ladder to seal the gap between a gutter and fascia with a caulking gun and protective gloves

How to Fix a Leak Between a Gutter and Fascia: Expert TipsHow to Fix a Leak Between a Gutter and Fascia: Expert Tips

Addressing a leak between your gutter and fascia is crucial for maintaining your home’s integrity.

Water leaking from this area can lead to structural damage and expensive repairs if left unchecked.

To fix this issue, begin by inspecting for clogged gutters. Then, clear any debris blocking water flow.

A person using a ladder to seal the gap between a gutter and fascia with a caulking gun and protective gloves

Seal any gaps or joints where leaks occur by applying a high-quality gutter sealant. Make sure to do this when the gutter is completely dry for effective results.

You should also examine the condition of your fascia board. Damage here may require replacement or reinforcement.

By promptly addressing these issues, see https://guttersofwestpalmbeach.com/, you protect your home from further water damage and maintain its structural soundness.

Assessing Gutter and Fascia Damage

When dealing with a leaky gutter, it’s crucial to start by understanding the underlying cause of the problem.

This involves identifying where the leak originates, checking for any signs of water damage, and evaluating the current state of the gutter system.

Proper assessment is the first step towards effective repair.

Identify the Source of the Leak

Begin by examining the entire length of your gutter system during a rainstorm or while you run water through it.

Look for visible leaks, focusing on joints, seams, and downspouts.

Cracks, gaps, and misalignments often lead to leaks.

Often, you might find debris or blockages near the leak, indicating water overflow.

Pinpointing exactly where the water escapes helps you target the necessary repairs accurately.

Inspect for Signs of Water Damage

Water damage can affect both the fascia board and the areas surrounding it.

Check for stains, discoloration, or soft spots on the fascia, which might suggest decay or rot.

Inside your home, look for dampness or mold growth in adjacent walls or ceilings, especially where gutter leaks may have diverted water.

Since water damage can progress quickly, it’s essential to address it promptly to prevent further structural issues.

Evaluate the Condition of Gutter System

Assess the general condition of your gutters for any signs of corrosion or wear, such as rust spots or sagging sections.

Check for loose or missing screws, particularly around the gutter hangers, which can destabilize your guttering.

Inspect the sealant at the joints and seams. If gaps or cracks are present, resealing may be necessary.

Also, make sure the gutters are pitched correctly to facilitate proper water flow to the downspouts.

Regular maintenance and thorough evaluation can help you maintain a healthy gutter system, reducing the likelihood of recurring problems. For professional work, see https://guttersofwestpalmbeach.com/.

Repairing and Preventing Gutter Leaks

Addressing gutter leaks involves clearing debris, securing loose elements, applying sealants, and employing protective measures.

Proper maintenance can prevent water damage and ensure your gutter system functions effectively.

Cleaning Clogged Gutters

Clogged gutters are a common cause of leaks as debris blocks water flow, leading to overflow that can damage fascia boards.

To prevent this, regularly clean your gutters, especially when trees are nearby.

Tools such as a scoop and a bucket are useful for removing debris. If ladders are inconvenient or unsafe, consider hiring professionals.

Regular cleaning keeps your gutters functional and prolongs the life of your gutter system.

Fixing Sagging Gutters and Loose Hangers

Sagging gutters and loose hangers can cause water to pool and leak over time.

Inspect the alignment of your gutters regularly.

If sagging is due to loose hangers, tighten existing screws or replace the hangers.

When gutters pull away from the fascia, it may be necessary to use new fasteners or brackets.

Ensuring secure connections helps the gutters maintain the proper slope for effective drainage.

Installing Gutter Guards and Flashing

Gutter guards and flashing are preventive measures that can help reduce clogging and leaks.

Gutter guards cover gutters, preventing debris from entering while allowing water flow.

Flashing, such as a drip edge or gutter apron, diverts water away from the fascia and roof edges, protecting against water intrusion.

Installing these can be a part of smart home improvement and protection strategy for your gutters.

Applying Gutter Sealant and Repairing Fascia Boards

To address leaks specifically at joints or corners, utilize gutter sealant.

Clean the area thoroughly before application to ensure the sealant adheres properly.

When leaks affect fascia boards, assess for damage and repair or replace them.

This may involve repainting or using treated wood to withstand moisture.

Applying sealant and maintaining fascia integrity prolong the overall health of your gutter system.

Regular Maintenance and Preventive Measures

Regular maintenance is key to avoiding costly repairs and preventing mold growth or landscape erosion.

Besides cleaning, inspect your gutters and fascia bi-annually or after severe weather events.

Address minor issues promptly, such as tightening loose screws or repositioning sagging sections.

By incorporating systematic inspections and maintenance into your routine, you can protect your home from water damage and prolong the life of your gutter system.

Building and Respecting Boundaries: The Cornerstone of Healthy RelationshipsBuilding and Respecting Boundaries: The Cornerstone of Healthy Relationships

Boundaries are the invisible lines we draw to define our personal space, both physically and emotionally. They are the guidelines that dictate what we find acceptable and unacceptable in our interactions with others. Far from being walls that shut people out, healthy boundaries act as bridges that foster understanding, respect, and genuine connection in any relationship, be it romantic, familial, or platonic according to https://pinay-flix.com/.  

Think of boundaries as your personal “user manual” for how you wish to be treated. They communicate your needs, values, and limits, allowing others to engage with you in a way that feels safe and comfortable. This clarity is essential for building trust and intimacy because when people know where they stand with you, they are more likely to approach the relationship with respect and consideration according to https://techplanet.today/.  

Why are Boundaries Important?

Without clearly defined boundaries, relationships can easily veer into unhealthy territory. Imagine a garden without fences; it becomes vulnerable to being trampled and overrun. Similarly, in relationships, a lack of boundaries can lead to:

  • Resentment: When your needs are consistently ignored, feelings of resentment inevitably build up. You may start feeling taken advantage of or like your contributions are not valued.  
  • Burnout: Constantly putting others’ needs before your own, without setting limits, can lead to emotional exhaustion and burnout.  
  • Codependency: A lack of boundaries can blur the lines between individuals, fostering a sense of codependency where one person’s well-being becomes overly reliant on the other. This can stifle personal growth and create an unhealthy dynamic.  
  • Loss of Self: Continuously compromising your values or accepting behavior that goes against your core beliefs can erode your sense of self.  

Building Strong Boundaries:

Establishing healthy boundaries is an ongoing process that requires self-awareness, assertiveness, and consistent communication. Here are some key steps to help you build strong boundaries:  

  1. Know Yourself: The first step is to understand your own needs, values, and limits. What are you comfortable with? What makes you feel uncomfortable or disrespected? Reflect on past experiences where you felt your boundaries were violated and identify the patterns.
  2. Communicate Clearly: Once you are aware of your boundaries, it’s crucial to communicate them clearly and assertively. Use “I” statements to express your needs and feelings without blaming or accusing the other person. For example, instead of saying “You always interrupt me,” try saying “I feel unheard when I’m interrupted. Could you please let me finish my thought?”
  3. Start Small: If you’re not used to setting boundaries, start with small, manageable steps. Practice saying “no” to requests that you don’t feel comfortable with or setting time limits for activities that drain your energy.
  4. Be Consistent: Consistency is key when it comes to enforcing your boundaries. If you give in to pressure or allow others to cross your lines intermittently, it sends mixed signals and weakens your position.  
  5. Expect Resistance: Not everyone will be happy with your newfound assertiveness. Some people may push back or try to guilt you into giving in. Stay firm and reiterate your boundaries calmly and respectfully.

Respecting Others’ Boundaries:

Building healthy relationships is a two-way street. Just as you need to establish and maintain your own boundaries, it’s equally important to respect the boundaries of others. This includes:

  • Active Listening: Pay attention to what others are saying, both verbally and nonverbally. Respect their “no” and avoid pressuring them to do things they are not comfortable with.  
  • Empathy and Understanding: Try to see things from their perspective and understand why they have set certain boundaries. Even if you don’t fully agree with their limits, acknowledge their right to have them.
  • Open Communication: Encourage open and honest communication about boundaries. Create a safe space where both parties feel comfortable expressing their needs and concerns without fear of judgment.
a very serious roof leakage of a home

How Serious is Leaking a Ceiling? Causes, Risks, and SolutionsHow Serious is Leaking a Ceiling? Causes, Risks, and Solutions

Dealing with a leaking ceiling can feel overwhelming, yet understanding its seriousness is essential for your home’s safety.

A ceiling leak is more than just a minor inconvenience; it poses a significant risk of structural damage and mold growth.

a very serious roof leakage of a home

Ignoring this issue can lead to costly repairs and potential safety hazards.

Water damage from a ceiling leak weakens the building structure over time, which can result in sagging, cracks, or even collapse.

Immediate attention from a professional plumber or a repair service is crucial.

Not only does a timely response protect your home, but it also helps prevent additional damage and costs down the line.

If you’re uncertain about the extent of the damage or how to address it, seeking expert advice is always a wise step.

Knowing when to call professionals can make a substantial difference in managing the situation effectively.

With CJ Commercial Roofing NJ, this article will delve deeper into the causes, consequences, and solutions, equipping you with the information needed to tackle ceiling leaks confidently.

Assessing the Severity of Ceiling Leaks

When dealing with ceiling leaks, evaluating the damage, identifying causes, and assessing structural implications are crucial.

Your ability to recognize early signs ensures timely action can be taken, potentially reducing repair costs and avoiding dangerous situations.

Identifying Signs of Water Damage

Look for visible indicators of leaks like bubbled or peeling paint on the ceiling surface.

Musty smells often indicate mold growth, which thrives in damp conditions.

You can use a moisture meter to detect moisture levels within the drywall, helping to determine the extent of water penetration.

Ceiling damage such as sagging or discoloration points toward a significant issue that needs immediate attention.

Understanding the Potential Causes

Various factors can lead to ceiling leaks, including roofing issues like damaged flashing or blocked gutters.

Plumbing problems, such as a burst pipe, can lead to water seeping into the ceiling.

Water leaks from faulty appliances or pipes are also common culprits.

Recognizing the root cause is essential for direct remediation and handling repairs efficiently.

Evaluating Structural Integrity

Assessing the structural integrity involves examining materials like ceiling joists and ensuring they are level and sturdy.

Water damage may weaken these supports, risking further collapse.

Inspecting the ceiling’s condition and using tools like moisture meters helps evaluate the damage’s impact.

Taking the time to dry the affected area promptly prevents additional structural concerns.

Professional and DIY Repair Strategies

When dealing with a ceiling leak, it’s essential to act promptly to minimize damage and follow the right repair methods.

This guide covers immediate measures, ceiling repair techniques, and when to seek professional help.

Immediate Steps to Mitigate Damage

First, you need to quickly catch the water to prevent damage to floors and furniture.

Use a large container or bucket directly under the leak. If you have a severe leak, towels or plastic sheeting may help divert the water.

Next, relieve any built-up water pressure by puncturing a small hole in sagging areas with a utility knife.

This helps drain water and prevents additional damage.

Fans and a dehumidifier should be set up to dry out the space completely, discouraging the growth of mold and mildew.

Repairing the Ceiling

Begin by assessing the extent of the damage and removing any compromised materials with a putty knife.

In minor cases, you can simply repair the area using joint compound and spackle.

Apply the compound with a putty knife and let it dry thoroughly.

Sand the patched area smooth with sandpaper for an even finish.

Follow up by using a primer to seal the new patch.

Paint the ceiling to match the existing color and ensure a uniform appearance.

Take care to check surrounding areas for signs of water damage and address them as needed.

Seeking Professional Assessment

For large or persistent leaks, consulting with a professional like CJ Commercial Roofing NJ is advisable.

Extensive water damage often requires the expertise of a professional plumber or a water damage restoration specialist. They can provide a comprehensive inspection and determine underlying causes.

A licensed professional will use specialized tools and techniques to ensure the leak is accurately repaired, preventing future issues.

They might suggest additional preventative measures, such as regular inspections and updating insulation or weatherproofing, to safeguard against further damage.