Beckys Bridal Formal Fabrics Uncategorized Why Cleaning Your Gutters Before Rain is Essential: Preventing Water Damage and Maintaining Your Home

Why Cleaning Your Gutters Before Rain is Essential: Preventing Water Damage and Maintaining Your Home

Why Cleaning Your Gutters Before Rain is Essential: Preventing Water Damage and Maintaining Your Home post thumbnail image

Cleaning your gutters before it rains may not be the most exciting task, but it is an essential one. Neglecting to do so can result in serious damage to your property and end up costing you a lot of money in repairs.

a gutter with overflowing water

In this article, we will explain why it is important to clean your gutters before it rains and what can happen if you don’t.

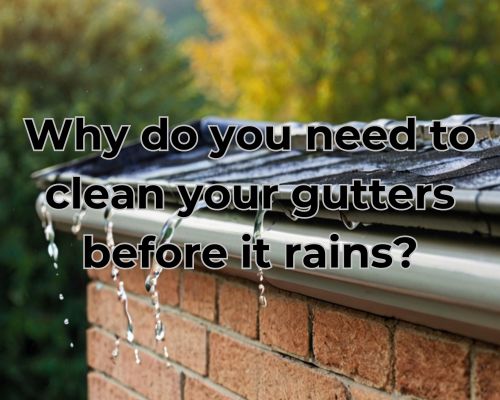
Gutters are designed to collect rainwater and direct it away from your property. However, when they become clogged with leaves, twigs, and other debris, they can no longer do their job effectively. For cleaning services, look for Gutter Cleaning near me.

This can lead to water overflowing from the gutters and pooling around the base of your property. Over time, this can cause water damage to your foundation, walls, and roof, which can be expensive to repair. Additionally, clogged gutters can become heavy and pull away from the roofline, causing further damage.

The Importance of Regular Gutter Maintenance

To prevent water damage and leaks, protect your roof and foundation, and reduce the risk of pests and mould, it is important to regularly maintain your gutters.

Regular gutter maintenance involves a few simple steps that can save you time, money, and headaches down the road.

Preventing Water Damage and Leaks

Blocked gutters can lead to water overflow, which can damage your home’s exterior and foundation. Water can seep into the walls and cause structural damage, leading to costly repairs.

Regular cleaning of your gutters can prevent water damage and leaks, and ensure that water flows freely through your gutters and downspouts.

Protecting Your Roof and Foundation

Clean gutters can also protect your roof and foundation. When gutters are clogged, water can build up and seep into the roof, causing rot and damage. Water can also pool around the foundation, causing it to crack and shift.

Regular gutter maintenance can help prevent these problems and extend the life of your roof and foundation. See Gutter Cleaning near me.

Reducing the Risk of Pests and Mould

Blocked gutters can create a breeding ground for pests, such as mosquitoes and rodents. The standing water can also lead to mould growth, which can cause health problems for you and your family.

Regular gutter maintenance can reduce the risk of pests and mould, and ensure that your home is a healthy and safe environment.

How to Clean Your Gutters Effectively

Cleaning your gutters is an important task that should be done regularly to ensure that they function properly. Here’s how to clean your gutters effectively:

Choosing the Right Tools and Equipment

Before you begin cleaning your gutters, you need to make sure you have the right tools and equipment. Here’s a list of what you’ll need:

  • Ladder: Make sure it’s sturdy and tall enough to reach your gutters.
  • Gloves: Protect your hands from debris and sharp edges.
  • Bucket: Use it to collect debris and prevent it from falling on the ground.
  • Gutter scoop: Use it to remove debris from your gutters.
  • Gutter cleaning attachments: Use them to clean hard-to-reach areas.
  • Leaf blower or pressure washer: Use them to remove stubborn debris.

Step-By-Step Guide to Gutter Cleaning

Follow these steps to clean your gutters effectively:

  1. Set up your ladder securely near your gutters.
  2. Put on your gloves and use your gutter scoop to remove any large debris from your gutters.
  3. Use your gutter cleaning attachments to clean hard-to-reach areas.
  4. Use your leaf blower or pressure washer to remove any remaining debris.
  5. Use your bucket to collect debris and dispose of it properly.

Related Post

a ceiling with water coming out due to leakage

How Do You Know if a Ceiling Leak Is Serious? Key Signs to Watch ForHow Do You Know if a Ceiling Leak Is Serious? Key Signs to Watch For

A ceiling leak is a problem that can cause significant damage if not addressed promptly. Water damage might lead to mold growth, structural weakening, and costly repairs.

The severity of a ceiling leak often depends on the source and duration of the leak. Persistent issues could indicate a more serious underlying problem.

a ceiling with water coming out due to leakage

It’s essential to determine whether the leak results from a minor issue, like poor caulking around a tub, or something more severe, such as a broken pipe or damaged roof.

Frequent dampness, especially when there hasn’t been rainfall, might suggest issues beyond surface level, requiring immediate attention.

Recognizing these signs early can prevent small leaks from escalating into major concerns.

Understanding what might be going on with your ceiling can save you both time and money. Some leaks can be fixed with a bit of DIY knowledge, while others may need a professional’s expertise like CJ Commercial Roofing NJ.

Spot any quick-growing stains or sagging areas, as these signs are often indicative of a more serious problem. Being proactive can ensure the integrity and safety of your home.

Determining the Severity of a Ceiling Leak

Identifying a serious ceiling leak is crucial for preventing further water damage. Recognizing signs like bubbling or sagging can highlight problems needing immediate attention.

Understanding the causes of leaks guides you in addressing the root issue effectively.

Identifying Signs of a Serious Leak

Ceiling leaks often manifest through visible and olfactory changes.

You may notice water stains with dark, yellow, or rust coloring, indicating prolonged exposure.

Bubbled paint or peeling can show moisture damage. A sagging ceiling or pooling water suggests potential structural damage and possibly a compromised foundation.

Additionally, musty odors indicate mold or mildew growth, a common issue in cases of severe leaks.

Checking for these signs regularly helps in recognizing and addressing leaks swiftly, reducing further damage to your home’s structure and aesthetics.

Understanding the Causes of Ceiling Leaks

Ceiling leaks have various causes, which require careful diagnosis.

Flashing issues on roofing can allow water penetration. Poor installation or maintenance often lead to settling and movement, causing ceiling cracks.

Distinguishing between types, like spiderweb cracks or direct moisture damage, is vital.

Water pooling on surfaces and joint compound deterioration imply a leak from a plumbing system above, demanding immediate action.

Building movement or poor workmanship during construction can exacerbate these issues.

Correctly identifying the cause ensures proper and effective repairs, preventing recurrence and minimizing expenses.

Effective Solutions and Preventative Measures

Addressing a ceiling leak promptly can save you from extensive damage and costly repairs. Ensuring proper maintenance and understanding when to seek professional help are essential steps to protect your home.

Repairing and Preventing Future Leaks

To begin, identify and stop the leak using a tarp or shutting off water supply.

Once the area is dry, inspect for water stains or musty smells that might indicate further issues.

If gutters are clogged, clean them to prevent overflow that could contribute to leaks.

Check for missing shingles or roof damage after storms since these can allow water penetration.

Hairline cracks in the ceiling may initially seem minor, but it’s important to repair them using drywall compound to prevent escalation.

Regularly inspect your roof and foundation for any signs of wear.

Routine maintenance, such as sealing small cracks or replacing damaged materials, is crucial to avoid future problems.

Ensuring a well-ventilated attic will also reduce moisture buildup.

Professional Assessment and Repair

For persistent ceiling leaks, engaging a professional roofer or a specialized contractor like CJ Commercial Roofing NJ might be necessary. They can assess roof leaks or plumbing leaks accurately. They can offer diagnostics like infrared moisture scanning to find the source of the leak effectively.

When water damage extends beyond superficial ceiling cracks, more advanced techniques and materials might be required. A professional can determine if your situation calls for more serious repairs. This includes reinforcing structural components or conducting a thorough foundation inspection.

Know when to call a professional by evaluating the severity of ceiling damage and the complexity of the repair needed. It ensures a comprehensive solution that addresses not just immediate leaks but also long-term prevention strategies.

a contractor doing a 1000-meter metal roof installation

How Much Would It Cost to Put a Metal Roof on a 1,000-Square-Foot House in New Jersey?How Much Would It Cost to Put a Metal Roof on a 1,000-Square-Foot House in New Jersey?

If you’re considering upgrading your roof to a durable and stylish metal option, you’re not alone. Metal roofs are increasingly popular in New Jersey due to their longevity, energy efficiency, and aesthetic appeal. But what does it actually cost to install a metal roof on a 1,000-square-foot house in the Garden State? This guide breaks down the factors influencing metal roofing costs and provides local insights specific to New Jersey homeowners.

a contractor doing a 1000-meter metal roof installation

Why Choose a Metal Roof for Your New Jersey Home?

Before diving into costs, it’s essential to understand why metal roofs are a smart investment, particularly in New Jersey. The state experiences diverse weather conditions, from snowy winters to hot, humid summers. Metal roofs excel in durability and weather resistance, making them ideal for withstanding New Jersey’s climate.

Key benefits include:

  • Longevity: Metal roofs can last 40-70 years, far outlasting traditional asphalt shingles.
  • Energy Efficiency: Reflective coatings reduce cooling costs during summer, which is especially beneficial in humid areas like Newark and Atlantic City.
  • Low Maintenance: Unlike wood or asphalt shingles, metal roofs require minimal upkeep.

Cost Factors for a Metal Roof in New Jersey

The cost to install a metal roof on a 1,000-square-foot house can vary significantly based on several factors:

1. Material Type

Metal roofing comes in various materials, each with its own price point:

  • Aluminum: Lightweight and rust-resistant, aluminum roofs cost $3.50 to $6.50 per square foot.
  • Steel: A durable and budget-friendly option, steel ranges from $3.00 to $7.00 per square foot.
  • Copper: Known for its premium look and patina over time, copper roofing can cost $14.00 to $25.00 per square foot.

2. Roof Design

The complexity of your roof’s design affects labor costs. A simple, flat roof in suburban areas like Edison or Trenton will cost less to install than a steep, multi-gabled roof commonly found in Victorian homes along the Jersey Shore.

3. Installation Labor

Labor costs in New Jersey average $5,000 to $7,000 for a 1,000-square-foot metal roof. Urban areas like Jersey City or Hoboken might have higher rates due to demand, while rural regions may offer slightly lower prices. You may also see https://cjcommercialroofingnj.com/ for an affordable and just costing.

4. Permits and Regulations

New Jersey requires building permits for roof installations, with fees varying by municipality. For example, towns like Morristown might charge a flat fee, while others calculate costs based on project value.

5. Additional Features

  • Insulation: Adding insulation can improve energy efficiency but increases upfront costs.
  • Underlayment: A high-quality underlayment is essential to prevent leaks and mold in New Jersey’s wet climate, costing $0.50 to $1.00 per square foot.

Average Cost Breakdown for New Jersey Homes

For a standard 1,000-square-foot home in New Jersey, here’s a rough breakdown of costs:

ExpenseEstimated Cost
Materials (Steel)$3,000 – $7,000
Labor$5,000 – $7,000
Permits$200 – $500
Additional Features$500 – $2,000
Total$8,700 – $16,500

Local Insights: Metal Roofing Trends in New Jersey

Popular Styles

Homeowners in northern New Jersey, like Bergen County, often opt for standing seam metal roofs for their sleek and modern appearance. In coastal areas such as Cape May, corrugated metal is a common choice due to its ability to resist salty air and harsh winds.

Tax Benefits and Rebates

New Jersey offers energy efficiency rebates for reflective metal roofs. For example, programs through NJ Clean Energy may offset installation costs if you choose Energy Star-rated materials.

Weather Considerations

  • Winter Snow: Metal roofs in areas like Sussex County excel at shedding snow, reducing the risk of roof collapse during heavy winters.
  • Hurricane-Grade Winds: Along the Jersey Shore, metal roofs are valued for their resistance to wind speeds up to 140 mph.

DIY vs. Professional Installation

While it might be tempting to save on labor by installing a metal roof yourself, this is generally not recommended. Roofing installation requires specialized skills and tools, and improper installation can void warranties. Professional roofing contractors in New Jersey, see https://cjcommercialroofingnj.com/, ensure compliance with state and local building codes, providing peace of mind and long-term durability.

Tips for Reducing Costs

  1. Compare Multiple Quotes: Get estimates from at least three licensed roofing contractors in your area.
  2. Choose Off-Season Installation: Roofing demand peaks during spring and summer. Scheduling your installation during fall or winter might save money.
  3. Opt for Financing Plans: Many New Jersey roofing companies offer financing options to help spread out costs.
  4. Invest in Energy-Efficient Options: Reflective coatings and proper insulation may qualify for state or federal tax credits.

Frequently Asked Questions

1. Is a metal roof worth the investment in New Jersey?
Absolutely. With its long lifespan and ability to withstand New Jersey’s varied climate, a metal roof can be a cost-effective, energy-efficient choice in the long run.

2. How does a metal roof perform in New Jersey’s winters?
Metal roofs are ideal for snowy climates like northern New Jersey. They shed snow easily, preventing ice dams and leaks.

3. Can I install solar panels on a metal roof?
Yes. Metal roofs are an excellent base for solar panels, which can further reduce energy bills and qualify for rebates.

Conclusion

Installing a metal roof on a 1,000-square-foot house in New Jersey is a significant investment, but one that pays off in durability, energy savings, and aesthetic appeal. Costs typically range from $8,700 to $16,500, depending on materials, labor, and additional features. By selecting the right material and working with experienced local contractors, you can enhance your home’s value while preparing it for decades of reliable performance.

For New Jersey homeowners, a metal roof is more than just a protective covering—it’s a smart, long-term investment in your property’s future. Reach out to local roofing specialists today to get personalized estimates and take the first step toward upgrading your home.

Gas Stove Pipe: What Kind to Use?Gas Stove Pipe: What Kind to Use?

“If you’re a homeowner looking to install a gas stove, one of the most important things to consider is what kind of pipe to use. Using the wrong type of pipe can be extremely dangerous and could result in gas leaks or even explosions.” said Dean Owens of Plumber Warragul.

gas stove firing up

First and foremost, it’s important to understand that gas is a highly flammable and potentially dangerous substance. As such, it’s absolutely crucial that you take all necessary safety precautions when installing a gas stove.

This means not only using the right type of pipe, but also following all relevant safety guidelines and regulations.

When it comes to choosing a pipe for your gas stove, there are a few different options available.

The most common types of pipes used for gas stoves are black iron pipe, copper tubing, and flexible gas pipe.

Each of these types of pipes has its own pros and cons, and the right choice will depend on a variety of factors. These factors include the distance between your stove and your gas line, the size of your stove, and your personal preferences.

Choosing the Right Pipe Material

When it comes to gas stove piping, choosing the right material is crucial for ensuring safe and efficient operation.

There are several pipe materials to choose from, each with its own advantages and disadvantages. In this section, we’ll take a closer look at the most common materials used for gas stove piping.

Steel and Stainless Steel Pipes

Steel and stainless steel pipes are the most common materials used for gas stove piping.

They are durable, affordable, and readily available. Galvanized steel pipes are coated with a layer of zinc to prevent corrosion, while stainless steel pipes are corrosion-resistant.

When choosing a steel or stainless steel pipe, make sure to consider the thickness of the pipe walls. Thicker walls offer better durability and resistance to damage.

Look for pipes from reputable manufacturers and brands to ensure quality and reliability.

Copper Pipes and Fittings

Copper pipes and fittings are another option for gas stove piping.

Copper is highly durable and resistant to corrosion, making it a popular choice for plumbing and gas piping.

Copper pipes are available in various sizes and can be easily bent and shaped to fit any space.

When using copper pipes and fittings, make sure to use teflon tape to ensure a tight seal. Copper pipes should also be properly supported and secured to prevent damage and leaks.

Flexible Gas Lines and CSST

Flexible gas lines and corrugated stainless steel tubing (CSST) are newer options for gas stove piping.

They offer flexibility and easy installation, making them ideal for tight spaces and retrofitting projects. Flexible gas lines are made of a durable material and are available in various lengths and sizes.

When using flexible gas lines or CSST, be sure to use the appropriate adapter to ensure a secure and leak-free connection.

Look for products from reputable manufacturers and brands to ensure quality and reliability.

Installation and Safety Measures

Proper Venting and Air Quality

When installing a gas stove, you must ensure proper venting and air quality.

Proper venting helps to prevent the buildup of harmful gases, such as carbon monoxide, which can pose a significant safety hazard.

You should install a chimney pipe or other approved venting system that meets local building codes.

Additionally, you need to ensure adequate air quality in the room where the gas stove is installed. A lack of ventilation can lead to the buildup of harmful gases, which can cause health problems.

Make sure that the room where the gas stove is installed has enough fresh air circulation.

Gas Connection and Leak Prevention

When connecting a gas stove, make sure to use the correct gas pipe and fittings.

The pipe should be made of durable materials like brass or stainless steel and have the corresponding sizes to provide a snug fit.

You should also use pipe joint compound or thread sealant on all threaded connections to prevent gas leaks.

Furthermore, you need to check for gas leaks before using the gas stove.

Mix a solution of soap and water and apply it to the gas line and connections. If there are any bubbles, it indicates a gas leak, and you should turn off the gas immediately and call a professional.

Regulatory Compliance and Professional Services

Installing a gas stove requires compliance with local building codes and regulations. You should consult with a professional like Plumber Warragul, and ensure that the installation meets all the necessary requirements.

A professional can help you with the installation, inspection, and maintenance of the gas stove.

Moreover, a professional can help you with the installation of an anti-tip bracket, which is a safety feature that prevents the gas stove from tipping over. Additionally, you may need a pressure regulator to ensure the gas pressure is correct for the gas stove.

The cost of installation and professional services may vary depending on the BTU and cubic feet per hour of the gas stove.