Beckys Bridal Formal Fabrics Uncategorized Are Roof Tiles Easy to Replace? Essential Tips and Considerations

Are Roof Tiles Easy to Replace? Essential Tips and Considerations

Are Roof Tiles Easy to Replace? Essential Tips and Considerations post thumbnail image

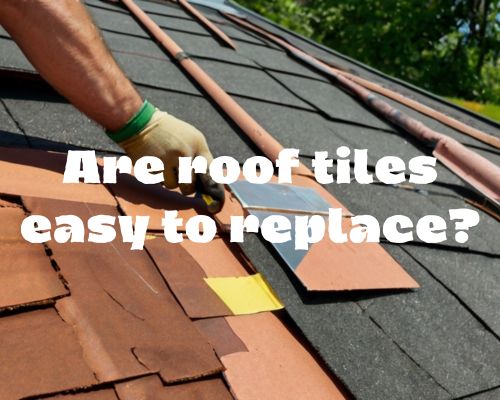
Replacing roof tiles can seem daunting. However, many homeowners find it manageable with the right tools and knowledge.

Roof tiles are generally easy to replace, especially if you are tackling a small section or a few damaged tiles. The complexity of the task largely depends on the type of tiles and the extent of the damage.

replacing tile roof of a home

Essential maintenance frequently involves replacing damaged or missing tiles to prevent leaks and further structural damage.

Signs that you might need to replace tiles include visible cracks, chips, or water stains on your ceilings or interior walls.

Regular inspection and timely replacement can save you from more costly repairs down the line.

Whether you decide to handle the replacement yourself or hire a professional like Star Roofing West Palm Beach, understanding the process can help you make informed decisions.

Properly installed and maintained tiles contribute significantly to the longevity of your roof, offering protection and aesthetic appeal.

Assessing Roof Tile Damage

Maintaining a tile roof requires regular inspections to spot potential issues early.

This involves identifying obvious signs like cracked or missing tiles and determining whether repairs or a full roof replacement is necessary.

Identifying Damaged Tiles

Damaged tiles can manifest as cracked, chipped, or completely missing pieces. These flaws often result from wind, rain, or age.

Look for water stains on your ceiling, a clear sign of leaks.

Moss growth and discoloration also indicate underlying water damage.

Sagging or uneven roof surfaces can signify structural issues that need prompt attention.

Perform inspections during clear weather. Cleaning gutters and trimming overhanging trees can help you spot problems more easily.

Use binoculars for a closer look if you can’t safely access your roof.

Determining the Extent of Repairs Needed

Once you’ve identified damaged tiles, assess whether a few replacements suffice or if a full roof replacement is needed.

Extensive cracking, widespread leaks, or multiple missing tiles often point towards more significant repairs.

Small-scale damage, such as a few broken tiles, can usually be addressed with DIY repairs.

Costs range from $200 to $600, depending on the damage. Meanwhile, professional repairs cost $500 to $1,500 or more, but ensure thorough inspections and correct fixes.

Consider the roof’s age and overall condition. Older roofs may have underlying structural issues that require attention beyond mere tile replacement. Removing debris and maintaining the roof contributes to its longevity.

Executing the Replacement Process

Replacing roof tiles involves several key steps to ensure a successful and durable repair.

From gathering the right tools to ensuring safety and proper installation, it’s important to follow each step carefully.

Tools and Materials Required

To replace roof tiles, you need several essential tools and materials.

A ladder is crucial for accessing the roof. Ensure it’s stable and secure.

Wear gloves for protection.

You’ll need a pry bar to remove damaged tiles, a hammer for nailing, and a nail gun for efficiency.

The materials include replacement tiles, roofing nails, roofing cement, and underlayment.

A trowel for roofing cement and a caulking gun for sealing are also needed. For slate roofs, a slate ripper helps remove old tiles.

Steps for Replacing Roof Tiles

  1. Preparation: Set up the ladder securely and put on safety gear.
  2. Remove Damaged Tiles: Use a pry bar to gently lift and remove the damaged tile.
  3. Check Underlayment: Inspect the underlayment for any signs of damage. Replace if necessary.
  4. Install New Tile: Slide the new tile into place, ensuring it interlocks correctly with adjacent tiles. The nibs on the back should hang over the batten.
  5. Secure with Nails: Use roofing nails or a nail gun to secure the tile, ensuring proper alignment.
  6. Seal and Finish: Apply roofing cement or sealant around the edges to prevent leaks.

Ensuring Quality and Safety

Working on a roof can be hazardous. Always prioritize safety by ensuring your ladder is stable and you have a secure footing.

It’s vital to wear gloves and non-slip shoes. Also, verify that all tools are in good condition and appropriate for the job.

Ensure that the replacement tiles match the existing ones in color, style, and material. Misaligned or improperly secured tiles can lead to leaks and other issues.

If you’re unsure about any step, it’s wise to consult a professional roofer like Star Roofing West Palm Beach. This guarantees the repair’s longevity and ensures compliance with any warranties.

Proper sealing and maintenance also enhance the roof’s energy efficiency and weathering capability.

Related Post

a 200 sq ft shingled roof

How Much Does It Cost to Put a Roof on a 2000 Sq Ft House in New Jersey?How Much Does It Cost to Put a Roof on a 2000 Sq Ft House in New Jersey?

When it comes to homeownership in New Jersey, one of the most important investments you’ll make is maintaining your roof. Whether you’re dealing with an aging roof or a new home project, understanding the cost to put a roof on a 2000 sq ft house in New Jersey is essential. Roof replacement can be a significant expense, and costs can vary based on several factors. With Charles Jimerson of CJ Commercial Roofing NJ, we’ll break down the average cost of roof installation, factors that influence the price, and how to ensure you’re getting the best value for your investment.

a 200 sq ft shingled roof

Average Cost to Put a Roof on a 2000 Sq Ft House in New Jersey

For homeowners in New Jersey, the cost of putting a roof on a 2000 sq ft house typically ranges from $6,000 to $12,000. However, several factors can cause this price to increase or decrease, such as the type of roofing material, the complexity of the installation, and the contractor you hire.

  • Standard Asphalt Shingles: If you’re opting for a basic, reliable roofing material like asphalt shingles, the cost will likely fall at the lower end of the range—around $6,000 to $8,000.
  • Higher-End Roofing Materials: If you choose more premium materials, such as metal roofing, clay tiles, or slate, the cost will increase significantly, potentially reaching $12,000 or more.

Factors Influencing Roof Installation Costs in New Jersey

Several factors influence the cost of roof installation, especially in regions like New Jersey, which experiences varying weather conditions, including harsh winters and heavy storms. Understanding these factors will help you make informed decisions when selecting a roofing contractor and materials.

1. Roof Material

The material you choose for your roof will have the most significant impact on the overall cost. Common roofing materials include:

  • Asphalt Shingles: This is the most common and affordable roofing material, perfect for a home in New Jersey. It’s durable, cost-effective, and performs well in various weather conditions.
  • Metal Roofing: Metal roofs are growing in popularity due to their longevity, durability, and energy efficiency. While metal roofing is more expensive initially, it can save money in the long run by lowering energy bills and reducing maintenance costs.
  • Wood Shingles or Shakes: Wood shingles add a natural aesthetic to your home but require more maintenance. Additionally, they can be prone to rot or damage from New Jersey’s humid summers and freezing winters.
  • Clay or Concrete Tiles: Popular in Mediterranean-style homes, clay tiles are more expensive and require skilled installers, which may raise the overall cost of installation.
  • Slate Roofing: Slate is one of the longest-lasting roofing materials but also one of the most expensive. It’s highly durable and ideal for homes in areas like New Jersey that experience heavy weather conditions.

For more, go to CJ Commercial Roofing NJ.

2. Roof Complexity

A flat roof or a roof with few slopes is generally cheaper to install than a roof with multiple valleys, dormers, or chimneys. The more complex the roof design, the higher the labor costs and the more materials required.

If your 2000 sq ft home has a steep pitch or intricate rooflines, you’ll need to factor in additional labor and material costs, which can increase the overall price of your roofing project.

3. Removal of Old Roof

Most roof replacements in New Jersey involve removing the old roofing material before installing a new one. This step can add up to $1,000 to $3,000 to the total cost, depending on the size and complexity of the job. If your old roof has multiple layers of shingles, it can add more time and cost to the project.

4. Labor Costs in New Jersey

Labor costs can vary across New Jersey depending on location and roofing company expertise. In areas with higher demand for roofing services, such as areas closer to larger cities like Newark, Jersey City, or Trenton, the cost of labor may be higher. It’s crucial to shop around and get multiple estimates to ensure you’re getting competitive pricing.

Labor costs in New Jersey typically range from $2 to $5 per square foot, depending on the roofing company and the complexity of the installation. The total labor cost for a 2000 sq ft home would typically be around $4,000 to $10,000.

5. Permits and Fees

Depending on your specific location within New Jersey, you may need to secure a permit for roof installation. The cost of permits can vary, but they usually range from $100 to $500. It’s essential to check with your local building department to ensure you’re complying with local regulations before beginning your project.

Additional Costs to Consider

In addition to the basic cost of roof installation, there are a few additional costs you should consider when budgeting for your roofing project:

  • Gutters and Downspouts: Installing or replacing gutters along with your new roof will cost additional money. Gutters are essential for redirecting water away from your home to avoid damage to the roof and foundation. Expect to pay $1,000 to $3,000 for new gutters.
  • Roof Insulation: Adding insulation or ventilation to your roof can improve energy efficiency. If you’re upgrading your insulation, this may cost anywhere from $1,500 to $3,500.
  • Warranties: A new roof often comes with a warranty, which can vary by manufacturer and contractor. Some warranties are limited, while others offer full coverage for up to 50 years. Be sure to discuss warranty options with your roofing company.

How to Save on Roof Installation in New Jersey

While roofing costs can be high, there are several ways to save on your roof installation project in New Jersey.

1. Get Multiple Quotes

Request estimates from at least three reputable roofing companies. Comparing quotes will give you a better understanding of the pricing in your area and help you identify any potential red flags.

2. Choose the Right Time of Year

In New Jersey, the best time to replace your roof is typically during the fall or spring. Roofing companies may offer discounts during the off-peak seasons, and the weather conditions are ideal for a smooth installation.

3. Consider Financing Options

Some roofing companies offer financing options, which can help you manage the cost of roof replacement by spreading payments out over time. Check with your contractor to see if they offer financing or if you can qualify for low-interest loans.

Conclusion

Roof replacement is an important investment in your New Jersey home, and understanding the costs involved will help you make informed decisions about your project. On average, homeowners in New Jersey can expect to pay anywhere from $6,000 to $12,000 to put a roof on a 2000 sq ft house, depending on the roofing material, complexity, and labor costs. By considering factors such as the type of roofing material, roof design, and additional costs like permits and insulation, you can better estimate the total cost of your roof installation. Be sure to get multiple quotes, choose the right time of year, and explore financing options to make the process more affordable.

Safe Weight Loss Pills: Achieving Healthy and Sustainable ResultsSafe Weight Loss Pills: Achieving Healthy and Sustainable Results

Are you struggling to shed those extra pounds and considering weight loss pills as an option? With the abundance of products available on the market, it can be challenging to determine which ones are safe and effective. In this article, we will explore the world of safe weight loss pills, providing you with valuable information to make informed decisions about your health and weight loss journey. Let’s dive in!

Introduction

In today’s fast-paced world, many individuals struggle with weight management. Safe weight loss pills can be a tempting solution to accelerate the process, but it’s essential to prioritize your well-being and choose products that are both safe and effective.

Understanding Safe Weight Loss

Before delving into weight loss pills, it’s crucial to understand what constitutes safe weight loss. Healthy and sustainable weight loss occurs when you gradually shed excess pounds by adopting a balanced lifestyle that includes regular exercise and a nutritious diet.

The Role of Weight Loss Pills

Weight loss pills can provide support and enhance your weight loss efforts. They work in various ways, such as suppressing appetite, boosting metabolism, or reducing fat absorption. However, it’s important to note that weight loss pills are not magical solutions; they should be used in conjunction with a healthy lifestyle.

Identifying Safe Weight Loss Pills

When it comes to choosing weight loss pills, safety should be your primary concern. Here are some key factors to consider:

1. Research and Certification

Look for weight loss pills that have undergone thorough research and testing. Check for certifications from reputable regulatory bodies to ensure the product’s safety and quality.

2. Ingredients and Formulation

Examine the ingredients list carefully. Opt for weight loss pills that contain natural and clinically proven ingredients. Avoid products that include harmful substances or undisclosed proprietary blends.

3. User Reviews and Testimonials

Read reviews and testimonials from individuals who have used the weight loss pills you are considering. Their experiences can offer valuable insights into the product’s effectiveness and potential side effects.

Natural and Herbal Weight Loss Pills

Natural and herbal weight loss pills have gained popularity due to their perceived safety and fewer side effects compared to synthetic alternatives. These products utilize plant-based ingredients known for their weight loss properties, such as green tea extract, Garcinia Cambogia, and raspberry ketones.

Prescription Weight Loss Pills

Prescription weight loss pills are typically recommended for individuals with obesity or significant weight-related health issues. These medications are regulated and can only be obtained through a doctor’s prescription. They are designed to be used under medical supervision and may have stronger effects compared to over-the-counter alternatives.

Over-the-Counter Weight Loss Pills

Over-the-counter weight loss pills are readily available without a prescription. They can be purchased from pharmacies, health food stores, or online retailers. These products often contain milder formulations and may require longer-term use to achieve noticeable results.

A gutter filled with 1-2 inches of water, surrounded by leaves and debris

How Much Water Should Sit in a Gutter? Expert Guidelines ExplainedHow Much Water Should Sit in a Gutter? Expert Guidelines Explained

Wondering how much water should sit in your gutters is a common concern for homeowners. After heavy rainfall, it’s typically okay to have up to an inch of water in your gutters temporarily.

This can happen due to the sheer volume of water, but your gutters should drain efficiently soon after. If water remains in your gutters beyond this point, it may signal the need for maintenance such as cleaning or re-pitching to ensure proper drainage.

A gutter filled with 1-2 inches of water, surrounded by leaves and debris

Water sitting in gutters is not an ideal situation. Persistent standing water can lead to serious issues, including water damage to your home’s structure or even basement flooding.

Gutters are integral to directing water away from your home, preventing potential damage to the foundations and avoiding costly repairs. Understanding the signs of improper drainage can save you time and money.

“Regular inspection and maintenance are essential for keeping your guttering system effective. If your gutters are prone to holding water, you might need to address issues with the slope or blockages.” said Steve Arnie of Gutter Cleaning Melbourne.

By ensuring that your gutters are clear and properly pitched, you protect your home from damaging overflow, helping maintain its structural integrity.

Determine whether you need to reinforce or replace parts of your system to keep everything in working order.

Optimising Gutter Performance

Optimising gutter performance involves ensuring the slope is appropriate for effective water drainage, conducting regular maintenance to prevent blockages, and installing gutter guards to minimise debris accumulation. Addressing these areas can help prevent standing water, overflow, and potential property damage.

Proper Installation and Slope

A correct slope is essential for efficient water flow. Aim for a slope of 1/4 inch per 10 feet to guide water towards downspouts. This prevents standing water and reduces the risk of sagging gutters.

Ensure gutters are securely installed with proper hangers to avoid sagging or separation. If you notice improper slope or inadequate fastening, consider reinforcement or consult professionals for adjustments.

Regular checks can help maintain optimal slope and function.

Regular Maintenance and Cleaning

Regular maintenance is necessary to keep gutters functioning efficiently. Clean gutters at least twice a year, more frequently if your area has heavy rainfall or abundant trees.

Remove leaves, debris, and built-up materials that could cause clogs. These obstructions can lead to standing water, which may cause overflow or damage to your property.

Inspections during cleaning can identify issues like sagging or misalignment early, allowing prompt repairs.

Effective Gutter Guards

Gutter guards are a preventive solution to keep gutters free of debris. They act as a barrier, reducing the risk of clogs and minimising maintenance frequency.

When choosing gutter guards, consider types such as mesh screens, surface tension guards, or foam inserts.

Installation of gutter guards can help maintain free water flow, preventing standing water and potential damage caused by frozen water accumulation.

Ensure compatibility with your existing gutter system and consult professionals like Steve Arnie of Gutter Cleaning Melbourne if necessary. This investment can save time and reduce long-term maintenance costs.

Addressing Gutter Issues

Properly maintaining gutters is crucial for preventing structural damage, enhancing water flow, and avoiding pest infestations. Understanding the impact of water in gutters helps in taking actionable steps to mitigate potential problems, ensuring a well-functioning system.

Preventing Water-Related Damage

Standing water in gutters can lead to significant structural damage, such as wood rot and roof damage. Regular maintenance involves clearing leaves and debris that block water flow.

Ensure gutters are mounted correctly with sturdy hangers to keep them from sagging.

Address issues with downspouts promptly, as they play a critical role in carrying water away from the foundation. Consider installing extensions or splash blocks to direct water further from your home, reducing the risk of basement flooding and foundational damage.

Enhancing Drainage Solutions

Improving the gutter drainage system can prevent water overflow and pooling. Evaluate the pitch of your gutters; they should slope towards the downspouts to facilitate efficient drainage.

If that’s not sufficient, you may need to adjust their angle or reinforce their installation.

Consider advanced solutions like rain barrels or French drains. These systems can effectively manage rainwater by directing it away from your home or storing it for later use, promoting sustainability and protecting your property.

Mitigating Pest Problems

Water in gutters creates a breeding ground for pests, including insects and rodents. Clogged or improperly drained gutters make this issue worse.

Ensuring a clean gutter system prevents pest infestations and related health concerns.

To deter infestations, install mesh or guards that keep debris out while allowing water to pass through. Regular checks for signs of mold or insect activity can prevent issues from escalating.

An effective drainage system will minimize stagnant water, reducing the likelihood of attracting pests.