Category: Uncategorized

fixed-water-pipes-underground

How to Fix a Leaking Water Pipe Underground: A Step-by-Step GuideHow to Fix a Leaking Water Pipe Underground: A Step-by-Step Guide

If you’re a homeowner, there’s a good chance that you’ll experience a leaking water pipe at some point. While it’s never a pleasant experience, it’s important to take action quickly to prevent further damage.

If the leak is underground, it can be even more challenging to detect and repair. In this guide, we’ll provide you with some tips on how to fix a leaking water pipe underground.

fixed water pipes underground

First, it’s important to identify the location of the leak. Look for signs of wet spots or puddles in your yard or driveway, as this can indicate the general area of the leak.

You can also check your water meter to see if it’s still running even when all the taps in your home are turned off. If the meter is still running, this could be a sign of a leak.

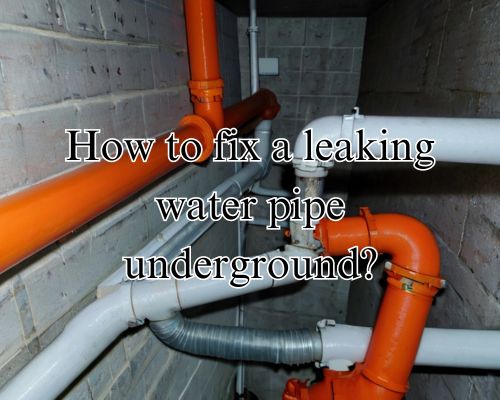
Once you’ve identified the location of the leak, it’s time to dig down to the pipe. This can be a challenging and time-consuming process, so be prepared to put in some effort.

Use a shovel to carefully dig around the area where you suspect the leak is located. Be careful not to damage the pipe further as you dig. But if you are not confident doing this kind of work, just call Leak Detection Warragul.

Once you’ve exposed the pipe, you can begin to assess the damage and determine the best course of action.

Identifying and Locating the Leak

Initial Inspection and Safety Precautions

If you suspect a leaking water pipe underground, the first step is to perform an initial inspection of your property. Look for wet spots, damp spots, and mildew growth on your walls, ceilings, and floors.

Check your water bill for any unexpected increase in usage that may indicate a leak.

Next, locate your water meter and check the spinning indicator. If it’s moving when no water is being used, this may be a sign of a leak.

Check for any recessed or swelling ground around the area where the water main enters your property. This could also indicate an underground water leak.

Before attempting to locate and fix the leak, it’s important to take safety precautions. Turn off your water supply at the shutoff valve to prevent any further damage to your property.

If you’re unsure about how to do this, contact a licensed plumber to assist you.

Understanding Ownership and Responsibility

When it comes to fixing a leaking water pipe underground, it’s important to understand ownership and responsibility.

The water main that supplies water to your property is typically owned and maintained by your local water authority. However, the pipes that run from the water main to your property are usually the responsibility of the property owner.

If you suspect a leaking water pipe underground, it’s important to determine who is responsible for fixing it. Contact your local water authority to confirm ownership and responsibility.

If the leaking pipe is on your property, you will need to hire a licensed plumber like Leak Detection Warragul to locate and fix the leak.

Repairing the Leaking Underground Pipe

When you have a leaking underground water pipe, it’s important to take immediate action to prevent further water damage, mold growth, and higher water bills.

While you can hire a professional plumber to fix the leak, you can also do it yourself with the right tools and materials. Here’s what you need to know to repair the leaking underground pipe:

Preparing for the Repair

Before you start digging, you need to locate the leak by following the sightline from the water meter to your home. Look for wet spots or low water pressure in your faucets to identify the damaged area.

Once you’ve located the leak, you need to obtain any necessary zoning or permits to perform the excavation and repair.

To prepare for the repair, you will need the following tools and materials:

  • Shovel or spade
  • Tarp
  • Sandpaper
  • Hacksaw
  • Copper, PVC, or PEX pipe (matching the diameter of the damaged pipe)
  • Fittings and connectors
  • Pipe cutter or similar tool
  • Water pressure gauge

Executing the Repair

To execute the repair, you will need to dig a trench around the damaged pipe, taking care to avoid any potable water lines or easements.

Once you have exposed the damaged pipe, you can cut out the leaking section using a pipe cutter or similar tool.

Be sure to cut the replacement pipe to match the length of the damaged section, and use fittings and connectors to attach it to the existing plumbing system.

After you have completed the repair, test it by running water through the pipes and checking the water pressure gauge for any abnormalities.

Sand the edges of the new pipe and fittings to ensure a tight seal, and cover the trench with soil and landscaping materials.

Post-Repair Considerations

It’s important to monitor the repaired area for any signs of water damage or mold growth.

If you notice any issues, contact a professional plumber to inspect the repair and ensure that it was done correctly.

Additionally, be aware of any tree roots or other potential causes of future leaks.

Take precautions to prevent structural damage to your yard, driveways, or patios.

What is the Difference Between Pipeline and Pipework?What is the Difference Between Pipeline and Pipework?

When it comes to the transportation of liquids or gases, two terms that are often used interchangeably are pipeline and pipework. However, there is a distinct difference between the two.

Pipework refers to the network of pipes within a specified boundary or space that transfer fluids from one piece of equipment to another. On the other hand, pipelines are long chains of pipes, usually of large diameters.

Pipelines can run underground, above ground, and underwater, sometimes spanning across villages or countries just like what Gas Plumber Warragul offers.

A network of pipes, valves, and fittings runs along the industrial facility, carrying various liquids and gases. The pipework extends throughout the building, connecting different machines and systems

One of the main differences between pipeline and pipework is their size. Pipelines are mostly large diameters that transport bulk liquid or gas from one place to another, sometimes spanning thousands of miles in distance.

Pipework, on the other hand, can range from ½” to 80″ as per the plant design requirements that transfer fluid from one piece of equipment to another.

Another difference is in their geographical scope. Pipelines are often demarcated by a boundary or fence, with the outside scope falling under the pipeline category and the inside boundary under the pipework category.

Fundamentals of Pipeline and Pipework

Definition and Purpose

Pipelines and pipework are both used to transport fluids, such as liquids and gases, from one place to another. However, there are some fundamental differences between the two.

Pipelines are typically used to transport large quantities of fluids over long distances, while pipework is used to transport fluids within a facility or plant.

The purpose of pipelines is to transport fluids over long distances, often across multiple states or even countries. Pipelines are used to transport a variety of fluids, including crude oil, natural gas, and water.

Pipework, on the other hand, is used to transport fluids within a facility, such as a chemical plant or refinery.

Components and Materials

Dean Owens of Gas Plumber Warragul highlights that “Both pipelines and pipework are made up of various components, including pipe fittings, valves, pumps, and heat exchangers. However, the materials used to construct pipelines and pipework can differ significantly.”

Pipelines are typically constructed from steel, which is durable and can withstand high pressures and temperatures. On the other hand, pipework can be made from a variety of materials, including steel, copper, and plastic.

Design and Engineering Standards

The design and engineering of pipelines and pipework must adhere to strict standards to ensure safe and efficient operation.

The ASME B31.4 and B31.8 codes are commonly used for pipelines, while the ASME B31.3 code is used for pipework.

The design of pipelines must take into account factors such as pressure, temperature, and fluid properties. Meanwhile, pipework design must consider factors such as flow rate, pressure drop, and fluid properties.

Operational Differences and Applications

Construction and Installation

When it comes to construction and installation, pipelines and pipework have some differences. Pipework refers to a network of pipes within a plant or facility, while pipelines are used for fluid transportation over long distances. Pipeline engineering and piping engineering are both involved in the design and construction of these systems.

The installation process for pipelines and pipework can also differ. Pipelines are often installed underground or underwater, while pipework is typically installed above ground within a facility. Both require careful planning and execution to ensure safe and efficient operation.

Maintenance and Inspection

Maintenance and inspection are critical to the safe and reliable operation of pipelines and pipework.

Pipelines require regular inspections to detect and repair any leaks or damage. In the oil and gas industry, subsea pipelines require specialized equipment and procedures for inspection and maintenance.

Pipework within a facility also requires regular maintenance and inspection to ensure proper operation. This may involve testing valves, pumps, and other equipment to ensure they are functioning correctly. Regular inspections can also help identify potential problems before they become major issues.

Industry-Specific Usage

Pipelines and pipework are used in various industries, including the oil and gas industry, transmission, and distribution of water and gas, and mains for residential and commercial use.

Each industry has specific requirements for the design, construction, and operation of these systems.

In the oil and gas industry, pipelines transport natural gas and oil over long distances. Valve stations and pumps regulate the flow of these fluids through the pipeline. Pipework within a plant transports fluids between different pieces of equipment.

In the transmission and distribution of water and gas, pipelines transport these fluids from one location to another. Mains within residential and commercial areas distribute these fluids to individual buildings.

While pipelines and pipework share some similarities, there are also important differences in their construction, maintenance, and application. Understanding these differences is crucial for ensuring safe and efficient operation in various industries.

A plumber holding a plunger and pointing to a toilet

What Do Plumbers Call a Toilet? The Professional Term ExplainedWhat Do Plumbers Call a Toilet? The Professional Term Explained

If you’re like most people, you probably don’t give much thought to what plumbers call a toilet. However, if you’re renovating your bathroom or dealing with a plumbing issue, it can be helpful to understand the different terms that plumbers use to refer to this essential fixture. See plumber near me.

A plumber holding a plunger and pointing to a toilet

One of the most common terms that plumbers use to refer to a toilet is “water closet.” This term is often abbreviated as “WC” and refers to the enclosed space where the toilet is located.

Another common term is “lavatory,” which is a more formal term that refers to a room containing a sink and toilet.

When it comes to the toilet itself, plumbers may use a variety of terms depending on where they are located and the specific type of toilet.

For example, “pan” is a term that is commonly used in Australia to refer to the bowl-shaped part of the toilet where waste is deposited. Meanwhile, “potty” is a more informal term that is often used to refer to a child’s training toilet.

Understanding Toilet Terminology and Function

Common Names and Nicknames for Toilets

Toilets have many different names and nicknames depending on where you are in the world. In Australia, they are commonly referred to as “toilets” or “lavatories”. Other common names include “WC” (short for water closet), “loo”, “john”, “crapper”, “throne”, “porcelain throne”, and “bathroom”.

Components and Mechanics of Toilet Operation

A typical toilet consists of two main components: the bowl and the tank.

The bowl is the part of the toilet that you sit on and where waste is deposited. The tank, on the other hand, is the part of the toilet that holds water and is used to flush the waste away.

When you flush the toilet, water from the tank rushes into the bowl and pushes the waste through a trapway and out of the toilet.

The mechanics of a toilet’s operation are relatively simple. When you flush the toilet, the water level in the tank drops, causing a water flap to open and allow water to rush into the bowl.

This water flow creates a siphon effect that pulls the waste through the trapway and out of the toilet. Once the water level in the tank drops low enough, a valve opens and allows water to flow back into the tank, refilling it for the next flush.

Materials and Tools for Plumbing

Toilets are typically made from porcelain or ceramic, which are durable and easy to clean.

When it comes to plumbing, there are a few essential tools that every homeowner should have on hand. These include a plunger, which is used to unclog blocked toilets, and a toilet auger or snake, which can be used to remove more stubborn blockages.

In addition to these basic tools, there are a few other materials and tools that may be needed for more complex plumbing jobs.

These include replacement parts for the toilet tank (such as valves and flappers), as well as wrenches, screwdrivers, and other hand tools. If you are unsure about how to perform a plumbing repair on your toilet, it is always best to call in a professional plumber, see plumber near me, who can diagnose and fix the problem for you.

Dealing with Common Toilet Issues

Identifying and Fixing Clogs

A clogged or blocked toilet is one of the most common problems you may face. This can be caused by various things, such as flushing foreign objects, hair, or too much toilet paper.

If you notice that your toilet is not flushing properly or is making gurgling sounds, it may be clogged.

To unclog a toilet, start by using a plunger. Ensure that the plunger covers the drain hole completely, then plunge vigorously.

If the bubbling continues, the vent might be blocked, and you can use a plumbing snake to clear any blockages in the vent.

Preventing and Addressing Toilet Leaks and Overflows

Toilet leaks and overflows can cause water damage and mold, making them a health hazard.

Common causes of leaks and overflows include cracks in the toilet bowl or tank, faulty fittings or valves, and backflow prevention issues.

To prevent leaks and overflows, regularly check the toilet’s fittings and valves for damage or wear and tear.

If you notice any leaks or overflowing water, turn off the water supply immediately to prevent further damage.

If the toilet is overflowing, use a plunger to try and clear the blockage or call a professional plumber for assistance.

When to Engage a Professional Plumber

Some toilet issues can be fixed with DIY methods, but others need a professional plumber. If you are unsure about the cause of the problem or have tried to fix it yourself but it persists, it’s time to call a plumber.

Experienced plumbers can quickly identify the root cause of the problem and provide a lasting solution. They can also advise you on when it’s time to replace your toilet or make upgrades to prevent future issues.

pipes-in-walls

How to Fix a Leaking Pipe Behind a Tiled Wall: A Step-by-Step GuideHow to Fix a Leaking Pipe Behind a Tiled Wall: A Step-by-Step Guide

“If you’re a homeowner, you may have experienced a leaking pipe behind a tiled wall at some point. This can be a frustrating and stressful situation, but it’s important to address the issue as soon as possible to prevent further damage to your home.” said Dean Owens of Plumber Warragul.

pipes in walls

The first step in fixing a leaking pipe behind a tiled wall is to shut off the water supply. This will help prevent any further damage from occurring. You can typically find the water shut-off valve in your home’s basement or utility room.

Once you’ve turned off the water supply, you can begin to assess the situation and determine the best course of action.

Depending on the severity of the leak, you may need to cut through the drywall behind the tile for access, repair the leak, and patch the drywall with waterproof backing. Alternatively, you may be able to access the leak through the ceiling or another wall. Using waterproof epoxy can also be an effective solution for sealing the leak.

In this article, we’ll explore these options in more detail and provide step-by-step instructions for fixing a leaking pipe behind a tiled wall.

Identifying and Assessing the Leak

When you notice a leak behind a tiled wall, it’s crucial to identify and assess the damage before attempting to fix it. This section will guide you through the process of detecting signs of a leak and evaluating the extent of damage.

Detecting Signs of a Leak

The first step in identifying a leak behind a tiled wall is to look for visible signs of damage. Some of the common signs of a water leak include water stains, discoloration, and corrosion.

If you notice any of these signs, it is essential to act quickly to prevent further damage.

Another sign of a water leak is a musty smell, which is often caused by mildew or dampness. If you notice a musty smell in the room, it’s a good indication that there is a water leak somewhere.

Evaluating the Extent of Damage

Once you have detected signs of a leak, it’s time to evaluate the extent of damage. If the leak is severe, you may notice water dripping from the ceiling or walls. In this case, it’s crucial to turn off the main water supply to prevent further damage.

If the leak is minor, you may only notice a small water stain on the ceiling or floor. In this case, it’s still essential to act quickly to prevent mold growth and further damage.

To assess the extent of damage, you may need to cut a hole in the drywall to inspect the pipes behind the wall. If you’re not comfortable doing this, it’s best to call a professional plumber to assess the damage.

Repairing the Leak

Preparing the Work Area

Before starting any plumbing repairs, you need to prepare your work area.

First, turn off the water supply to the leaking pipe. You can usually find the water shut-off valve in your home’s basement or utility room. Turning off the water supply will help prevent any further damage from occurring.

Next, protect the surrounding area by placing a plastic sheet or towel on the floor. This will help catch any water that may leak during the repair process.

You should also wear gloves and safety goggles to protect yourself from any sharp tools or debris.

Accessing the Leaking Pipe

Once you have prepared your work area, you need to access the leaking pipe.

If the leak is behind a tiled wall, you may need to remove some tiles to gain access to the pipe. Use a chisel and hammer to carefully remove the tiles around the leak. Be sure to wear safety glasses when doing this to protect your eyes from flying debris.

If you don’t want to remove tiles, you can access the pipe through an access panel in the wall or ceiling. If there is no access panel, you may need to cut a hole in the drywall to access the pipe.

Use a saw to cut a hole in the drywall, making sure to only cut as much as you need to access the pipe.

Fixing or Replacing the Pipe

Once you have accessed the leaking pipe, you need to fix or replace it.

If the leak is caused by a small hole or crack, you can fix it using plumbing tape or a pipe repair clamp. If the pipe is severely damaged, you may need to replace it entirely.

To replace the pipe, use a pipe cutter to cut out the damaged section of pipe. Be sure to cut the pipe as straight as possible to ensure a proper fit for the replacement piece.

Use pliers to remove any remaining pieces of the old pipe.

Next, measure and cut a new piece of pipe to fit the gap. Use plumbing tape or adhesive to attach the replacement piece to the existing pipe.

Finally, use a wrench to tighten the connections and joints.

Restoring the Tiled Wall

Once you have fixed or replaced the leaking pipe, it’s time to restore the tiled wall.

Clean the area around the repaired pipe with a wire brush to remove any debris or grout. Then, apply a thin layer of caulk or adhesive to the back of the replacement tile and press it into place.

Allow the adhesive to dry completely before applying grout to the seams between the tiles. Use a caulk gun to apply a thin layer of caulk around the edges of the tiles to seal them in place.

Testing for Leaks

After restoring the tiled wall, turn on the water supply and test for leaks.

Use a flashlight to inspect the repaired area for any signs of water leaks. If you suspect a hidden plumbing leak, you can use an infrared camera to confirm its presence.

If you don’t know how to fix a leaking pipe behind a tiled wall, it’s best to seek the help of a professional plumber like Plumber Warragul.

They have the tools and supplies needed to fix any pipe leakage and can help you avoid costly mistakes.

pipe-connected-to-toilet

When to Call a Plumber for a Toilet: Signs of Plumbing ProblemsWhen to Call a Plumber for a Toilet: Signs of Plumbing Problems

If you’re a homeowner, you know how important it is to keep your plumbing system in good condition. One of the most common issues you may face is a clogged toilet.

While some minor clogs can be resolved with a plunger or a plumbing snake, there are times when you may need to call a plumber for help.

pipe connected to toilet

So, when should you call a plumber for a toilet? Let’s know it with Dean Owens of Plumber Warragul.

If you’re dealing with a stubborn clog that won’t go away, it’s time to call in the experts. A professional plumber has the tools and expertise to diagnose the problem and fix it quickly and efficiently.

Additionally, if you notice any signs of a more serious issue, such as sewage backup or water damage, it’s important to call a plumber right away to prevent further damage to your home.

Recognising the Need for a Professional Plumber

If you are experiencing issues with your toilet, it may be tempting to try and fix the problem yourself. However, there are certain signs that indicate you need to call a professional plumber to avoid causing further damage to your plumbing system or risking your health.

Common Signs of Toilet Plumbing Issues

  • Clogged Toilet: If your toilet is not flushing properly or is overflowing, it may be clogged. While you can try to use a plunger to remove the blockage, persistent clogs may require the expertise of a professional plumber.
  • Gurgling Sounds: If you hear gurgling sounds coming from your toilet or other plumbing fixtures, it may indicate a blockage in your plumbing system. This can lead to further plumbing issues if not addressed promptly.
  • Water Level Fluctuations: If the water level in your toilet bowl is constantly fluctuating, it may indicate a problem with your plumbing system. This can lead to an overflowing toilet or other plumbing issues if not addressed promptly.

Assessing the Severity of Toilet Problems

When assessing the severity of toilet problems, it is important to consider the following:

  • Experience: If you have experience dealing with plumbing issues, you may be able to handle minor toilet problems on your own. However, if you are unsure of what to do, it is best to call a professional plumber.
  • Emergency: If your toilet is overflowing or you suspect a major plumbing issue, it is important to call a professional plumber immediately to prevent water damage and health hazards.
  • Damage: If your toilet is causing damage to your home or plumbing system, it is important to call a professional plumber to assess the situation and make necessary repairs.

The Risks of DIY Toilet Repairs

When your toilet is acting up, it’s tempting to try and fix the problem yourself. However, DIY toilet repairs can be risky and may end up causing more harm than good. Here are some of the risks you should consider before attempting a DIY fix.

Limitations of Home Plumbing Tools and Techniques

While plungers and chemical drain cleaners can be useful for minor clogs, they may not be enough to fix more serious plumbing problems. Attempting to use these tools on a blocked toilet or foreign object stuck in your pipes can cause further damage and even lead to costly repairs.

When to Avoid DIY and Call a Professional

If you’ve tried using a plunger or chemical drain cleaners and the problem persists, it may be time to call a professional plumber like Plumber Warragul.

Ignoring a plumbing problem can lead to more serious issues, including higher water bills and inconvenience. Additionally, attempting a DIY fix can void warranties and guarantees on your plumbing fixtures.

Professional plumbers have the tools, skills, and professional expertise to diagnose and fix plumbing problems quickly and effectively.

While it may be tempting to try and save money with a DIY fix, the cost of a professional repair can be much less than the cost of repairing damage caused by a failed DIY attempt.

In summary, while DIY toilet repairs may seem like a cost-effective solution, they can be risky and may cause more harm than good. If you’re experiencing a plumbing problem, it’s best to call a professional plumber to ensure a quick and effective fix.

Gas Stove Pipe: What Kind to Use?Gas Stove Pipe: What Kind to Use?

“If you’re a homeowner looking to install a gas stove, one of the most important things to consider is what kind of pipe to use. Using the wrong type of pipe can be extremely dangerous and could result in gas leaks or even explosions.” said Dean Owens of Plumber Warragul.

gas stove firing up

First and foremost, it’s important to understand that gas is a highly flammable and potentially dangerous substance. As such, it’s absolutely crucial that you take all necessary safety precautions when installing a gas stove.

This means not only using the right type of pipe, but also following all relevant safety guidelines and regulations.

When it comes to choosing a pipe for your gas stove, there are a few different options available.

The most common types of pipes used for gas stoves are black iron pipe, copper tubing, and flexible gas pipe.

Each of these types of pipes has its own pros and cons, and the right choice will depend on a variety of factors. These factors include the distance between your stove and your gas line, the size of your stove, and your personal preferences.

Choosing the Right Pipe Material

When it comes to gas stove piping, choosing the right material is crucial for ensuring safe and efficient operation.

There are several pipe materials to choose from, each with its own advantages and disadvantages. In this section, we’ll take a closer look at the most common materials used for gas stove piping.

Steel and Stainless Steel Pipes

Steel and stainless steel pipes are the most common materials used for gas stove piping.

They are durable, affordable, and readily available. Galvanized steel pipes are coated with a layer of zinc to prevent corrosion, while stainless steel pipes are corrosion-resistant.

When choosing a steel or stainless steel pipe, make sure to consider the thickness of the pipe walls. Thicker walls offer better durability and resistance to damage.

Look for pipes from reputable manufacturers and brands to ensure quality and reliability.

Copper Pipes and Fittings

Copper pipes and fittings are another option for gas stove piping.

Copper is highly durable and resistant to corrosion, making it a popular choice for plumbing and gas piping.

Copper pipes are available in various sizes and can be easily bent and shaped to fit any space.

When using copper pipes and fittings, make sure to use teflon tape to ensure a tight seal. Copper pipes should also be properly supported and secured to prevent damage and leaks.

Flexible Gas Lines and CSST

Flexible gas lines and corrugated stainless steel tubing (CSST) are newer options for gas stove piping.

They offer flexibility and easy installation, making them ideal for tight spaces and retrofitting projects. Flexible gas lines are made of a durable material and are available in various lengths and sizes.

When using flexible gas lines or CSST, be sure to use the appropriate adapter to ensure a secure and leak-free connection.

Look for products from reputable manufacturers and brands to ensure quality and reliability.

Installation and Safety Measures

Proper Venting and Air Quality

When installing a gas stove, you must ensure proper venting and air quality.

Proper venting helps to prevent the buildup of harmful gases, such as carbon monoxide, which can pose a significant safety hazard.

You should install a chimney pipe or other approved venting system that meets local building codes.

Additionally, you need to ensure adequate air quality in the room where the gas stove is installed. A lack of ventilation can lead to the buildup of harmful gases, which can cause health problems.

Make sure that the room where the gas stove is installed has enough fresh air circulation.

Gas Connection and Leak Prevention

When connecting a gas stove, make sure to use the correct gas pipe and fittings.

The pipe should be made of durable materials like brass or stainless steel and have the corresponding sizes to provide a snug fit.

You should also use pipe joint compound or thread sealant on all threaded connections to prevent gas leaks.

Furthermore, you need to check for gas leaks before using the gas stove.

Mix a solution of soap and water and apply it to the gas line and connections. If there are any bubbles, it indicates a gas leak, and you should turn off the gas immediately and call a professional.

Regulatory Compliance and Professional Services

Installing a gas stove requires compliance with local building codes and regulations. You should consult with a professional like Plumber Warragul, and ensure that the installation meets all the necessary requirements.

A professional can help you with the installation, inspection, and maintenance of the gas stove.

Moreover, a professional can help you with the installation of an anti-tip bracket, which is a safety feature that prevents the gas stove from tipping over. Additionally, you may need a pressure regulator to ensure the gas pressure is correct for the gas stove.

The cost of installation and professional services may vary depending on the BTU and cubic feet per hour of the gas stove.

gas-pipes

What are Three Types of Plumbing? A Comprehensive GuideWhat are Three Types of Plumbing? A Comprehensive Guide

Dean Owens of Plumber Warragul has to say that “If you’re a homeowner or a building manager, you know that plumbing is an essential part of any structure. Whether you’re using the sink to wash your hands or the toilet to flush waste, plumbing systems are responsible for delivering water to your fixtures and removing waste from your building.”

gas pipes

There are three main types of plumbing systems that you should be aware of: potable water systems, sanitary drainage systems, and stormwater drainage systems.

Potable water systems are responsible for supplying clean and safe drinking water to your building. This system involves treating and distributing water to various fixtures and appliances such as sinks, bathtubs, and showers.

Sanitary drainage systems, on the other hand, are responsible for removing waste and other non-potable water from your building. This system includes pipes, fittings, and fixtures that connect to the main sewer line.

Stormwater drainage systems are designed to manage rainwater and other surface water runoff. This system helps prevent flooding and erosion by directing water away from your building.

Types of Plumbing Systems

When it comes to plumbing systems, there are three main types: potable water plumbing, sanitary drainage plumbing, and stormwater drainage plumbing. Each system serves a different purpose and requires specific types of pipes and fixtures.

Potable Water Plumbing

Potable water plumbing is responsible for bringing clean and safe drinking water into your home. This system involves sourcing, treating, and distributing water to various fixtures and appliances in a building.

The most commonly used types of pipes for potable water plumbing are copper pipes, CPVC pipes, and PEX pipes.

Copper pipes are durable and long-lasting, but they can be expensive. Meanwhile, CPVC pipes are a lightweight and affordable alternative to copper, but they are not as durable. Lastly, PEX pipes are flexible and easy to install, but they may not be suitable for areas with high water pressure.

To maintain the quality of your potable water plumbing system, you should have it regularly inspected and maintained by a professional plumber like Plumber Warragul. This can help prevent leaks, discoloration, and contamination.

Sanitary Drainage Plumbing

Sanitary drainage plumbing is responsible for removing human waste and wastewater from your home. This system includes all the pipes and fixtures that connect to your sewer lines or septic system.

The most commonly used types of pipes for sanitary drainage plumbing are PVC pipes, ABS pipes, and cast iron pipes.

PVC pipes are lightweight and easy to install, but they may not be suitable for areas with high temperatures. Meanwhile, ABS pipes are durable and resistant to chemicals, but they may not be suitable for areas with high water pressure. Lastly, cast iron pipes are strong and durable, but they can be expensive and difficult to install.

To maintain the quality of your sanitary drainage plumbing system, you should have it regularly inspected and maintained by a professional plumber. This can help prevent blockages, property damage, and contamination.

Stormwater Drainage Plumbing

Stormwater drainage plumbing is responsible for removing rainwater and other surface water from your property. This system includes all the pipes and fixtures that connect to your stormwater drains, gutters, and sump pumps.

The most commonly used types of pipes for stormwater drainage plumbing are PVC pipes, polyvinyl chloride (PVC) pipes, and corrugated pipes.

PVC pipes are lightweight and easy to install, but they may not be suitable for areas with high temperatures. PVC pipes are also commonly used for stormwater distribution systems. Meanwhile, polyvinyl chloride (PVC) pipes are lightweight and affordable, but they may not be suitable for areas with high water pressure. Lastly, corrugated pipes are lightweight and flexible, but they may not be suitable for areas with heavy rainfall.

To maintain the quality of your stormwater drainage plumbing system, you should have it regularly inspected and maintained by a professional plumber. This can help prevent flooding, damage to plants and property, and contamination of stormwater runoff.

Materials and Maintenance

Common Plumbing Materials

When it comes to plumbing materials, there are several options available, each with its own advantages and disadvantages. The most common materials used in plumbing are copper, PVC, GI, steel, and PEX.

Copper pipes are one of the most popular choices due to their durability and resistance to rust and mineral buildup. They are often used in potable plumbing systems and can last for decades with proper maintenance.

PVC pipes are lightweight, easy to install, and resistant to corrosion. They are commonly used in drain and waste systems, as well as vent pipes.

GI or galvanized iron pipes are strong and durable, but they are prone to rust and discoloration over time. They are often used in water supply systems and need to be regularly checked for leaks and blockages.

PEX pipes are flexible and easy to install, making them a popular choice for DIY plumbing projects. They are also resistant to freezing and bursting, which makes them ideal for cold climates.

Plumbing System Maintenance

Maintaining your plumbing system is essential to prevent property damage and ensure that your fixtures and appliances function properly.

Here are some tips for maintaining your plumbing system:

  • Check your water meter regularly to monitor your water usage and detect any leaks.
  • Keep an eye out for discoloration or minerals in your water, which can indicate a problem with your pipes.
  • Inspect your fixtures and appliances, such as toilets, sinks, and washing machines, for leaks and other issues.
  • Clean your gutters and downspouts regularly to prevent blockages and flooding.
  • Check your septic tank regularly and have it pumped out as needed.
  • Hire a professional plumber for any repairs or maintenance tasks that are beyond your skill level.

a-gutter-guard-to-be-replaced

Is Replacing Gutters Hard? A Comprehensive GuideIs Replacing Gutters Hard? A Comprehensive Guide

Replacing gutters is an essential part of home maintenance. It can be necessary due to various reasons, such as damage or wear and tear over time.

a gutter guard to be replaced

If you’re wondering whether replacing gutters is hard, the answer is that it depends on your level of experience and DIY skills. While you can replace gutters yourself, you need to understand the process and have the right tools and materials to complete the job correctly.

One of the first things to consider when replacing gutters is whether you have the necessary skills and experience to do it yourself. If you have experience with DIY home improvement projects, you may be able to replace gutters without too much difficulty.

However, if you’re not confident in your abilities, it may be best to hire a professional (see gutter cleaning near me) to ensure that the job is done correctly. Keep in mind that improperly installed gutters can cause significant damage to your home, so it’s essential to take the necessary precautions to avoid any potential issues.

Another factor to consider when replacing gutters is the cost. While hiring a professional can be more expensive, it may be worth it in the long run to avoid any potential issues that could arise from improperly installed gutters.

However, if you’re on a tight budget, it is possible to replace gutters yourself with the right tools and materials. Just be sure to do your research beforehand and follow the proper procedures to ensure that the job is done correctly.

Assessing the Scope of Gutter Replacement

When replacing gutters, it is important to assess the scope of the project to ensure that you choose the right materials and understand the work involved. Here are some key factors to consider when assessing the scope of gutter replacement:

Evaluating Gutter Conditions

Before you begin the replacement process, you need to evaluate the condition of your existing gutter system. Look for signs of damage, such as rust, corrosion, cracks, or holes.

If your gutters are sagging or pulling away from the fascia, this could also be a sign that they need to be replaced.

If you are unsure about the condition of your gutters, it is best to consult with a professional gutter contractor. They can assess the condition of your gutter system and provide recommendations for replacement.

Choosing the Right Gutter Materials

Choosing the right gutter materials is essential for a successful replacement project. There are several materials available, including steel, vinyl, and aluminium.

Each material has its own advantages and disadvantages, so it is important to choose the one that best suits your needs.

Steel gutters are strong and durable, but they can rust over time. Meanwhile, vinyl gutters are affordable and easy to install, but they may not be as durable as other materials.

Aluminium gutters are lightweight and rust-resistant, making them a popular choice for many homeowners.

Understanding Gutter Styles and Sizes

Another important factor to consider when replacing gutters is the style and size of the gutters. There are several styles available, including K-style, half-round, and box gutters.

Each style has its own unique look and functionality, so it is important to choose the one that best suits your home’s style and needs.

Gutter size is also an important consideration. The size of your gutters will depend on the size of your roof and the amount of rainfall in your area.

Larger gutters are better able to handle heavy rainfall, while smaller gutters may be more suitable for areas with lighter rainfall.

Executing the Gutter Replacement

When executing a gutter replacement, there are three main steps to follow: preparing for installation, installing new gutters, and finishing touches and maintenance. If you cannot do the job, see gutter cleaning near me.

Preparing for Installation

Before beginning the installation process, you’ll need to gather the necessary tools and equipment. This includes a ladder, screws, hacksaw, end caps, elbows, caulk, chalk, tape measure, chisel, downspout elbow, connectors, gutter guards, cordless drill, miter saw, hole saw, downspout brackets, pop rivets, aviation snips, caulking gun, hanging brackets, and safety gear such as gloves, goggles, and a hard hat.

It’s important to take safety precautions when working on your gutters. Make sure you have a sturdy ladder and scaffolding if necessary, and avoid working in extreme weather conditions.

Always wear protective gear, and be careful when working near landscaping or delicate siding and trim.

Installing New Gutters

Once you have all the necessary tools and equipment, you can begin installing your new gutters.

Start by removing the old gutters, being careful not to damage the fascia and soffit in the process. Then, prime and paint any bare wood, and attach fascia brackets to hold the new gutters in place.

Next, install the gutter runs, making sure to create a slight slope towards the downspouts for proper water drainage. Use connectors to join the gutter runs, and add end caps and elbows as needed.

Use a hole saw to create downspout holes, and attach downspout brackets to secure them in place.

Finally, add gutter guards to protect against debris buildup and ensure the longevity of your rain gutter system. Use pop rivets and hanging straps to secure the gutters in place, and use silicone or caulk to seal any cracks or seam stress points.

Finishing Touches and Maintenance

Once your new gutters are installed, it’s important to perform regular maintenance to keep them in good condition.

This includes cleaning out any debris that may accumulate in the gutters and downpipes. Also, check for corrosion or damages, and replace any damaged parts as needed.

You may also want to consider adding a rain barrel to collect rainwater for gardening or other uses. This can help reduce your water bill and conserve resources.

Replacing gutters may seem like a daunting task. But with the right tools and components, and careful attention to safety and maintenance, it can be a DIY project that can save you money in the long run.

However, if you’re not comfortable with DIY gutter installation, it’s always best to seek professional installation. This ensures that the job is done correctly and safely.

cleaned-gutters-in-Brishane

How Much Does It Cost to Clean Gutters in Brisbane? A Comprehensive GuideHow Much Does It Cost to Clean Gutters in Brisbane? A Comprehensive Guide

Cleaning your gutters is an essential part of maintaining your home. It helps to prevent water damage, keeps pests away, and ensures that your gutters are functioning properly.

cleaned gutters in Brishane

However, when it comes to the cost of gutter cleaning in Brisbane, there are a few factors to consider.

The cost of gutter cleaning in Brisbane can vary depending on the size of your home, the height of your roof, and the amount of debris in your gutters.

On average, you can expect to pay between $4 and $7 per meter of guttering that needs cleaning. This can translate to around $200 to $250 an hour.

However, these prices can vary depending on the specific circumstances of your home and the company you choose to hire. See gutter cleaning werribee.

Understanding Gutter Cleaning Costs in Brisbane

Cleaning your gutters is an important task that should be done regularly to maintain the integrity of your property. However, the cost of gutter cleaning services can vary depending on several factors.

In this section, we will discuss the factors that influence gutter cleaning prices in Brisbane and the average price range for residential and commercial properties.

Factors Influencing Gutter Cleaning Prices

The following factors can influence the cost of gutter cleaning services in Brisbane:

  • Size of property: The size of your property is a significant factor in determining the cost of gutter cleaning services. Larger properties will require more time and effort to clean, resulting in higher prices.
  • Gutter guards: If your property has gutter guards installed, it may take more time and effort to clean, which can increase the overall cost of the service.
  • Trees: If your property has trees that overhang the gutters, it can result in more debris and blockages, which can increase the cost of the service.
  • Debris and blockages: The amount of debris and blockages in your gutters can significantly impact the cost of the service. If there is a lot of debris and blockages, it will take more time and effort to clean, resulting in higher prices.

Average Price Range for Residential and Commercial Properties

The cost of gutter cleaning services for residential and commercial properties in Brisbane can vary. For less pricing, see gutter cleaning werribee.

Here is a breakdown of the average price range for each property type:

  • Residential properties: The average cost of gutter cleaning services for residential properties in Brisbane is between $150 and $450, depending on the factors mentioned above.
  • Commercial properties: The cost of gutter cleaning services for commercial properties in Brisbane is typically higher than for residential properties. The average cost for commercial properties can range from $500 to $1,000, depending on the size of the property and the factors mentioned above.

It’s important to note that the prices mentioned above are just averages. The actual cost of gutter cleaning services can vary depending on the factors mentioned earlier.

It’s always a good idea to get a quote from a gutter cleaning service provider before hiring them. Many providers offer a quote form on their website, allowing you to get a free quote for their services.

Choosing the Right Gutter Cleaning Service

When choosing a gutter cleaning service in Brisbane, it is important to evaluate their expertise and equipment. You want to ensure that the gutter cleaner you choose has the necessary skills and tools to clean your gutters effectively and safely.

Evaluating Gutter Cleaners’ Expertise and Equipment

Before hiring a gutter cleaner, ask about their experience and training. A reputable gutter cleaning company will have an expert team that is fully trained and has the necessary expertise to clean gutters of all types.

They should also have the latest equipment to ensure that the job is done efficiently and effectively.

It is also important to ask about their safety equipment and procedures. Gutter cleaning can be a dangerous job, and you want to ensure that the gutter cleaner you choose takes safety seriously.

They should have safety equipment such as harnesses and ladders, and they should follow strict safety procedures to minimize the risk of accidents.

Additional Services and Considerations

When choosing a gutter cleaning service, you may also want to consider whether they offer additional services.

These services can include gutter guard installation, repairs, downpipe repairs, and pressure cleaning. They help to keep your gutters in good condition and prevent future problems.

It is also important to ensure that the gutter cleaner you choose is insured. A reputable gutter cleaning company will be fully insured, which means that you are protected in the event of any damage or accidents.

Finally, you may want to ask the gutter cleaner for before and after photos of previous jobs they have completed. This can give you a good idea of the quality of their work and help you to make an informed decision.

gutter-with-dirt-cleaned-by-the-cleaner

What is the Average Cost of Gutter Cleaning in My Area?What is the Average Cost of Gutter Cleaning in My Area?

If you own a property with gutters, you probably know that keeping them clean is important for the health of your home.

Regular gutter cleaning prevents water damage, foundation issues, and other costly repairs.

But what is the average cost of gutter cleaning in your area? How Much Does Gutter Cleaning Cost in Melbourne?

gutter with dirt cleaned by the cleaner

The cost of gutter cleaning varies depending on several factors, including the size of your property, the number of stories, and the condition of your gutters.

On average, you can expect to pay between $150 and $400 for gutter cleaning services in Australia.

However, keep in mind that this is just an estimate, and the final cost may vary depending on your specific needs.

It’s important to note that while gutter cleaning may seem like an unnecessary expense, it can save you money in the long run by preventing damage to your property.

Neglecting your gutters can lead to costly repairs, so it’s best to have them cleaned regularly.

In the following sections, we’ll take a closer look at the average cost of gutter cleaning in different areas of Australia, as well as some tips for saving money on this essential service.

Understanding Gutter Cleaning Costs

When it comes to gutter cleaning costs, there are several factors that can influence the price.

In this section, we will dive into the different factors that can affect the cost of gutter cleaning and give you an idea of the average prices and quotes.

Factors Influencing Gutter Cleaning Prices

The following factors can affect the cost of gutter cleaning:

  • Size and length of gutters: The larger and longer your gutters are, the more time and effort it will take to clean them, which can increase the cost.
  • Slope of your roof: If your roof has a steep slope, it can be more dangerous and difficult to clean the gutters, which can increase the cost.
  • Amount of debris: If there is a lot of debris in your gutters, it can take longer to clean them, which can increase the cost.
  • Gutter guards: If you have gutter guards installed, it can be more difficult to clean the gutters and may require more time, which can increase the cost.
  • Accessibility: If your gutters are hard to reach due to the house design, it can be more dangerous and difficult to clean them, which can increase the cost.

Average Prices and Quotes

The average cost of gutter cleaning can vary depending on your location, the size of your home, and the extent of the cleaning required. How Much Does Gutter Cleaning Cost in Melbourne?

In general, you can expect to pay between $100 and $600 for gutter cleaning.

Here are some average prices and quotes for gutter cleaning in New South Wales, specifically in Sydney:

  • Single-story house (2-3 bedrooms): $250-$350
  • Single-story house (4 bedrooms): $350-$450
  • Two-story house (2-3 bedrooms): $350-$500
  • Two-story house (4 bedrooms): $400-$600

It’s important to note that these prices are just averages and can vary depending on the factors mentioned above.

Additionally, some professional gutter cleaners may offer discounts for regular service or for larger homes.

While DIY gutter cleaning may seem like a cost-effective option, it’s important to consider the safety risks and potential damage to your gutters.

Hiring a professional gutter cleaning service can ensure that your gutters are properly cleaned and maintained without putting yourself in danger.

Choosing a Gutter Cleaning Service

When it comes to choosing a gutter cleaning service, there are a few things you need to consider to ensure you get the best service for your money.

This section will provide you with some tips to help you choose a reliable and professional gutter cleaning service.

Safety and Insurance Considerations

Gutter cleaning can be a dangerous job, especially if your home has multiple stories.

Therefore, it is important to choose an insured professional who takes safety measures seriously.

Make sure to ask about their safety protocols and insurance coverage before hiring them.

Evaluating Experience and Quality

Experience and quality are crucial factors to consider when choosing a gutter cleaning service.

Look for a company that has been in business for several years and has a good reputation in your area.

Check if they have the necessary training and tools to provide a professional gutter cleaning service.

Ask for references and read online reviews to get an idea of their quality of service.

Additional Services and Maintenance

Some gutter cleaning services offer additional services, such as downspout cleaning, gutter guard installation, and roof repair.

Consider hiring a company that provides these services to ensure your gutters and roof perform seamlessly.

Additionally, regular gutter cleaning and maintenance can help prolong the life of your gutters and prevent water damage to your home.

When requesting quotes, make sure to ask about any additional fees, such as travel fees, and the cost of labour.

The average cost of gutter cleaning in your area may vary depending on the time of year, time since the last clean, and the extent of clogged gutters.

Therefore, it is important to get an accurate quote before hiring a gutter cleaning service.

guttering-installed

How Many Downpipes Do You Need for Your Guttering?How Many Downpipes Do You Need for Your Guttering?

If you’re installing a new gutter system or replacing an old one, you may be wondering how many downpipes you need. The answer depends on several factors, including the size of your roof, the pitch of your roof, the amount of rainfall in your area, and the type of gutter system you have. See Gutter Cleaning near me for installation services.

guttering installed

One of the most important factors to consider when determining how many downpipes you need is the size of your roof. The larger your roof, the more water it will collect during a rainfall. This means you’ll need more downpipes to ensure the water is properly drained away from your home.

Additionally, the pitch of your roof can affect the amount of water that collects on your roof. A steeper pitch will cause water to run off more quickly, which may require more downpipes to handle the increased volume of water.

Understanding Guttering and Downpipes

Role of Gutters and Downpipes

Gutters and downpipes play a crucial role in protecting your property from water damage. They work together to collect and channel rainwater away from your roof and walls. Without gutters and downpipes, rainwater can accumulate on your roof and seep into your property’s foundation, causing costly damage.

Gutter Types and Shapes

Gutters come in different types and shapes, each with its own advantages and disadvantages. Some of the common gutter types include box gutters, quad gutters, and half-round gutters.

Box gutters are rectangular in shape and can be concealed behind the roof’s fascia. Quad gutters are similar to box gutters but have a more curved shape. Meanwhile, half-round gutters have a semicircular shape and are often used in traditional-style homes.

Key Terms in Guttering

It’s important to understand some key terms when it comes to guttering. Here are a few:

  • Fall: The angle at which gutters are installed to ensure water flows towards the downpipes.
  • Overflow: A device that prevents water from overflowing from the gutters during heavy rain.
  • Brackets: Used to support gutters and keep them in place.
  • Stop ends: Used to prevent water from flowing out of the gutters at the ends.

In addition to gutters, downpipes are also an essential part of your property’s water management system.

Maintenance

Regular maintenance of gutters and downpipes is important to ensure they function properly. Leaves, debris, and other materials can accumulate in gutters and cause blockages, preventing water from flowing freely. This can lead to water damage and other issues.

It’s recommended to clean gutters at least twice a year, preferably in spring and autumn. See Gutter Cleaning near me for cleaning services.

Calculating Downpipe Requirements

When determining the number of downpipes required for guttering, you need to consider several factors. Here are the steps to follow to calculate your downpipe requirements:

Assessing Roof Catchment Area

The first step is to assess the total roof catchment area. This can be done by measuring the length and width of the roof and multiplying these numbers together. If the roof has multiple sections, measure each section separately and add the totals together.

Determining Rainfall Intensity and Overflow Measures

Next, determine the rainfall intensity for your area. This information can be obtained from the Bureau of Meteorology.

Once you have this information, you can use it to calculate the overflow capacity required for your guttering system. This will ensure that the gutters do not overflow during heavy rain.

Applying Australian Standards and Codes

When designing your guttering system, make sure that it complies with the relevant Australian Standards and Codes. Specifically, AS/NZS 3500.3 outlines the requirements for stormwater drainage systems.

This standard covers everything from gutter size to downpipe size and the number of downpipes required.

Finalising Downpipe Number and Size

Once you have assessed the roof catchment area, determined the rainfall intensity, and applied the relevant Australian Standards and Codes, you can finalize the number and size of downpipes required.

The number of downpipes required will depend on the total roof catchment area and the acceptable solutions outlined in the plumbing code. Meanwhile, the downpipe size will also depend on the roof slope, gutter area, and the effective head of water.

It is recommended that all downpipes on a project are the same size. If you prefer a particular size, the eaves gutter calculator can tell you how many downpipes of that size you need.

Conversely, if you can only fit a certain number of downpipes, the program will tell you what size you need.

To calculate the required size of the downpipes, you need to work back from the discharge coefficient of the downpipe, which is based on the internal diameter of the downpipe.

The internal diameter should be based on the vertical faces of the downpipe, and the nominal diameter should be used for the pressure at the bottom of the downpipe. The gutter cross-sectional area should be used to determine the overflow volume, and the working back from the overflow volume will give you the required size of the downpipes.

Reconciliation

In the spirit of reconciliation, the Australian Building Codes Board acknowledges the Traditional Custodians of country throughout Australia and their connections to land, sea, and community. We pay our respect to Elders past and present. We also extend that respect to all Aboriginal and Torres Strait Islander peoples today.

a-gutter-with-overflowing-water

Why Cleaning Your Gutters Before Rain is Essential: Preventing Water Damage and Maintaining Your HomeWhy Cleaning Your Gutters Before Rain is Essential: Preventing Water Damage and Maintaining Your Home

Cleaning your gutters before it rains may not be the most exciting task, but it is an essential one. Neglecting to do so can result in serious damage to your property and end up costing you a lot of money in repairs.

a gutter with overflowing water

In this article, we will explain why it is important to clean your gutters before it rains and what can happen if you don’t.

Gutters are designed to collect rainwater and direct it away from your property. However, when they become clogged with leaves, twigs, and other debris, they can no longer do their job effectively. For cleaning services, look for Gutter Cleaning near me.

This can lead to water overflowing from the gutters and pooling around the base of your property. Over time, this can cause water damage to your foundation, walls, and roof, which can be expensive to repair. Additionally, clogged gutters can become heavy and pull away from the roofline, causing further damage.

The Importance of Regular Gutter Maintenance

To prevent water damage and leaks, protect your roof and foundation, and reduce the risk of pests and mould, it is important to regularly maintain your gutters.

Regular gutter maintenance involves a few simple steps that can save you time, money, and headaches down the road.

Preventing Water Damage and Leaks

Blocked gutters can lead to water overflow, which can damage your home’s exterior and foundation. Water can seep into the walls and cause structural damage, leading to costly repairs.

Regular cleaning of your gutters can prevent water damage and leaks, and ensure that water flows freely through your gutters and downspouts.

Protecting Your Roof and Foundation

Clean gutters can also protect your roof and foundation. When gutters are clogged, water can build up and seep into the roof, causing rot and damage. Water can also pool around the foundation, causing it to crack and shift.

Regular gutter maintenance can help prevent these problems and extend the life of your roof and foundation. See Gutter Cleaning near me.

Reducing the Risk of Pests and Mould

Blocked gutters can create a breeding ground for pests, such as mosquitoes and rodents. The standing water can also lead to mould growth, which can cause health problems for you and your family.

Regular gutter maintenance can reduce the risk of pests and mould, and ensure that your home is a healthy and safe environment.

How to Clean Your Gutters Effectively

Cleaning your gutters is an important task that should be done regularly to ensure that they function properly. Here’s how to clean your gutters effectively:

Choosing the Right Tools and Equipment

Before you begin cleaning your gutters, you need to make sure you have the right tools and equipment. Here’s a list of what you’ll need:

  • Ladder: Make sure it’s sturdy and tall enough to reach your gutters.
  • Gloves: Protect your hands from debris and sharp edges.
  • Bucket: Use it to collect debris and prevent it from falling on the ground.
  • Gutter scoop: Use it to remove debris from your gutters.
  • Gutter cleaning attachments: Use them to clean hard-to-reach areas.
  • Leaf blower or pressure washer: Use them to remove stubborn debris.

Step-By-Step Guide to Gutter Cleaning

Follow these steps to clean your gutters effectively:

  1. Set up your ladder securely near your gutters.
  2. Put on your gloves and use your gutter scoop to remove any large debris from your gutters.
  3. Use your gutter cleaning attachments to clean hard-to-reach areas.
  4. Use your leaf blower or pressure washer to remove any remaining debris.
  5. Use your bucket to collect debris and dispose of it properly.

roof-with-gutter-guards-and-downpipes

Are Gutter Guards Worth It? Pros and Cons to ConsiderAre Gutter Guards Worth It? Pros and Cons to Consider

If you’re a homeowner, you know that cleaning your gutters can be a tedious and time-consuming task. Gutter guards are often marketed as a solution to this problem, but are they worth the investment? See gutter cleaning Melbourne.

roof with gutter guards and downpipes

In this article, we’ll explore the pros and cons of gutter guards to help you determine whether they’re right for you.

Gutter guards are designed to prevent debris from accumulating in your gutters, reducing the need for frequent cleaning. They come in a variety of materials, including mesh, foam, and brush-style inserts, and can be installed over new or existing gutters.

While gutter guards can be effective at keeping out large debris like leaves and twigs, they’re not foolproof. Small particles like pine needles and shingle grit can still get through, and some types of guards can actually make it easier for debris to accumulate by trapping it in the gutters.

So, are gutter guards worth it? The answer depends on a variety of factors, including the type of guards you choose, the climate in your area, and the amount of debris that typically accumulates in your gutters.

Keep reading to learn more about the pros and cons of gutter guards and whether they’re a good investment for your home.

Evaluating the Effectiveness of Gutter Guards

Types and Functions

Gutter guards are designed to prevent debris buildup and clogging in your gutter system.

There are several types of gutter guards available, including mesh, micro-mesh, foam, brush, and screen gutter guards.

Mesh and micro-mesh gutter guards are effective in preventing debris such as leaves and pine needles from entering your gutter system.

Foam gutter guards are designed to allow water to flow through while blocking debris. Meanwhile, brush gutter guards have bristles that block large debris while permitting water to flow.

Lastly, screen gutter guards have a curved design that allows water to adhere to the cover while directing debris to fall off the edge. Reverse curve gutter guards are designed to allow water to flow into the gutter while debris falls off the edge.

Benefits vs. Drawbacks

The benefits of gutter guards include reduced maintenance and cleaning, prevention of clogs and debris buildup, and protection against water damage to your foundation and soil erosion. Gutter guards can also prevent ice dams and flooding.

However, there are also drawbacks to consider.

Gutter guards can be expensive to install, with prices ranging from $200 to $6,000 depending on the material and professional installation. They may also not be effective in heavy rainfall, and some types of gutter guards may require more maintenance than others.

Material and Durability

Gutter guards are typically made of aluminum, plastic, vinyl, or stainless steel.

Aluminum and stainless steel are more durable and corrosion-resistant than plastic and vinyl. The lifespan of gutter guards varies depending on the material and quality of the product, but most gutter guards can last up to 20 years.

Cost-Benefit Analysis

When evaluating the worth of gutter guards, it is important to consider the cost-benefit analysis.

This analysis involves weighing the upfront cost of installation and maintenance against the long-term savings and environmental and climatic considerations.

Installation and Maintenance Costs

The cost of gutter guards can vary depending on whether you opt for a DIY installation or professional installation (see gutter cleaning Melbourne).

DIY gutter guards are generally more affordable, but may not be as effective as professionally installed guards.

The upfront cost of professional installation can be expensive, but it often comes with a lifetime warranty and can save you time and money in the long run.

Maintenance costs should also be considered.

While gutter guards can reduce the need for gutter cleaning, they still require some maintenance to ensure they are functioning properly. DIY maintenance is typically inexpensive, while professional maintenance can be more costly.

Long-Term Savings

Gutter guards can provide long-term savings by reducing the need for gutter cleaning and extending the life of your gutters.

This can save you money on costly repairs and replacements. Additionally, gutter guards can prevent water damage to your home, which can be expensive to repair.

Environmental and Climatic Considerations

Gutter guards can provide environmental benefits. They reduce the amount of debris that enters your gutters and ultimately your rainwater. This can help to prevent clogs and reduce the amount of rainwater that goes to waste.

In arid climates, gutter guards can also help to prevent embers from entering your gutters and potentially causing a fire. In areas with trees, twigs, and birds, gutter guards can prevent these items from clogging your gutters and creating a pest infestation.

The cost-benefit analysis of gutter guards can vary depending on your budget, the value you place on your time, and the environmental and climatic considerations in your area. It is important to weigh these factors carefully and make an informed decision on whether gutter guards are worth the investment for your home.

a-roof-gutter-that-is-in-need-of-cleaning

How to Tell If Your Gutters Need CleaningHow to Tell If Your Gutters Need Cleaning

Maintaining your gutters is an important part of keeping your home in good condition.

It can be easy to forget about your gutters until something goes wrong, but regular maintenance can help prevent costly repairs down the track. See gutter cleaning Melbourne.

So, how do you know if your gutters need cleaning?

a roof gutter that is in need of cleaning

One of the most obvious signs that your gutters need cleaning is if they are overflowing during rain.

This can be caused by a build-up of debris such as leaves, twigs, and dirt.

If your gutters are overflowing, you should clean them as soon as possible to prevent water damage to your home’s foundation and walls.

Another sign that your gutters need cleaning is if you notice water damage to your home’s exterior.

This can include staining on your walls, brickwork, siding, and roof.

Stagnant water in your gutters can cause mildew and mould to grow, which can be harmful to your health.

If you notice any signs of water damage, have your gutters cleaned to prevent further damage.

Identifying Gutter Cleaning Needs

To ensure the longevity of your property and protect it from water damage, it is essential to maintain clean and functional gutters.

Here are some key visual and physical signs to help you identify when it’s time for a gutter clean.

Visual Inspection Clues

It’s important to perform a visual inspection of your gutters regularly.

If you notice any of the following, it’s time to clean your gutters:

  • Debris buildup: Leaves, twigs, and other debris can accumulate in your gutters and cause blockages.
  • Sagging gutters: If your gutters are sagging, it’s likely due to the weight of debris buildup and standing water.
  • Overflowing gutters: This is a clear indication that your gutters are clogged and need cleaning.

Physical Signs of Blockages

If you’re experiencing any of the following physical signs, it’s time to clean your gutters:

  • Water damage: If you notice water damage on your walls, ceilings, or foundation, it may be due to clogged gutters.
  • Pests: If you notice pests such as rodents, insects, or birds nesting in your gutters, it’s a clear indication that they need to be cleaned.
  • Rust: Rust on your gutters is a sign of standing water, which can be caused by blockages.

Consequences of Neglect

Neglecting your gutters can lead to serious consequences, such as:

  • Water damage: Clogged gutters can cause water to overflow and damage your home’s foundation, walls, and ceilings.
  • Mold growth: Standing water in your gutters can lead to mold growth, which can be harmful to your health.
  • Pest infestations: Clogged gutters can attract pests such as rodents and insects, which can cause damage to your home and pose a health risk.

Best Practices for Gutter Maintenance

Routine Cleaning Schedule

Regular maintenance is key to keeping your gutter system in good condition.

It is recommended to clean your gutters at least twice a year, in the spring and fall.

However, if you live in an area with a lot of trees or experience heavy rainfall, you may need to clean them more frequently.

To ensure your gutters are functioning properly, inspect them regularly or go to a gutter cleaning Melbourne. Look for signs of damage, such as cracks or holes, and check that the downspouts are clear of debris.

Choosing the Right Tools and Safety Measures

When it comes to cleaning your gutters, it’s important to choose the right tools and take necessary safety precautions.

A sturdy ladder with a stabilizer is essential to prevent falls.

Always wear rubber gloves to protect your hands and consider using a gutter scoop to remove debris.

If you decide to use a pressure washer or leaf blower, be cautious not to damage the gutter system.

It’s also important to be mindful of your landscape and avoid spraying debris onto your lawn or garden.

When to Call Professionals

Cleaning your gutters can be a DIY job. But if you’re not comfortable with heights or don’t have the necessary tools, it’s best to call a professional gutter cleaning service.

They have the expertise and equipment to safely and effectively clean your gutters. They can also repair any damage or leaks.

Professional gutter cleaning services can also install gutter screens or sealant to prevent future clogs and damage. However, if you do decide to tackle the job yourself, make sure you have the necessary supplies and follow ladder safety guidelines.

Remember, proper gutter maintenance is essential to protecting your home from water damage and pest infestations. By following these best practices, you can ensure your gutters are functioning properly and avoid costly repairs in the future.