Beckys Bridal Formal Fabrics Uncategorized How to Fix a Leaking Pipe Behind a Tiled Wall: A Step-by-Step Guide

How to Fix a Leaking Pipe Behind a Tiled Wall: A Step-by-Step Guide

How to Fix a Leaking Pipe Behind a Tiled Wall: A Step-by-Step Guide post thumbnail image

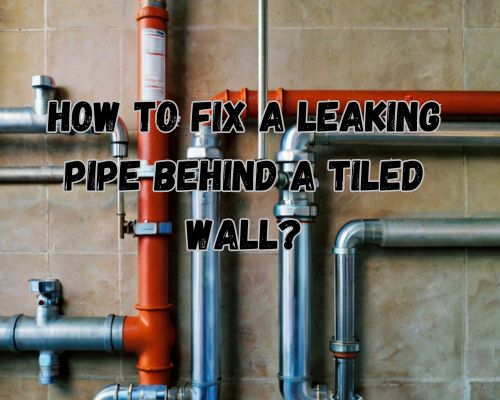
“If you’re a homeowner, you may have experienced a leaking pipe behind a tiled wall at some point. This can be a frustrating and stressful situation, but it’s important to address the issue as soon as possible to prevent further damage to your home.” said Dean Owens of Plumber Warragul.

pipes in walls

The first step in fixing a leaking pipe behind a tiled wall is to shut off the water supply. This will help prevent any further damage from occurring. You can typically find the water shut-off valve in your home’s basement or utility room.

Once you’ve turned off the water supply, you can begin to assess the situation and determine the best course of action.

Depending on the severity of the leak, you may need to cut through the drywall behind the tile for access, repair the leak, and patch the drywall with waterproof backing. Alternatively, you may be able to access the leak through the ceiling or another wall. Using waterproof epoxy can also be an effective solution for sealing the leak.

In this article, we’ll explore these options in more detail and provide step-by-step instructions for fixing a leaking pipe behind a tiled wall.

Identifying and Assessing the Leak

When you notice a leak behind a tiled wall, it’s crucial to identify and assess the damage before attempting to fix it. This section will guide you through the process of detecting signs of a leak and evaluating the extent of damage.

Detecting Signs of a Leak

The first step in identifying a leak behind a tiled wall is to look for visible signs of damage. Some of the common signs of a water leak include water stains, discoloration, and corrosion.

If you notice any of these signs, it is essential to act quickly to prevent further damage.

Another sign of a water leak is a musty smell, which is often caused by mildew or dampness. If you notice a musty smell in the room, it’s a good indication that there is a water leak somewhere.

Evaluating the Extent of Damage

Once you have detected signs of a leak, it’s time to evaluate the extent of damage. If the leak is severe, you may notice water dripping from the ceiling or walls. In this case, it’s crucial to turn off the main water supply to prevent further damage.

If the leak is minor, you may only notice a small water stain on the ceiling or floor. In this case, it’s still essential to act quickly to prevent mold growth and further damage.

To assess the extent of damage, you may need to cut a hole in the drywall to inspect the pipes behind the wall. If you’re not comfortable doing this, it’s best to call a professional plumber to assess the damage.

Repairing the Leak

Preparing the Work Area

Before starting any plumbing repairs, you need to prepare your work area.

First, turn off the water supply to the leaking pipe. You can usually find the water shut-off valve in your home’s basement or utility room. Turning off the water supply will help prevent any further damage from occurring.

Next, protect the surrounding area by placing a plastic sheet or towel on the floor. This will help catch any water that may leak during the repair process.

You should also wear gloves and safety goggles to protect yourself from any sharp tools or debris.

Accessing the Leaking Pipe

Once you have prepared your work area, you need to access the leaking pipe.

If the leak is behind a tiled wall, you may need to remove some tiles to gain access to the pipe. Use a chisel and hammer to carefully remove the tiles around the leak. Be sure to wear safety glasses when doing this to protect your eyes from flying debris.

If you don’t want to remove tiles, you can access the pipe through an access panel in the wall or ceiling. If there is no access panel, you may need to cut a hole in the drywall to access the pipe.

Use a saw to cut a hole in the drywall, making sure to only cut as much as you need to access the pipe.

Fixing or Replacing the Pipe

Once you have accessed the leaking pipe, you need to fix or replace it.

If the leak is caused by a small hole or crack, you can fix it using plumbing tape or a pipe repair clamp. If the pipe is severely damaged, you may need to replace it entirely.

To replace the pipe, use a pipe cutter to cut out the damaged section of pipe. Be sure to cut the pipe as straight as possible to ensure a proper fit for the replacement piece.

Use pliers to remove any remaining pieces of the old pipe.

Next, measure and cut a new piece of pipe to fit the gap. Use plumbing tape or adhesive to attach the replacement piece to the existing pipe.

Finally, use a wrench to tighten the connections and joints.

Restoring the Tiled Wall

Once you have fixed or replaced the leaking pipe, it’s time to restore the tiled wall.

Clean the area around the repaired pipe with a wire brush to remove any debris or grout. Then, apply a thin layer of caulk or adhesive to the back of the replacement tile and press it into place.

Allow the adhesive to dry completely before applying grout to the seams between the tiles. Use a caulk gun to apply a thin layer of caulk around the edges of the tiles to seal them in place.

Testing for Leaks

After restoring the tiled wall, turn on the water supply and test for leaks.

Use a flashlight to inspect the repaired area for any signs of water leaks. If you suspect a hidden plumbing leak, you can use an infrared camera to confirm its presence.

If you don’t know how to fix a leaking pipe behind a tiled wall, it’s best to seek the help of a professional plumber like Plumber Warragul.

They have the tools and supplies needed to fix any pipe leakage and can help you avoid costly mistakes.

Related Post

A person sitting at a desk, surrounded by scattered papers and a laptop, looking contemplative with a thoughtful expression

Is it Worth Paying a Business Coach? Exploring Return on InvestmentIs it Worth Paying a Business Coach? Exploring Return on Investment

Deciding whether to invest in a business coach can be a pivotal choice for your professional journey. With the right guidance, you can unlock potential that may otherwise remain dormant. A coach brings invaluable perspective and expertise to your endeavor.

A competent business coach can be worth the investment if you’re clear about your business goals and ready to elevate your leadership skills.

A person sitting at a desk, surrounded by scattered papers and a laptop, looking contemplative with a thoughtful expression

Engaging a business coach especially in Make It Happen Coaching, provides the advantage of an experienced outsider who can identify your business’s strengths and weaknesses. The accountability a coach provides is crucial in ensuring you consistently strive towards your goals, ultimately enhancing performance and driving growth.

While the investment might seem substantial, you gain a partner committed to fostering your development as a leader. A skilled coach utilizes evidence-based methodologies tailored to your needs, ensuring that the strategies applied are both practical and effective in propelling your business forward.

Determining the Value of a Business Coach

Business coaching can provide entrepreneurs with guidance, support, and opportunities for growth. A well-chosen business coach helps navigate challenges, enhances your skills, and aligns with your business goals.

Assessing Credentials and Experience

When considering a business coach, it’s crucial to evaluate their credentials and experience. Look for qualifications such as an MBA or certifications from reputable organizations. These indicate a strong theoretical foundation and professional commitment.

Assess their track record in your industry to ensure relevant insights and expertise. Experienced coaches bring nuanced knowledge tailored to your needs. Their previous success stories with small businesses can offer confidence in their ability to guide you effectively.

Industry connections and practical knowledge can extend valuable opportunities and resources, enhancing your business’s growth potential.

Understanding the Investment

Business coaching should be seen as an investment rather than a cost. Evaluate the potential return on investment (ROI) by considering how improvements in strategic planning, decision-making, or business finance could impact your bottom line.

Coaches provide tailored insights that can significantly enhance your operations, leading to better outcomes and increased profitability. Weigh the upfront costs against long-term benefits to determine value.

A business coach’s ability to identify new opportunities and facilitate resourceful solutions supports your growth, making the investment worthwhile. Your commitment to implementing their guidance will largely shape the ROI and future success. For more, see Make It Happen Coaching.

Evaluating Coaching Outcomes

Evaluating coaching outcomes involves assessing the progress towards set business goals and examining personal growth, skills, and strategies acquired through coaching. Focus on tangible success measures can help you gauge the overall impact of the coaching relationship.

Setting and Achieving Business Goals

To evaluate coaching effectiveness, it’s crucial to set clear, actionable business goals from the start. These goals guide your progress and provide a benchmark to measure success.

Break down large goals into smaller, manageable tasks. Establish accountability by regularly reviewing these tasks with your coach to ensure you’re on track.

Metrics such as revenue growth, improved team performance, or enhanced leadership skills are practical ways to measure success. Coaches often use these metrics to help you stay focused and make strategic adjustments as necessary.

Real-life Success Stories

Client testimonials and real-life success stories offer valuable insights into the coaching process. Hearing about others’ progress can be motivating and provide proof of the coaching’s value.

These stories often highlight personal growth, improved strategies, and leadership skills developed through coaching. For example, a business leader may share how mentorship helped them refine their strategic planning skills.

Stories like these can illustrate the impact of coaching on business growth and personal development. Use such testimonials to understand how coaching can transform challenges into successes.

Clean, well-installed gas pipe along wall

Can a Gas Line Be Too Long? What Warragul Homeowners Need to KnowCan a Gas Line Be Too Long? What Warragul Homeowners Need to Know

When planning any home renovation or gas appliance upgrade in Warragul, one often overlooked yet critical consideration is the length of the gas line. You might be wondering: Can a gas line be too long? The answer is yes—and understanding why can help you avoid performance issues, safety hazards, and costly rework.

Clean, well-installed gas pipe along wall

With Dean Owens of Plumber Warragul, we will walk you through everything you need to know about gas line length, pressure loss, compliance with Australian Standards, and how local factors in Warragul affect installation. Whether you’re adding an outdoor gas BBQ in Drouin or renovating a heritage home in Warragul North, the distance your gas line runs matters more than you might think.

What Happens When a Gas Line Is Too Long?

In simple terms, a gas line that’s too long can result in a pressure drop, meaning your appliances may not receive enough gas to function properly. This can lead to:

  • Inconsistent heating
  • Inefficient appliance operation
  • Flame-out issues in water heaters and stoves
  • Increased safety risks due to incomplete combustion

In more severe cases, gas lines that exceed recommended lengths without pressure regulation can cause long-term wear on appliances, or even trigger leaks if not installed to code.

Gas Pressure, Line Length, and Appliance Performance

Gas flows through your piping under pressure. In Australia, residential properties typically use either natural gas (NG) or liquefied petroleum gas (LPG), and both have different flow characteristics.

In a suburb like Warragul, where many homes use LPG due to semi-rural zoning and limited mains gas coverage in outlying areas like Ellinbank or Bona Vista, pressure regulation becomes even more important. LPG travels as a denser gas, so it requires a properly balanced system to maintain flow over long distances.

Here’s how gas line length affects pressure:

  • The longer the pipe, the more resistance the gas faces.
  • As distance increases, friction loss occurs inside the pipe.
  • If the pipe diameter isn’t increased accordingly, insufficient gas reaches the appliance.

For instance, a gas line running 30+ metres to a backyard alfresco kitchen in Warragul South might need a larger pipe diameter or a secondary regulator installed midway to ensure safe and consistent delivery.

What Australian Standards Say About Gas Line Length

Australian Standard AS/NZS 5601.1:2022 outlines the requirements for gas installations in residential and commercial properties. While there’s no single “maximum length,” the code mandates that:

  • Pressure at any appliance must meet manufacturer specs
  • Installations must be tested for leakage and pressure loss
  • Piping must be sized to maintain minimum required pressure even at maximum demand

In essence, it’s not just about length—it’s about whether the system as a whole is engineered for demand. Local licensed gas fitters in Warragul are required to follow these standards strictly. Attempting to DIY or using unlicensed labor can result in hefty penalties and unsafe conditions.

Warragul’s Terrain & Weather Can Affect Installations

One thing many Warragul residents may not consider is how local terrain and climate can impact gas line performance.

  • Elevation changes between properties in the north (like Lardner or Nilma North) can make longer gas lines even more challenging due to gravity affecting pressure.
  • In colder months—particularly through July and August when Warragul sees its chilliest temps—gas contracts slightly, making pressure drops more noticeable.
  • Properties with expansive acreage, common in Warragul East and nearby Buln Buln, often have detached dwellings or outdoor kitchens that require long gas runs.

All these factors add up to the need for a custom-engineered solution.

Signs Your Gas Line May Be Too Long (or Undersized)

If you live in Warragul and recently installed a new gas appliance—or extended your gas system—and are experiencing issues, here are some red flags to look out for:

  • Weak or yellow flame on your stove or heater
  • Water heater takes longer to heat up than it used to
  • Unusual sounds like sputtering or hissing from appliances
  • Gas appliance shuts off unexpectedly
  • Strong gas smell near connection points

If you notice any of these, it’s crucial to contact a licensed gas plumber in Warragul immediately. Don’t wait—gas leaks are a serious hazard. For professional needs, just go to Dean Owens of Plumber Warragul.

How a Local Gas Fitter in Warragul Can Help

Local gas professionals are familiar with the unique building codes and property layouts in Warragul and surrounding towns like Yarragon, Darnum, and Neerim South. They’ll assess:

  • Your total appliance load (in MJ/h)
  • Your pipe material and diameter (e.g., copper, polyethylene)
  • Any elevation changes or external environmental factors
  • Opportunities for splitting lines with branch regulators
  • Whether mains or LPG best suits your property

Using calculation tables from AS/NZS 5601.1, they’ll size the pipes accordingly. This often includes pressure testing with gauges and leak detection with soapy water or electronic sniffers.

What’s the Ideal Gas Line Length?

There’s no universal number, but here’s a general rule of thumb:

  • Up to 15m = standard residential pipe size (20mm or 3/4″)
  • 15m–30m = may need upsizing to 25mm
  • 30m+ = definitely requires upsizing or adding regulators

Remember, this also depends on how many appliances you’re running. For example, a Warragul home with a gas stovetop, water heater, and outdoor pizza oven may reach total consumption levels that strain a long, undersized pipe.

Cost of Correcting an Overextended Gas Line in Warragul

Fixing a poorly planned gas line isn’t cheap, but it’s far less costly than the consequences of a gas leak or appliance failure.

Here’s what you might expect:

  • Pipe upsizing (per metre): $70–$100 depending on material and access
  • Secondary regulator installation: $250–$400
  • Gas leak detection and pressure testing: $150–$300
  • Council permit or compliance certificate: ~$150

Choosing a Warragul-based gas professional ensures local compliance and often reduces travel or callout fees.

Final Thoughts: Don’t Let Distance Compromise Your Gas Safety

So, can a gas line be too long? Absolutely.

Whether you’re building a new granny flat near Warragul Civic Park or adding a spa heater in Warragul Heights, don’t leave gas line design to guesswork. Long lines introduce real risks—but they’re entirely manageable with the right planning, materials, and professional expertise.

When in doubt, consult a certified gas plumber who understands Warragul’s topography, climate, and council regulations. A properly designed system not only ensures optimal appliance performance but also keeps your home and family safe.

Need Expert Advice on Gas Installations in Warragul?
Reach out to a licensed gas fitter near you for a compliance inspection and ensure your system is ready for years of safe, efficient use.

How to Repair an Old Roof: Tips and Techniques for a Successful ProjectHow to Repair an Old Roof: Tips and Techniques for a Successful Project

If you own an old house, you might have noticed that your roof has started to deteriorate over time. Age, weather, and damage can all contribute to a damaged roof.

Repairing a roof can seem like a daunting task, but with the right knowledge and tools, you can do it yourself. With Charles Jimerson of Commercial Roofing NJ, we will guide you through the process of repairing an old roof.

men working on repairing a roof

The first step in repairing an old roof is to inspect it thoroughly. You need to identify the areas that need repair or replacement.

Look for missing or damaged shingles, cracked or corroded metal flashings, and damaged mortar fillets. Check the interior of your house for any signs of water damage or leaks.

Once you have identified the problem areas, you can start repairing your roof.

Repairing an old roof can be challenging, but it is not impossible. With the right tools and knowledge, you can save yourself a lot of money by doing it yourself.

In the following sections, we will guide you through the process of repairing your old roof. We will cover everything from inspecting your roof to repairing damaged shingles and flashings. So, let’s get started!

Assessing Roof Damage and Preparing for Repair

Before repairing an old roof, it is important to assess the damage and prepare for the repair. This will ensure that the repair is done properly and will last for a long time.

In this section, we will discuss how to identify common roofing issues, the tools and materials required for roof repair, and the safety precautions and initial inspection that should be taken.

Identifying Common Roofing Issues

The first step in assessing roof damage is to identify the common roofing issues. These issues include damaged or missing shingles, damaged flashing, holes, roof leaks, water damage, cracks, and leaky rafters.

During the storm season, it is especially important to inspect the roof for any damage caused by strong winds or hail.

You can use binoculars to inspect the roof from the ground. Look for missing or damaged shingles, water staining, and any other signs of damage. You should also inspect the attic for any signs of mold or water damage.

Tools and Materials Required for Roof Repair

Once you have identified the roofing issues, you will need the right tools and materials for the repair.

Some of the tools you will need include a hammer, roofing nails, a utility knife, a caulking gun, and a ladder.

The materials you will need depend on the type of repair you are doing. For example, if you are replacing shingles, you will need new shingles, roofing cement, and roofing nails.

Safety Precautions and Initial Inspection

Before starting any repair work, it is important to take safety precautions. This includes wearing safety gear such as gloves and safety glasses, and using a sturdy ladder that is placed on a flat surface.

You should also inspect the roof for any hazards such as power lines or loose debris.

Once you have taken the necessary safety precautions, you should conduct an initial inspection of the roof. This includes assessing the extent of the damage and identifying the areas that need repair. You should also check the condition of the roof deck and make sure it is sturdy and free from any damage.

Executing Roof Repairs

When it comes to executing roof repairs, there are a few key areas that you need to focus on. These include repairing or replacing shingles and flashing, addressing structural and water damage, and sealing and preventing future roof leaks.

By taking a methodical approach and using the right tools and materials, you can make sure that your roof is in top condition and protect your home from the elements.

Repairing or Replacing Shingles and Flashing

One of the most common issues with an old roof is damaged shingles and flashing. To repair or replace them, you’ll need a few basic tools, including a hammer, pry bar, utility knife, and roofing nails.

Start by removing the damaged shingles or flashing, being careful not to damage any surrounding tiles or sheathing. Once you’ve removed the damaged materials, replace them with new shingles or flashing, securing them in place with roofing nails.

Addressing Structural and Water Damage

Another important aspect of executing roof repairs is addressing any structural or water damage that you may find. This can include rotting timbers, widespread damage to the underlayment or sheathing, and ventilation problems.

In some cases, you may need to replace entire sections of the roof to address these issues. If you’re not comfortable doing this work yourself, it’s best to hire a professional roofer like Commercial Roofing NJ to handle it for you.

Sealing and Preventing Future Roof Leaks

Finally, it’s important to seal your roof properly to prevent future leaks.

This can involve using a variety of materials, including roof sealant, EPDM, and a caulk gun.

Make sure to inspect your roof regularly for signs of damage, such as tears, twigs, or leaves on the roof.

If you notice any problems, address them as soon as possible to prevent further damage.

By taking a proactive approach to roof repairs, you can save yourself time and money in the long run.

Whether you’re dealing with a flat roof, asphalt shingle roof, or another type of roofing material, make sure to use cost-effective solutions that will protect your home and improve its curb appeal.

And don’t forget to check with your homeowners insurance to see if your policy covers any roof repair costs.