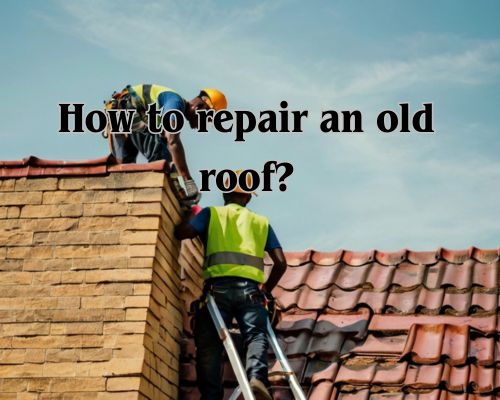
How to Repair an Old Roof: Tips and Techniques for a Successful ProjectHow to Repair an Old Roof: Tips and Techniques for a Successful Project

If you own an old house, you might have noticed that your roof has started to deteriorate over time. Age, weather, and damage can all contribute to a damaged roof.

Repairing a roof can seem like a daunting task, but with the right knowledge and tools, you can do it yourself. With Charles Jimerson of Commercial Roofing NJ, we will guide you through the process of repairing an old roof.

men working on repairing a roof

The first step in repairing an old roof is to inspect it thoroughly. You need to identify the areas that need repair or replacement.

Look for missing or damaged shingles, cracked or corroded metal flashings, and damaged mortar fillets. Check the interior of your house for any signs of water damage or leaks.

Once you have identified the problem areas, you can start repairing your roof.

Repairing an old roof can be challenging, but it is not impossible. With the right tools and knowledge, you can save yourself a lot of money by doing it yourself.

In the following sections, we will guide you through the process of repairing your old roof. We will cover everything from inspecting your roof to repairing damaged shingles and flashings. So, let’s get started!

Assessing Roof Damage and Preparing for Repair

Before repairing an old roof, it is important to assess the damage and prepare for the repair. This will ensure that the repair is done properly and will last for a long time.

In this section, we will discuss how to identify common roofing issues, the tools and materials required for roof repair, and the safety precautions and initial inspection that should be taken.

Identifying Common Roofing Issues

The first step in assessing roof damage is to identify the common roofing issues. These issues include damaged or missing shingles, damaged flashing, holes, roof leaks, water damage, cracks, and leaky rafters.

During the storm season, it is especially important to inspect the roof for any damage caused by strong winds or hail.

You can use binoculars to inspect the roof from the ground. Look for missing or damaged shingles, water staining, and any other signs of damage. You should also inspect the attic for any signs of mold or water damage.

Tools and Materials Required for Roof Repair

Once you have identified the roofing issues, you will need the right tools and materials for the repair.

Some of the tools you will need include a hammer, roofing nails, a utility knife, a caulking gun, and a ladder.

The materials you will need depend on the type of repair you are doing. For example, if you are replacing shingles, you will need new shingles, roofing cement, and roofing nails.

Safety Precautions and Initial Inspection

Before starting any repair work, it is important to take safety precautions. This includes wearing safety gear such as gloves and safety glasses, and using a sturdy ladder that is placed on a flat surface.

You should also inspect the roof for any hazards such as power lines or loose debris.

Once you have taken the necessary safety precautions, you should conduct an initial inspection of the roof. This includes assessing the extent of the damage and identifying the areas that need repair. You should also check the condition of the roof deck and make sure it is sturdy and free from any damage.

Executing Roof Repairs

When it comes to executing roof repairs, there are a few key areas that you need to focus on. These include repairing or replacing shingles and flashing, addressing structural and water damage, and sealing and preventing future roof leaks.

By taking a methodical approach and using the right tools and materials, you can make sure that your roof is in top condition and protect your home from the elements.

Repairing or Replacing Shingles and Flashing

One of the most common issues with an old roof is damaged shingles and flashing. To repair or replace them, you’ll need a few basic tools, including a hammer, pry bar, utility knife, and roofing nails.

Start by removing the damaged shingles or flashing, being careful not to damage any surrounding tiles or sheathing. Once you’ve removed the damaged materials, replace them with new shingles or flashing, securing them in place with roofing nails.

Addressing Structural and Water Damage

Another important aspect of executing roof repairs is addressing any structural or water damage that you may find. This can include rotting timbers, widespread damage to the underlayment or sheathing, and ventilation problems.

In some cases, you may need to replace entire sections of the roof to address these issues. If you’re not comfortable doing this work yourself, it’s best to hire a professional roofer like Commercial Roofing NJ to handle it for you.

Sealing and Preventing Future Roof Leaks

Finally, it’s important to seal your roof properly to prevent future leaks.

This can involve using a variety of materials, including roof sealant, EPDM, and a caulk gun.

Make sure to inspect your roof regularly for signs of damage, such as tears, twigs, or leaves on the roof.

If you notice any problems, address them as soon as possible to prevent further damage.

By taking a proactive approach to roof repairs, you can save yourself time and money in the long run.

Whether you’re dealing with a flat roof, asphalt shingle roof, or another type of roofing material, make sure to use cost-effective solutions that will protect your home and improve its curb appeal.

And don’t forget to check with your homeowners insurance to see if your policy covers any roof repair costs.

a-house-under-re-roofing

Is Re-Roofing a Good Idea? Pros and Cons to ConsiderIs Re-Roofing a Good Idea? Pros and Cons to Consider

Charles Jimerson of Commercial Roofing NJ has to say “If you’re a homeowner, you know that one of the most important investments you can make is in your roof. It protects your home from the elements and ensures that you and your family stay safe and dry.”

But when your roof starts to show signs of wear and tear, you may be wondering whether it’s time to replace it or if re-roofing is a good idea.

In this article, we’ll explore the pros and cons of re-roofing and help you decide if it’s the right choice for your home.

a house under re-roofing

Re-roofing is a process that involves adding a new layer of shingles on top of your existing roof. It’s a popular choice for homeowners who want to save money and time on a full roof replacement.

Re-roofing can be a good idea if your roof is still in good condition, but is starting to show signs of wear and tear, such as missing or damaged shingles. However, it’s important to note that re-roofing is not always the best solution, and there are some situations where a full roof replacement is necessary.

In the next section, we’ll explore the pros and cons of re-roofing in more detail.

Assessing the Need for Re-Roofing

When it comes to assessing the need for re-roofing, there are a few key factors to consider.

Evaluating Roof Condition

The first step in determining whether re-roofing is necessary is to evaluate the condition of your roof.

Look for signs of age, rot, damage, leaks, water damage, missing shingles, and other issues that may be affecting its integrity. If you notice any of these problems, it may be time to consider re-roofing.

It’s important to keep in mind that even if your roof is relatively new, it may still need repair or replacement.

Regular roof inspections can help identify underlying issues before they become major problems. If you’re unsure about the condition of your roof, consider having a professional inspection done.

Understanding the Impact of Weather

Weather can have a significant impact on the lifespan of your roof.

If you live in an area with harsh winters, for example, you may be more likely to experience issues like ice dams, which can cause water damage and lead to the need for re-roofing.

Mold, mildew, and moss can also be a problem in humid or wet climates. Regular cleaning and maintenance can help prevent these issues from becoming serious, but if you notice significant growth or damage, re-roofing may be necessary.

Sagging is another issue that can be caused by weather or underlying issues with the roof’s structure.

If you notice any sagging or other signs of damage, have a professional inspection done to determine the cause and whether re-roofing is necessary.

Considerations for Re-Roofing

When it comes to re-roofing, there are several factors to consider before making a decision. In this section, we will discuss some of the most important considerations to help you make an informed choice.

Material Selection and Cost

The selection of roofing material is an essential factor to consider when re-roofing.

Options include asphalt shingles, metal, clay tiles, and slate. Each material has its pros and cons, and the cost varies based on the type of material you choose.

Asphalt shingles are the most popular and cost-effective roofing material, while metal roofs are more expensive but more durable and energy-efficient.

Choosing the Right Contractor

Choosing the right roofing contractor is critical to ensuring that the re-roofing process is completed efficiently and effectively.

When selecting a contractor, make sure they are licensed and insured. Check their references and reviews to ensure they have a good reputation in the industry.

A professional roofing contractor like Commercial Roofing NJ will also provide you with a detailed estimate and explain the entire re-roofing process.

Understanding the Re-Roofing Process

The re-roofing process involves stripping the old roof and inspecting the roof deck for damage. Then, a new roofing system is installed.

During the process, the contractor will remove the old shingles, underlayment, and felt paper. They will also inspect the roof deck for any significant damage and make repairs if necessary. After that, they will install the new roofing system, including the underlayment, shingles, and protective layer. The process can take several days, depending on the size of the roof and the weather conditions.

When considering re-roofing, keep in mind that building codes only allow for a total of two layers of roofing. Re-roofing can be a cost-effective solution for minor issues or when the roof is nearing the end of its lifespan. However, if the roof has significant damage, a roof replacement may be a better long-term solution.

Re-roofing can be a good option if your roof is in good shape, and you want to improve its curb appeal and energy efficiency. However, it is essential to consider the pros and cons of re-roofing and work with a licensed, professional roofing contractor to ensure the process is done safely and efficiently.

a-plumber-fixing-sink-pipe

How Long Does It Take to Become a Qualified Plumber in Australia? A Comprehensive GuideHow Long Does It Take to Become a Qualified Plumber in Australia? A Comprehensive Guide

Becoming a qualified plumber in Australia is a rewarding career path that requires a combination of education and on-the-job training.

If you’re interested in pursuing this career, you might be wondering how long it takes to become a qualified plumber. The answer to this question varies depending on the path you choose to take. Let us know it with Dean Owens of Plumbers Warragul.

a plumber fixing sink pipe

To become a qualified plumber in Australia, you’ll need to complete a Certificate III in Plumbing (General Plumber) or a similar course. This typically takes around 4 years to complete, including both classroom instruction and on-the-job training.

However, the exact length of time it takes to become a qualified plumber can vary depending on a number of factors, including your level of experience and the specific requirements of your state or territory.

If you’re already working as a plumber but don’t have a formal qualification, you may be able to complete a Recognition of Prior Learning (RPL) program to become qualified more quickly.

RPL programs assess your existing skills and knowledge to determine whether you meet the requirements for a formal qualification. This can be a faster way to become a qualified plumber if you already have a lot of experience in the industry.

Pathways to Becoming a Plumber in Australia

If you are interested in pursuing a career in plumbing, there are two main pathways to becoming a licensed plumber in Australia like Plumbers Warragul: apprenticeship and certification.

Apprenticeship and Training Requirements

To become a licensed plumber through an apprenticeship, you will typically need to complete a Certificate III in Plumbing. This apprenticeship usually takes 3-4 years of full-time study and work experience.

During this time, you will receive hands-on training in the plumbing industry and gain practical experience working as an apprentice plumber.

In addition to completing the apprenticeship, you will also need to comply with the training and application requirements set by the Victorian Building Authority (VBA).

This includes submitting an application for a plumbing license and passing a certification exam to become a licensed plumber.

Certification and Licensing

If you already have experience in the plumbing industry, you may be able to become a licensed plumber through certification and licensing.

This process involves meeting the certification and licensing requirements set by the VBA, which includes completing a Certificate III in Plumbing or a similar qualification, gaining practical experience, and passing a certification exam.

Becoming a licensed plumber can provide job security, career advancement, and job satisfaction. It also ensures that you are complying with plumbing regulations and safety standards, which is essential for protecting the infrastructure and safety of the community.

Specialisations and Advancements in Plumbing

Diverse Fields within Plumbing

Plumbing is a diverse field with many specialisations. Some of the areas of specialisation in plumbing include drainage, mechanical service, gas fitting, sanitary, roofing, fire protection, water supply, irrigation, and plumbing systems. Each specialisation requires a different set of skills and knowledge.

For example, drainage plumbers install and repair drainage systems, while gas fitters install and repair gas systems. Meanwhile, roofing plumbers install and repair roofs and gutters. It is important to choose a specialisation that suits your interests and skills.

Continuing Education and Career Development

Continuing education and career development are essential for advancement in the plumbing industry.

To become a master plumber, you need to complete a specialised class and pass a state examination. This will enable you to take on more complex and challenging plumbing work.

In addition, you can take courses to learn new skills and stay up-to-date with the latest plumbing technologies and techniques.

Effective communication is also important in plumbing, as you need to communicate with clients, contractors, and other professionals.

As you gain more experience and expertise, you can advance to higher positions such as foreman or project manager.

You can also start your own plumbing business and become a contractor. This requires knowledge of small business management, insurance, and other aspects of running a business.

Job opportunities in plumbing are generally stable, as plumbing is an essential service.

Plumbers are in high demand, and there is a shortage of skilled plumbers in many areas. Job stability and good salary are some of the advantages of a career in plumbing.

To become a qualified plumber in Australia, you need to complete a CPC40920 Certificate IV in Plumbing and Services after finishing a 4-year apprenticeship under the supervision of a licensed plumber.

This will enable you to take on the full scope of plumbing work and advance in your career.

A house with a fully functional plumbing system, including pipes, faucets, and a water heater, all in perfect working order

What is a Home Run Plumbing System? An Overview of this Innovative Plumbing DesignWhat is a Home Run Plumbing System? An Overview of this Innovative Plumbing Design

If you’re planning on building a new home or renovating your existing one, you may have heard the term “home run plumbing system” being thrown around. But what exactly is a home run plumbing system, and how does it differ from traditional plumbing systems? Let us know it with Dean Owens of Plumber Warragul.

A house with a fully functional plumbing system, including pipes, faucets, and a water heater, all in perfect working order

In a traditional plumbing system, water is distributed throughout the house via large-diameter trunk lines that branch off into smaller lines to supply each fixture.

This can result in wasted water and longer wait times for hot water to reach certain fixtures. On the other hand, a home run plumbing system is designed to be more efficient and cost-effective by using a dedicated line for each fixture directly from a central manifold.

This means that hot water is delivered to each fixture faster, resulting in less wasted water and energy.

The benefits of a home run plumbing system don’t stop there. Because each fixture has its own dedicated line, it’s easier to locate and fix any leaks or issues that may arise.

Additionally, a home run plumbing system can be more flexible and adaptable to changes in your home’s layout or plumbing needs. Overall, a home run plumbing system can provide a more efficient and reliable plumbing solution for your home.

Components and Installation of Home-Run Plumbing Systems

Understanding PEX Plumbing

PEX, or cross-linked polyethylene, is a popular material used in home-run plumbing systems. It is known for its flexibility, durability, and resistance to corrosion.

PEX tubing comes in different sizes, and fittings are used to connect them. These fittings can be made of copper, brass, or plastic.

The Manifold: Heart of the Home-Run System

The manifold is the central hub of a home-run plumbing system. It is where all the water lines start and end.

The manifold distributes water to each fixture in the house, such as faucets, toilets, and showers. The manifold can be made of copper, brass, or plastic, and it has shutoff valves to control the flow of water to each fixture.

Installation Process and Techniques

The installation process for a home-run plumbing system involves running a separate water line from the manifold to each fixture in the house.

The water lines are typically made of PEX tubing, which is flexible and easy to work with. The tubing is connected to the manifold using fittings, which can be crimped or secured with cinch clamps.

When installing a home-run plumbing system, it is important to consider the plumbing layout and water pressure.

The layout should be designed to minimize the amount of tubing needed and reduce the risk of kinks or other damage. The water pressure should be regulated to ensure that each fixture receives an adequate amount of water.

Soldering and copper pipes are not typically used in home-run plumbing systems, as they are more time-consuming and difficult to work with than PEX tubing and fittings.

Crimp rings and cinch clamps are the most common methods of securing PEX tubing to fittings.

For installation works, you can go to Plumber Warragul.

Advantages and Considerations

Efficiency and Water Delivery

A home run plumbing system offers several advantages when it comes to efficiency and water delivery. Compared to traditional trunk and branch systems, home run systems use smaller lines that reduce friction and pressure drop.

This results in faster and more efficient hot-water delivery to your faucets, shower, and bathtub. Moreover, with a home-run manifold system, you can enjoy leak-free and consistent water supply to each fixture in your home.

Maintenance and Longevity

When it comes to maintenance and longevity, home run plumbing systems are easier to maintain than trunk and branch systems.

With a home-run manifold system, you can easily isolate and shut off water supply to specific fixtures without affecting the rest of your home’s plumbing. This makes it easier to repair or replace fixtures, such as your toilet, shower, or kitchen sink, without disrupting your daily routine.

Additionally, home run systems are designed to last longer than traditional trunk and branch systems, which tend to have more joints and fittings that are prone to leaks and corrosion.

Cost and Resource Management

Home run plumbing systems can be more expensive to install than traditional trunk and branch systems. However, the long-term benefits of a home run system can offset the price difference. For example, a home run system can lead to lower maintenance costs and increased longevity.

Additionally, home run systems are more resource-efficient than trunk and branch systems. They use less water and energy to deliver hot water to your fixtures.

You can further increase the efficiency of your home run system by installing water recirculation or radiant heating systems. These systems reduce the amount of water wasted while waiting for hot water to arrive at your faucet or shower.

metal-pipes-underground

What Are Plumbing Fixtures Called? A Comprehensive Guide to Common Plumbing TerminologyWhat Are Plumbing Fixtures Called? A Comprehensive Guide to Common Plumbing Terminology

Plumbing fixtures are an essential part of any building’s plumbing system. They are the devices that interact with the water system, providing clean water, disposing of waste, and ensuring proper sanitation.

Plumbing fixtures come in many different shapes and sizes, and they serve various functions.

metal pipes underground

The term “plumbing fixtures” refers to any device or appliance connected to a plumbing system that is designed for a specific function or use, such as a sink, toilet, bathtub, shower, or faucet. These fixtures play a crucial role in providing clean water and proper waste management, ensuring the health and safety of occupants.

Dean Owens of Plumbers Warragul hhighlights that “When constructing or renovating a house, understanding the different types of plumbing fixtures is essential. The choice of fixtures can impact the functionality, aesthetics, and even the resale value of a property.”

In this article, we will explore the different types of plumbing fixtures and their uses. We will also discuss the importance of selecting the right fixtures for your needs, including considerations such as water conservation, functionality, comfort, and aesthetics.

Whether you are a homeowner, a builder, or a plumber, this article will provide you with the knowledge you need to make informed decisions about plumbing fixtures.

Types and Functions of Plumbing Fixtures

Plumbing fixtures are an essential part of any residential or commercial plumbing system. They serve various functions such as providing clean water, disposing of waste, and ensuring proper sanitation.

In this section, we will discuss the different types of plumbing fixtures and their functions.

Common Fixtures in Residential Properties

Toilets

Toilets are one of the most important plumbing fixtures in any residential property. They are designed to dispose of human waste and ensure proper sanitation.

There are two types of toilets: gravity-fed and pressure-assisted. Gravity-fed toilets use the force of gravity to flush waste, while pressure-assisted toilets use compressed air to create a more powerful flush.

Sinks

Sinks are another common fixture in residential properties. They are used for washing hands, dishes, and other items.

Sinks come in various sizes and shapes, and they can be made from different materials such as stainless steel, porcelain, and granite.

Bathtubs

Bathtubs are a popular fixture in bathrooms. They are designed for taking baths and relaxing after a long day.

Bathtubs come in various sizes and shapes, and they can be made from different materials such as acrylic, fiberglass, and cast iron.

Showers

Showers are a common fixture in bathrooms. They are designed for taking quick showers and are more water-efficient than bathtubs.

Showers come in various types, such as walk-in showers, showerheads, and outdoor showers.

Specialised Fixtures for Enhanced Comfort

Bidets

Bidets are a specialised fixture that is designed for personal hygiene. They are commonly found in bathrooms and are used for cleaning the genital and anal areas after using the toilet.

Bidets come in various types, such as standalone, wall-mounted, and handheld.

Faucets

Faucets are used to control the flow of water in sinks, bathtubs, and bidets.

Faucets come in various designs and finishes, from vintage brass to sleek chrome, fitting a wide range of interior themes.

Water Heaters

Water heaters are a specialised fixture that is designed for heating water for domestic use.

They come in various types, such as tankless, electric, and gas. Water heaters are essential for ensuring hot water is available for showers, washing dishes, and other household activities.

Garbage Disposals

Garbage disposals are a specialised fixture that is designed for grinding food waste into small particles that can be easily disposed of down the drain.

They are commonly found in kitchens and are essential for ensuring efficient waste disposal.

Installation, Maintenance, and Upkeep

Professional Installation and DIY Considerations

When it comes to installing plumbing fixtures, you have two options: hiring a professional plumber or doing it yourself.

While a DIY installation may save you money, it’s important to consider your skill level and the complexity of the installation.

Some fixtures, such as toilets and showers, may require professional installation to ensure proper function and avoid costly mistakes. For professional work, go to Plumbers Warragul.

If you do decide to tackle the installation yourself, be sure to carefully read the manufacturer’s instructions and follow them step-by-step.

You should also have all the necessary tools and materials on hand before beginning the installation.

If you encounter any issues or are unsure of what to do, it’s always better to stop and seek professional help rather than risking damage to your plumbing system.

Routine Maintenance and Troubleshooting

Regular maintenance of your plumbing fixtures is essential to keep them functioning properly and avoid costly repairs. Here are some maintenance tips to keep in mind:

  • Check for leaks: Regularly inspect your fixtures for any signs of leaks, such as water stains or puddles. Fixing leaks promptly can help prevent water damage and save you money on your water bill.
  • Keep drains clear: Clogged drains can cause water to back up and damage your fixtures. Use a drain strainer to catch hair and other debris, and avoid pouring grease or oil down the drain.
  • Test water pressure: Low water pressure can indicate a problem with your fixtures or plumbing system. Check the pressure regularly and consult a plumber if you notice any issues.
  • Clean fixtures regularly: Regular cleaning can help prevent buildup of mineral deposits and other debris that can affect the function and aesthetic appeal of your fixtures.

If you do encounter any minor issues with your fixtures, such as a clogged drain or a running toilet, there are some troubleshooting steps you can take before calling a plumber.

For example, you can try using a plunger or drain snake to clear a clogged drain. Or, you can adjust the float valve in your toilet tank to stop a running toilet.

leaking-kitchen-sink-pipe

How Much Does It Cost to Fix a Leaking Pipe Under a Sink? A Comprehensive GuideHow Much Does It Cost to Fix a Leaking Pipe Under a Sink? A Comprehensive Guide

If you have a leaking pipe under your kitchen sink, you may be wondering how much it will cost to fix. The cost of repairing a leaking pipe can vary depending on the severity of the leak and the required repairs.

In this article, we will break down the factors that can affect the cost of fixing a leaking pipe under your sink.

leaking kitchen sink pipe

One of the factors that can affect the cost of fixing a leaking pipe is the location of the leak. If the leak is in a hard-to-reach area, such as behind a wall or under the floor, the repair may be more complex and time-consuming, which can increase the cost.

Additionally, the severity of the leak can also impact the cost. A minor leak may only require a simple repair, while a major leak may require more extensive repairs or even a replacement of the plumbing system.

If you are not experienced in plumbing repairs, it is recommended that you hire a licensed plumber like Plumbers Warragul to fix the leak. A plumber will have the knowledge and experience to diagnose the problem and provide an accurate estimate of the repair costs.

In the next section, we will discuss the average costs of fixing a leaking pipe under a sink, based on industry data and research.

Identifying the Source of the Leak

Assessing the Damage and Location

The first step in fixing a leaking pipe under your sink is to identify the source of the leak. Start by examining the area under the sink for any signs of moisture or water damage.

Check the walls, floors, and ceilings around the sink for any signs of water damage. If you notice any water stains or wet spots, it’s likely that there is a leak under the sink.

Next, turn off the water supply to the sink and open the faucet to drain any remaining water from the pipes. Use a towel or bucket to catch any water that may still be in the pipes.

Once the pipes are drained, inspect all of the plumbing fixtures under the sink, including the drain pipe, P-trap, washers, gaskets, and O-rings. Look for any signs of corrosion, loose connections, or damage to the fixtures.

Common Causes of Leaks Under the Sink

There are several common causes of leaks under the sink. One of the most common causes is a loose connection between the faucet and the water supply line. If the connection is loose, water can leak out and cause damage to the surrounding area.

Another common cause of leaks under the sink is a damaged P-trap. The P-trap is the curved pipe that connects the sink drain to the main drain line. If the P-trap is damaged or becomes clogged, water can leak out of the sink and cause damage to the surrounding area.

Other common causes of leaks under the sink include damaged washers, gaskets, and O-rings, as well as corrosion on the plumbing fixtures. If you notice any signs of damage or corrosion, it’s important to replace the damaged parts as soon as possible to prevent further leaks and water damage.

In some cases, the source of the leak may be more difficult to diagnose. If you’re unable to locate the source of the leak, it may be necessary to call a professional plumber to diagnose and repair the problem.

Repair and Replacement Options

When to Call a Plumber

If you have a leaking pipe under your sink, you may be tempted to try to fix it yourself. However, it is important to know when to call a plumber.

If you are not experienced with plumbing jobs, it is best to call a plumber like Plumbers Warragul to avoid making the problem worse. Additionally, if the leak is severe or if you do not have the necessary tools, it is best to call an experienced plumber.

In an emergency plumbing service, a plumber will be able to assess the situation and determine the best course of action. They will have the necessary experience, equipment, and materials to fix the leak or replace the pipe if necessary.

Cost Factors for Fixing Leaks

The cost of fixing a leaking pipe under a sink can vary depending on a number of factors.

Some of the factors that can affect the cost include the severity of the leak, the age of the plumbing system, and the type of pipe that needs to be replaced.

If the leak is severe, it may require an emergency plumber, which can increase the cost. Additionally, a corroded or broken shut-off valve may need to be replaced, which can also increase the cost.

The cost of a plumber can also vary depending on the plumber’s experience. An experienced plumber may charge more than a less experienced plumber. Some plumbers may also charge a call-out fee, which can also increase the cost.

When it comes to pipe replacement, the cost can vary depending on the type of pipe that needs to be replaced.

For example, copper pipes can be more expensive than PVC pipes. The cost of materials and equipment can also affect the overall cost of the repair or replacement.

Consistency in One’s Financial Situation is One of the Many Aspects that Must be Present in Order to Maintain a Healthy Work-life Balance.Consistency in One’s Financial Situation is One of the Many Aspects that Must be Present in Order to Maintain a Healthy Work-life Balance.

In the bustling metropolis of London, there are a large number of women who are attempting to navigate the intricate web of career aspirations, personal development, and meaningful relationships among themselves. They are fully conscious of the fact that having a stable financial situation is an essential component in achieving overall well-being, and they are making a significant amount of effort in order to strike a delicate but necessary balance between their home life and their professional life according to charlotteaction.org.

As a result of the women who came forward to share their experiences, it became clear that achieving financial freedom required a great deal more than merely establishing economic independence. This helps them develop a sense of independence and self-assurance that permeates all part of their lives, which fosters the growth of their sense of self-confidence according to charlotte action website. It is possible that they will take advantage of this situation. These women feel more emboldened to pursue both their professional and romantic goals without making any concessions because they are able to make judgments based on their own personal preferences rather than being bound by financial considerations. This allows them to pursue both of their goals without making any compromises. This is due to the fact that kids are able to make choices based on their own individual tastes.

As an example, take into consideration the circumstance of Sarah, a well-known marketing specialist who resides in London. She continued by explaining that the fact that she was able to attain financial security gave her the self-assurance to take risks in her professional life, which eventually led to a higher level of professional satisfaction. She went on to say that this was the reason why she was able to achieve financial security. Having this equilibrium, which enabled her to link her personal life with her professional life, enabled her to make a contribution to her place of employment without compromising her personal life. This allowed her to combine her personal life with her professional life. Due to the fact that she did not have to be concerned about the strain that her financial situation caused, she was able to pursue meaningful relationships and periods of relaxation without having to worry about it.

In addition, those who are working toward the goal of achieving financial independence in order to cultivate their own sense of empowerment can gain a great deal from the guidance that these insights provide. It is possible that the experiences that London women have shared with one another can create chances for other women who are striving to grow confidence and freedom in their own professional and romantic decisions. The narratives may provide these folks with both inspiration and understanding that can be put into practice.

A modern house with a sleek, flat roof made of eco-friendly and durable metal panels, reflecting the latest trend in roofing materials

What is the Trending Roofing Material? A Comprehensive Guide to the Latest Roofing OptionsWhat is the Trending Roofing Material? A Comprehensive Guide to the Latest Roofing Options

If you’re in the market for a new roof, you may be wondering what the trending roofing materials are. With so many options available, it can be difficult to know which one to choose.

A modern house with a sleek, flat roof made of eco-friendly and durable metal panels, reflecting the latest trend in roofing materials

David Spade of Star Roofing- Roofing West Palm Beach highlights that “One of the biggest trends in roofing materials right now is sustainability. Homeowners are increasingly looking for roofing options that are environmentally friendly and reduce their carbon footprint.”

Metal roofing, particularly Colorbond steel, is a popular choice for those looking to go green. Not only is it durable and long-lasting, but it is also made from recycled materials and is fully recyclable at the end of its life.

Another trend in roofing materials is using more than one material for the roof. Combining different materials can create a unique aesthetic appeal and can also provide functional benefits.

For example, using both asphalt shingles and metal roofing can provide a contrast of color and also take advantage of the durability of metal.

When choosing roofing materials, it’s important to consider both the cost and the investment value, as well as the style and colors that will best complement your home.

Materials and Durability

When it comes to roofing materials, durability is a key factor to consider. You want to invest in a material that will stand the test of time and require minimal maintenance.

Here are some of the most durable roofing materials available in the market today:

Metal Roofing Advantages

Metal roofing is a popular choice for homeowners due to its longevity and low maintenance requirements. It is available in a variety of materials, including aluminum, steel, copper, and zinc.

Metal roofs are known for their durability, with a lifespan of up to 75 years. They are also eco-friendly and energy-efficient, as they can be fitted with solar panels to reduce energy costs.

Slate and Clay Tiles

Slate and clay tiles are among the most durable roofing materials available. They are known for their longevity, with a lifespan of up to 100 years.

Slate and clay tiles are also fire-resistant and require minimal maintenance. They are ideal for homeowners who want a classic, elegant look for their home.

Innovative Solar Roofing

Solar roofing is a new and innovative way to make your home more energy-efficient. It involves installing solar roof tiles that generate electricity from the sun.

Solar roofing is not only eco-friendly, but it can also save you money on energy costs in the long run. The lifespan of solar roofing is similar to that of traditional roofing materials, making it a durable and long-lasting option.

Installation and Maintenance

Evaluating Roofing Options

When it comes to selecting a roofing material, there are several factors to consider. You want a material that is durable, cost-effective, and easy to install.

Additionally, you want a material that provides adequate protection from the elements and helps insulate your home.

Before making a decision, evaluate your options and compare their pros and cons. Consider factors such as the material’s lifespan, resistance to weather damage, and affordability.

You may also want to consult with a roofing contractor like Roofing West Palm Beach to get their professional opinion and ensure that your selection is suitable for your budget and needs.

The Impact of Climate on Materials

The climate in your area can have a significant impact on the performance of your roofing material.

If you live in an area with extreme weather conditions, such as heavy rain, hailstorms, or high winds, you need a material that can withstand these conditions.

For instance, metal roofing is a popular choice for areas prone to high winds and hailstorms, while asphalt shingles are more suitable for areas with moderate weather conditions.

Long-Term Roofing Maintenance

Proper maintenance is crucial for the longevity of your roof. Regular inspections and repairs can help prevent damage and prolong the life of your roofing material.

Additionally, you may want to consider investing in roof replacement or repair insurance to protect your investment. This type of insurance can help cover the cost of repairs or replacement in case of damage or natural disasters.

Overall, selecting the right roofing material and maintaining it properly can save you money in the long run.

Consult with a professional roofing contractor to ensure that your roofing material is installed correctly and maintained properly.

A gabled roof with two sloping sides and a peak in the middle, commonly seen in residential homes

What is the Best Type of Roof Style? A Comprehensive GuideWhat is the Best Type of Roof Style? A Comprehensive Guide

David Spade of Star Roofing West Palm Beach highlights “When it comes to building or renovating your home, choosing the right roof style is an important decision. The roof not only protects your home from the elements but also adds to its overall design and architecture.”

With so many roof styles available, it can be overwhelming to determine which one is the best fit for your home. In this article, we will explore some of the most popular roof styles and their pros and cons, helping you make an informed decision.

A gabled roof with two sloping sides and a peak in the middle, commonly seen in residential homes

One of the most important factors to consider when choosing a roof style is the climate in which you live. A roof that works well in one area may not be suitable for another.

For example, a flat roof may be a good choice in a dry climate with little rainfall, but it may not be ideal in an area with heavy snow or rain.

Additionally, the roof style you choose can affect the energy efficiency of your home, as some styles may allow for better ventilation or insulation than others.

Another consideration when choosing a roof style is the overall design and architecture of your home. The roof can significantly impact the curb appeal and aesthetic of your home.

A roof that complements the design of your home can enhance its overall beauty and value. On the other hand, a roof that clashes with the design of your home can detract from its appearance.

So, it’s essential to choose a roof style that not only functions well but also looks great.

Evaluating Roof Styles for Your Home

When it comes to choosing the best roof style for your home, there are several factors to consider. In this section, Star Roofing West Palm Beach will discuss the most important considerations, popular roof styles and their characteristics, as well as materials and construction.

Considerations for Choosing a Roof Style

Before selecting a roof style, you should take into account the following factors:

  • Climate: The weather conditions in your area will play a significant role in choosing the right roof style. For example, areas with heavy snowfall may require a steeper pitch to prevent snow buildup.
  • Home Design: The style and architecture of your home will influence the roof style you choose. For instance, a Victorian-style home may require a more ornate roof design.
  • Cost: The cost of the roof will depend on the materials and complexity of the design. Some roof styles, such as flat roofs, are more cost-effective than others.
  • Maintenance: Some roof styles require more maintenance than others. For example, a flat roof may require more upkeep than a gable roof.
  • Durability: The lifespan of a roof will depend on the materials used and the quality of the construction. Some materials, such as slate, can last up to 100 years.
  • Energy Efficiency: Certain roof styles and materials can help reduce energy costs by providing better insulation and ventilation.

Popular Roof Styles and Their Characteristics

Here are some of the most popular roof styles and their unique characteristics:

  • Gable Roof: This is a simple, triangular roof design that is easy to construct and provides good ventilation. It is also known as a pitched or peaked roof.
  • Hip Roof: This roof style has four sloping sides that meet at a ridge. It is more stable than a gable roof and can provide better protection against high winds.
  • Flat Roof: This is a horizontal roof design that is often used for commercial buildings. It is easy to install and provides additional outdoor living space.
  • Mansard Roof: This is a French-inspired roof style that has a flat top with two sloping sides. It provides additional living space and is often used in urban areas.
  • Gambrel Roof: This is a two-sided roof design that has two slopes on each side. It is often used on barns and provides additional storage space.
  • Shed Roof: This is a simple, one-sided roof design that is often used for small structures such as sheds and workshops.
  • Butterfly Roof: This is a unique roof design that has two wings that slope upward, resembling a butterfly’s wings. It provides additional natural light and is often used in modern architecture.
  • Bonnet Roof: This is a double-sloped roof design that has a small slope over a larger one. It provides additional protection against the elements and is often used in tropical areas.
  • Skillion Roof: This is a single-sloped roof design that is often used in modern architecture. It provides a sleek, minimalist look.
  • Jerkinhead Roof: This is a hybrid roof design that combines elements of a gable and hip roof. It provides additional stability and protection against high winds.
  • Combination Roof: This is a roof design that combines two or more styles for a unique look.

Materials and Construction

The materials and construction of your roof will also play a significant role in its durability and longevity. Some of the most popular roofing materials include:

  • Asphalt Shingles: This is the most common roofing material in the United States due to its affordability and ease of installation.
  • Metal Roofing: This is a durable and long-lasting roofing material that is often used in areas with high winds and heavy precipitation.
  • Clay Tiles: This is a popular roofing material in areas with warm climates due to its ability to reflect heat and provide insulation.
  • Wood Shingles: This is a traditional roofing material that provides a natural, rustic look. It requires more maintenance than other materials.
  • Slate Roofing: This is a high-end roofing material that is known for its durability and longevity. It can last up to 100 years with proper maintenance.
  • Cedar Shakes: This is a natural roofing material that provides a unique, rustic look. It requires more maintenance than other materials.
  • Concrete Roofing: This is a durable and long-lasting roofing material that is often used in commercial buildings.
  • Green Roofing: This is a roofing system that incorporates vegetation and soil to provide insulation and reduce energy costs.
  • Solar Roofing: This is a roofing system that incorporates solar panels to generate electricity and reduce energy costs.

Design Considerations and Aesthetic Appeal

When choosing the best type of roof style for your home, you should consider both the design and aesthetic appeal.

The roof design should match the architectural style of your home, while the aesthetic appeal should enhance the curb appeal of your property.

Architectural Harmony and Curb Appeal

The roof shape and design should complement the architectural style of your home. For instance, a Dutch Colonial home would look great with a gambrel roof, while a farmhouse would be best suited with a gable roof.

A gazebo, on the other hand, would look best with a hip roof.

The roof design can also enhance the curb appeal of your home. A well-designed roof can make your home stand out in the neighbourhood.

You can achieve this by using dormer windows, which add character and depth to the roof. Clerestory windows are also a great option that can add natural light to your home while improving the aesthetic appeal of your roof.

Functional Enhancements and Additions

Your roof design should also have functional benefits.

For instance, a mansard roof provides extra living space in the attic or loft.

Meanwhile, a shed roof is perfect for incorporating solar panels. A flat roof, on the other hand, can be used as a rooftop garden or patio.

Dormers are also a great addition to any roof design.

They not only add architectural interest, but also provide extra headroom and natural light to the attic or loft. You can use dormers to create a cozy reading nook or a home office.

a-roof-newly-replaced

Is Replacing a Roof a Good Investment? Pros and Cons to ConsiderIs Replacing a Roof a Good Investment? Pros and Cons to Consider

Replacing a roof can be a significant investment for any homeowner. However, it is also a necessary expense that can greatly impact the value and overall condition of your home.

The question is, is replacing a roof a good investment? Let us know it with David Spade of Star Roofing –Roofing West Palm Beach.

a roof newly replaced

The answer depends on several factors. These include the age and condition of your current roof, the materials you choose for the replacement, and the potential return on investment.

According to various studies and real estate experts, replacing a roof can have a positive impact on your home’s value and marketability.

A new roof can improve your home’s curb appeal and give potential buyers peace of mind knowing that they won’t have to worry about costly roof repairs in the near future.

Additionally, a new roof can also improve your home’s energy efficiency. This can lead to lower utility bills and further increase its value.

However, it’s important to keep in mind that the return on investment can vary depending on the materials you choose and the local real estate market.

The Value of Roof Replacement

Replacing your roof can be a significant investment, but it can also provide a number of benefits that make it a worthwhile expense. Here are a few reasons why replacing your roof can be a good investment:

Understanding ROI and Resale Value

One of the primary benefits of replacing your roof is the potential return on investment (ROI) and resale value it can provide.

According to Remodeling’s 2019 Cost vs. Value Report, the average cost of replacing an asphalt shingle roof of midrange quality is $22,636.

The same report found that a new roof can increase a home’s resale value by an average of $15,247, which represents a 68.2% ROI.

Enhancing Curb Appeal and Attracting Buyers

In addition to the financial benefits, replacing your roof can also enhance the curb appeal of your home and make it more attractive to potential buyers.

A new roof can give your home a fresh, updated look that can help it stand out in a crowded real estate market. This can be especially important if you’re planning to sell your home in the near future.

Material Choices and Their Impact on Investment

When it comes to roofing materials, there are a variety of options available, each with their own pros and cons.

Asphalt shingles are a popular choice due to their affordability and ease of installation, but they may not last as long as other materials.

Metal roofs, on the other hand, can be more expensive upfront but can last significantly longer and provide better energy efficiency.

Ultimately, the choice of roofing material will depend on a variety of factors, including your budget, the climate in your area, and your personal preferences.

It’s important to consider all of these factors carefully when making your decision to ensure that you get the most value for your investment.

Long-Term Benefits of a New Roof

Replacing your roof is a significant investment, but it can provide numerous long-term benefits that make it worth the cost. Here are some of the benefits you can expect to enjoy with a new roof.

Energy Efficiency and Cost Savings

A new roof can significantly improve your home’s energy efficiency and help you save money on your energy bills.

A well-insulated and ventilated roof can keep your home cooler in the summer and warmer in the winter, reducing the load on your HVAC system.

Additionally, if you choose a cool roof or install solar panels, you can further reduce your energy consumption and costs.

Safety, Protection, and Peace of Mind

Your roof is your home’s first line of defense against the elements, and a new roof can provide better protection against weather-related damage, leaks, and other issues.

A new roof can also improve your home’s safety by ensuring that it can withstand high winds, heavy snow, and other severe weather conditions.

Knowing that your home is protected can give you peace of mind and reduce your stress levels.

Maintenance and Durability Considerations

A new roof requires less maintenance than an older roof. It can last for decades with proper care. Investing in a high-quality roof with durable materials can save you money in the long run. This is because it reduces the need for repairs and replacements.

Additionally, a new roof can increase your home’s resale value. This makes it a smart investment if you plan to sell your home in the future.

When considering a new roof, make sure to choose a reputable contractor like Roofing West Palm Beach. They should use high-quality materials and offer a warranty on their work. You should also consider factors such as the type of insulation and ventilation used. Additionally, consider any additional features like cool roofs or solar panels. These can further improve your home’s energy efficiency and performance.

fixed-water-pipes-underground

How to Fix a Leaking Water Pipe Underground: A Step-by-Step GuideHow to Fix a Leaking Water Pipe Underground: A Step-by-Step Guide

If you’re a homeowner, there’s a good chance that you’ll experience a leaking water pipe at some point. While it’s never a pleasant experience, it’s important to take action quickly to prevent further damage.

If the leak is underground, it can be even more challenging to detect and repair. In this guide, we’ll provide you with some tips on how to fix a leaking water pipe underground.

fixed water pipes underground

First, it’s important to identify the location of the leak. Look for signs of wet spots or puddles in your yard or driveway, as this can indicate the general area of the leak.

You can also check your water meter to see if it’s still running even when all the taps in your home are turned off. If the meter is still running, this could be a sign of a leak.

Once you’ve identified the location of the leak, it’s time to dig down to the pipe. This can be a challenging and time-consuming process, so be prepared to put in some effort.

Use a shovel to carefully dig around the area where you suspect the leak is located. Be careful not to damage the pipe further as you dig. But if you are not confident doing this kind of work, just call Leak Detection Warragul.

Once you’ve exposed the pipe, you can begin to assess the damage and determine the best course of action.

Identifying and Locating the Leak

Initial Inspection and Safety Precautions

If you suspect a leaking water pipe underground, the first step is to perform an initial inspection of your property. Look for wet spots, damp spots, and mildew growth on your walls, ceilings, and floors.

Check your water bill for any unexpected increase in usage that may indicate a leak.

Next, locate your water meter and check the spinning indicator. If it’s moving when no water is being used, this may be a sign of a leak.

Check for any recessed or swelling ground around the area where the water main enters your property. This could also indicate an underground water leak.

Before attempting to locate and fix the leak, it’s important to take safety precautions. Turn off your water supply at the shutoff valve to prevent any further damage to your property.

If you’re unsure about how to do this, contact a licensed plumber to assist you.

Understanding Ownership and Responsibility

When it comes to fixing a leaking water pipe underground, it’s important to understand ownership and responsibility.

The water main that supplies water to your property is typically owned and maintained by your local water authority. However, the pipes that run from the water main to your property are usually the responsibility of the property owner.

If you suspect a leaking water pipe underground, it’s important to determine who is responsible for fixing it. Contact your local water authority to confirm ownership and responsibility.

If the leaking pipe is on your property, you will need to hire a licensed plumber like Leak Detection Warragul to locate and fix the leak.

Repairing the Leaking Underground Pipe

When you have a leaking underground water pipe, it’s important to take immediate action to prevent further water damage, mold growth, and higher water bills.

While you can hire a professional plumber to fix the leak, you can also do it yourself with the right tools and materials. Here’s what you need to know to repair the leaking underground pipe:

Preparing for the Repair

Before you start digging, you need to locate the leak by following the sightline from the water meter to your home. Look for wet spots or low water pressure in your faucets to identify the damaged area.

Once you’ve located the leak, you need to obtain any necessary zoning or permits to perform the excavation and repair.

To prepare for the repair, you will need the following tools and materials:

  • Shovel or spade
  • Tarp
  • Sandpaper
  • Hacksaw
  • Copper, PVC, or PEX pipe (matching the diameter of the damaged pipe)
  • Fittings and connectors
  • Pipe cutter or similar tool
  • Water pressure gauge

Executing the Repair

To execute the repair, you will need to dig a trench around the damaged pipe, taking care to avoid any potable water lines or easements.

Once you have exposed the damaged pipe, you can cut out the leaking section using a pipe cutter or similar tool.

Be sure to cut the replacement pipe to match the length of the damaged section, and use fittings and connectors to attach it to the existing plumbing system.

After you have completed the repair, test it by running water through the pipes and checking the water pressure gauge for any abnormalities.

Sand the edges of the new pipe and fittings to ensure a tight seal, and cover the trench with soil and landscaping materials.

Post-Repair Considerations

It’s important to monitor the repaired area for any signs of water damage or mold growth.

If you notice any issues, contact a professional plumber to inspect the repair and ensure that it was done correctly.

Additionally, be aware of any tree roots or other potential causes of future leaks.

Take precautions to prevent structural damage to your yard, driveways, or patios.

What is the Difference Between Pipeline and Pipework?What is the Difference Between Pipeline and Pipework?

When it comes to the transportation of liquids or gases, two terms that are often used interchangeably are pipeline and pipework. However, there is a distinct difference between the two.

Pipework refers to the network of pipes within a specified boundary or space that transfer fluids from one piece of equipment to another. On the other hand, pipelines are long chains of pipes, usually of large diameters.

Pipelines can run underground, above ground, and underwater, sometimes spanning across villages or countries just like what Gas Plumber Warragul offers.

A network of pipes, valves, and fittings runs along the industrial facility, carrying various liquids and gases. The pipework extends throughout the building, connecting different machines and systems

One of the main differences between pipeline and pipework is their size. Pipelines are mostly large diameters that transport bulk liquid or gas from one place to another, sometimes spanning thousands of miles in distance.

Pipework, on the other hand, can range from ½” to 80″ as per the plant design requirements that transfer fluid from one piece of equipment to another.

Another difference is in their geographical scope. Pipelines are often demarcated by a boundary or fence, with the outside scope falling under the pipeline category and the inside boundary under the pipework category.

Fundamentals of Pipeline and Pipework

Definition and Purpose

Pipelines and pipework are both used to transport fluids, such as liquids and gases, from one place to another. However, there are some fundamental differences between the two.

Pipelines are typically used to transport large quantities of fluids over long distances, while pipework is used to transport fluids within a facility or plant.

The purpose of pipelines is to transport fluids over long distances, often across multiple states or even countries. Pipelines are used to transport a variety of fluids, including crude oil, natural gas, and water.

Pipework, on the other hand, is used to transport fluids within a facility, such as a chemical plant or refinery.

Components and Materials

Dean Owens of Gas Plumber Warragul highlights that “Both pipelines and pipework are made up of various components, including pipe fittings, valves, pumps, and heat exchangers. However, the materials used to construct pipelines and pipework can differ significantly.”

Pipelines are typically constructed from steel, which is durable and can withstand high pressures and temperatures. On the other hand, pipework can be made from a variety of materials, including steel, copper, and plastic.

Design and Engineering Standards

The design and engineering of pipelines and pipework must adhere to strict standards to ensure safe and efficient operation.

The ASME B31.4 and B31.8 codes are commonly used for pipelines, while the ASME B31.3 code is used for pipework.

The design of pipelines must take into account factors such as pressure, temperature, and fluid properties. Meanwhile, pipework design must consider factors such as flow rate, pressure drop, and fluid properties.

Operational Differences and Applications

Construction and Installation

When it comes to construction and installation, pipelines and pipework have some differences. Pipework refers to a network of pipes within a plant or facility, while pipelines are used for fluid transportation over long distances. Pipeline engineering and piping engineering are both involved in the design and construction of these systems.

The installation process for pipelines and pipework can also differ. Pipelines are often installed underground or underwater, while pipework is typically installed above ground within a facility. Both require careful planning and execution to ensure safe and efficient operation.

Maintenance and Inspection

Maintenance and inspection are critical to the safe and reliable operation of pipelines and pipework.

Pipelines require regular inspections to detect and repair any leaks or damage. In the oil and gas industry, subsea pipelines require specialized equipment and procedures for inspection and maintenance.

Pipework within a facility also requires regular maintenance and inspection to ensure proper operation. This may involve testing valves, pumps, and other equipment to ensure they are functioning correctly. Regular inspections can also help identify potential problems before they become major issues.

Industry-Specific Usage

Pipelines and pipework are used in various industries, including the oil and gas industry, transmission, and distribution of water and gas, and mains for residential and commercial use.

Each industry has specific requirements for the design, construction, and operation of these systems.

In the oil and gas industry, pipelines transport natural gas and oil over long distances. Valve stations and pumps regulate the flow of these fluids through the pipeline. Pipework within a plant transports fluids between different pieces of equipment.

In the transmission and distribution of water and gas, pipelines transport these fluids from one location to another. Mains within residential and commercial areas distribute these fluids to individual buildings.

While pipelines and pipework share some similarities, there are also important differences in their construction, maintenance, and application. Understanding these differences is crucial for ensuring safe and efficient operation in various industries.

A plumber holding a plunger and pointing to a toilet

What Do Plumbers Call a Toilet? The Professional Term ExplainedWhat Do Plumbers Call a Toilet? The Professional Term Explained

If you’re like most people, you probably don’t give much thought to what plumbers call a toilet. However, if you’re renovating your bathroom or dealing with a plumbing issue, it can be helpful to understand the different terms that plumbers use to refer to this essential fixture. See plumber near me.

A plumber holding a plunger and pointing to a toilet

One of the most common terms that plumbers use to refer to a toilet is “water closet.” This term is often abbreviated as “WC” and refers to the enclosed space where the toilet is located.

Another common term is “lavatory,” which is a more formal term that refers to a room containing a sink and toilet.

When it comes to the toilet itself, plumbers may use a variety of terms depending on where they are located and the specific type of toilet.

For example, “pan” is a term that is commonly used in Australia to refer to the bowl-shaped part of the toilet where waste is deposited. Meanwhile, “potty” is a more informal term that is often used to refer to a child’s training toilet.

Understanding Toilet Terminology and Function

Common Names and Nicknames for Toilets

Toilets have many different names and nicknames depending on where you are in the world. In Australia, they are commonly referred to as “toilets” or “lavatories”. Other common names include “WC” (short for water closet), “loo”, “john”, “crapper”, “throne”, “porcelain throne”, and “bathroom”.

Components and Mechanics of Toilet Operation

A typical toilet consists of two main components: the bowl and the tank.

The bowl is the part of the toilet that you sit on and where waste is deposited. The tank, on the other hand, is the part of the toilet that holds water and is used to flush the waste away.

When you flush the toilet, water from the tank rushes into the bowl and pushes the waste through a trapway and out of the toilet.

The mechanics of a toilet’s operation are relatively simple. When you flush the toilet, the water level in the tank drops, causing a water flap to open and allow water to rush into the bowl.

This water flow creates a siphon effect that pulls the waste through the trapway and out of the toilet. Once the water level in the tank drops low enough, a valve opens and allows water to flow back into the tank, refilling it for the next flush.

Materials and Tools for Plumbing

Toilets are typically made from porcelain or ceramic, which are durable and easy to clean.

When it comes to plumbing, there are a few essential tools that every homeowner should have on hand. These include a plunger, which is used to unclog blocked toilets, and a toilet auger or snake, which can be used to remove more stubborn blockages.

In addition to these basic tools, there are a few other materials and tools that may be needed for more complex plumbing jobs.

These include replacement parts for the toilet tank (such as valves and flappers), as well as wrenches, screwdrivers, and other hand tools. If you are unsure about how to perform a plumbing repair on your toilet, it is always best to call in a professional plumber, see plumber near me, who can diagnose and fix the problem for you.

Dealing with Common Toilet Issues

Identifying and Fixing Clogs

A clogged or blocked toilet is one of the most common problems you may face. This can be caused by various things, such as flushing foreign objects, hair, or too much toilet paper.

If you notice that your toilet is not flushing properly or is making gurgling sounds, it may be clogged.

To unclog a toilet, start by using a plunger. Ensure that the plunger covers the drain hole completely, then plunge vigorously.

If the bubbling continues, the vent might be blocked, and you can use a plumbing snake to clear any blockages in the vent.

Preventing and Addressing Toilet Leaks and Overflows

Toilet leaks and overflows can cause water damage and mold, making them a health hazard.

Common causes of leaks and overflows include cracks in the toilet bowl or tank, faulty fittings or valves, and backflow prevention issues.

To prevent leaks and overflows, regularly check the toilet’s fittings and valves for damage or wear and tear.

If you notice any leaks or overflowing water, turn off the water supply immediately to prevent further damage.

If the toilet is overflowing, use a plunger to try and clear the blockage or call a professional plumber for assistance.

When to Engage a Professional Plumber

Some toilet issues can be fixed with DIY methods, but others need a professional plumber. If you are unsure about the cause of the problem or have tried to fix it yourself but it persists, it’s time to call a plumber.

Experienced plumbers can quickly identify the root cause of the problem and provide a lasting solution. They can also advise you on when it’s time to replace your toilet or make upgrades to prevent future issues.

pipes-in-walls

How to Fix a Leaking Pipe Behind a Tiled Wall: A Step-by-Step GuideHow to Fix a Leaking Pipe Behind a Tiled Wall: A Step-by-Step Guide

“If you’re a homeowner, you may have experienced a leaking pipe behind a tiled wall at some point. This can be a frustrating and stressful situation, but it’s important to address the issue as soon as possible to prevent further damage to your home.” said Dean Owens of Plumber Warragul.

pipes in walls

The first step in fixing a leaking pipe behind a tiled wall is to shut off the water supply. This will help prevent any further damage from occurring. You can typically find the water shut-off valve in your home’s basement or utility room.

Once you’ve turned off the water supply, you can begin to assess the situation and determine the best course of action.

Depending on the severity of the leak, you may need to cut through the drywall behind the tile for access, repair the leak, and patch the drywall with waterproof backing. Alternatively, you may be able to access the leak through the ceiling or another wall. Using waterproof epoxy can also be an effective solution for sealing the leak.

In this article, we’ll explore these options in more detail and provide step-by-step instructions for fixing a leaking pipe behind a tiled wall.

Identifying and Assessing the Leak

When you notice a leak behind a tiled wall, it’s crucial to identify and assess the damage before attempting to fix it. This section will guide you through the process of detecting signs of a leak and evaluating the extent of damage.

Detecting Signs of a Leak

The first step in identifying a leak behind a tiled wall is to look for visible signs of damage. Some of the common signs of a water leak include water stains, discoloration, and corrosion.

If you notice any of these signs, it is essential to act quickly to prevent further damage.

Another sign of a water leak is a musty smell, which is often caused by mildew or dampness. If you notice a musty smell in the room, it’s a good indication that there is a water leak somewhere.

Evaluating the Extent of Damage

Once you have detected signs of a leak, it’s time to evaluate the extent of damage. If the leak is severe, you may notice water dripping from the ceiling or walls. In this case, it’s crucial to turn off the main water supply to prevent further damage.

If the leak is minor, you may only notice a small water stain on the ceiling or floor. In this case, it’s still essential to act quickly to prevent mold growth and further damage.

To assess the extent of damage, you may need to cut a hole in the drywall to inspect the pipes behind the wall. If you’re not comfortable doing this, it’s best to call a professional plumber to assess the damage.

Repairing the Leak

Preparing the Work Area

Before starting any plumbing repairs, you need to prepare your work area.

First, turn off the water supply to the leaking pipe. You can usually find the water shut-off valve in your home’s basement or utility room. Turning off the water supply will help prevent any further damage from occurring.

Next, protect the surrounding area by placing a plastic sheet or towel on the floor. This will help catch any water that may leak during the repair process.

You should also wear gloves and safety goggles to protect yourself from any sharp tools or debris.

Accessing the Leaking Pipe

Once you have prepared your work area, you need to access the leaking pipe.

If the leak is behind a tiled wall, you may need to remove some tiles to gain access to the pipe. Use a chisel and hammer to carefully remove the tiles around the leak. Be sure to wear safety glasses when doing this to protect your eyes from flying debris.

If you don’t want to remove tiles, you can access the pipe through an access panel in the wall or ceiling. If there is no access panel, you may need to cut a hole in the drywall to access the pipe.

Use a saw to cut a hole in the drywall, making sure to only cut as much as you need to access the pipe.

Fixing or Replacing the Pipe

Once you have accessed the leaking pipe, you need to fix or replace it.

If the leak is caused by a small hole or crack, you can fix it using plumbing tape or a pipe repair clamp. If the pipe is severely damaged, you may need to replace it entirely.

To replace the pipe, use a pipe cutter to cut out the damaged section of pipe. Be sure to cut the pipe as straight as possible to ensure a proper fit for the replacement piece.

Use pliers to remove any remaining pieces of the old pipe.

Next, measure and cut a new piece of pipe to fit the gap. Use plumbing tape or adhesive to attach the replacement piece to the existing pipe.

Finally, use a wrench to tighten the connections and joints.

Restoring the Tiled Wall

Once you have fixed or replaced the leaking pipe, it’s time to restore the tiled wall.

Clean the area around the repaired pipe with a wire brush to remove any debris or grout. Then, apply a thin layer of caulk or adhesive to the back of the replacement tile and press it into place.

Allow the adhesive to dry completely before applying grout to the seams between the tiles. Use a caulk gun to apply a thin layer of caulk around the edges of the tiles to seal them in place.

Testing for Leaks

After restoring the tiled wall, turn on the water supply and test for leaks.

Use a flashlight to inspect the repaired area for any signs of water leaks. If you suspect a hidden plumbing leak, you can use an infrared camera to confirm its presence.

If you don’t know how to fix a leaking pipe behind a tiled wall, it’s best to seek the help of a professional plumber like Plumber Warragul.

They have the tools and supplies needed to fix any pipe leakage and can help you avoid costly mistakes.