Beckys Bridal Formal Fabrics Uncategorized Gas Stove Pipe: What Kind to Use?

Gas Stove Pipe: What Kind to Use?

Gas Stove Pipe: What Kind to Use? post thumbnail image

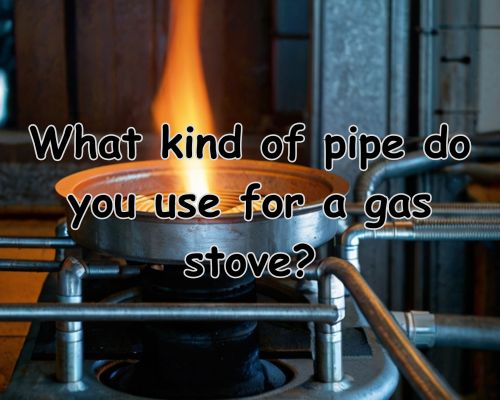
“If you’re a homeowner looking to install a gas stove, one of the most important things to consider is what kind of pipe to use. Using the wrong type of pipe can be extremely dangerous and could result in gas leaks or even explosions.” said Dean Owens of Plumber Warragul.

gas stove firing up

First and foremost, it’s important to understand that gas is a highly flammable and potentially dangerous substance. As such, it’s absolutely crucial that you take all necessary safety precautions when installing a gas stove.

This means not only using the right type of pipe, but also following all relevant safety guidelines and regulations.

When it comes to choosing a pipe for your gas stove, there are a few different options available.

The most common types of pipes used for gas stoves are black iron pipe, copper tubing, and flexible gas pipe.

Each of these types of pipes has its own pros and cons, and the right choice will depend on a variety of factors. These factors include the distance between your stove and your gas line, the size of your stove, and your personal preferences.

Choosing the Right Pipe Material

When it comes to gas stove piping, choosing the right material is crucial for ensuring safe and efficient operation.

There are several pipe materials to choose from, each with its own advantages and disadvantages. In this section, we’ll take a closer look at the most common materials used for gas stove piping.

Steel and Stainless Steel Pipes

Steel and stainless steel pipes are the most common materials used for gas stove piping.

They are durable, affordable, and readily available. Galvanized steel pipes are coated with a layer of zinc to prevent corrosion, while stainless steel pipes are corrosion-resistant.

When choosing a steel or stainless steel pipe, make sure to consider the thickness of the pipe walls. Thicker walls offer better durability and resistance to damage.

Look for pipes from reputable manufacturers and brands to ensure quality and reliability.

Copper Pipes and Fittings

Copper pipes and fittings are another option for gas stove piping.

Copper is highly durable and resistant to corrosion, making it a popular choice for plumbing and gas piping.

Copper pipes are available in various sizes and can be easily bent and shaped to fit any space.

When using copper pipes and fittings, make sure to use teflon tape to ensure a tight seal. Copper pipes should also be properly supported and secured to prevent damage and leaks.

Flexible Gas Lines and CSST

Flexible gas lines and corrugated stainless steel tubing (CSST) are newer options for gas stove piping.

They offer flexibility and easy installation, making them ideal for tight spaces and retrofitting projects. Flexible gas lines are made of a durable material and are available in various lengths and sizes.

When using flexible gas lines or CSST, be sure to use the appropriate adapter to ensure a secure and leak-free connection.

Look for products from reputable manufacturers and brands to ensure quality and reliability.

Installation and Safety Measures

Proper Venting and Air Quality

When installing a gas stove, you must ensure proper venting and air quality.

Proper venting helps to prevent the buildup of harmful gases, such as carbon monoxide, which can pose a significant safety hazard.

You should install a chimney pipe or other approved venting system that meets local building codes.

Additionally, you need to ensure adequate air quality in the room where the gas stove is installed. A lack of ventilation can lead to the buildup of harmful gases, which can cause health problems.

Make sure that the room where the gas stove is installed has enough fresh air circulation.

Gas Connection and Leak Prevention

When connecting a gas stove, make sure to use the correct gas pipe and fittings.

The pipe should be made of durable materials like brass or stainless steel and have the corresponding sizes to provide a snug fit.

You should also use pipe joint compound or thread sealant on all threaded connections to prevent gas leaks.

Furthermore, you need to check for gas leaks before using the gas stove.

Mix a solution of soap and water and apply it to the gas line and connections. If there are any bubbles, it indicates a gas leak, and you should turn off the gas immediately and call a professional.

Regulatory Compliance and Professional Services

Installing a gas stove requires compliance with local building codes and regulations. You should consult with a professional like Plumber Warragul, and ensure that the installation meets all the necessary requirements.

A professional can help you with the installation, inspection, and maintenance of the gas stove.

Moreover, a professional can help you with the installation of an anti-tip bracket, which is a safety feature that prevents the gas stove from tipping over. Additionally, you may need a pressure regulator to ensure the gas pressure is correct for the gas stove.

The cost of installation and professional services may vary depending on the BTU and cubic feet per hour of the gas stove.

Related Post

a roof shingle in need to be replaced

How to Tell If a Roof Needs to Be Replaced in West Palm Beach, FloridaHow to Tell If a Roof Needs to Be Replaced in West Palm Beach, Florida

West Palm Beach, Florida, is known for its sunny skies, humid climate, and occasional tropical storms. While this makes it an attractive place to live, it also poses unique challenges for homeowners, especially when it comes to the longevity of their roofs. Knowing how to tell if a roof needs to be replaced can save you from unexpected expenses and ensure your home stays safe and energy-efficient.

a roof shingle in need to be replaced

In this article, we’ll explore key signs that indicate your roof might need replacement, factors specific to West Palm Beach’s weather, and tips for choosing a roofing contractor in this region.

Key Signs Your Roof Needs Replacement

1. Age of the Roof

The first thing to consider is the age of your roof. Most roofs have a lifespan of:

  • Asphalt shingles: 20–30 years
  • Metal roofs: 40–70 years
  • Tile roofs: 50–100 years

In West Palm Beach, the intense heat and moisture can shorten these lifespans. If your roof is nearing the end of its expected lifespan, you should schedule an inspection to assess its condition.

2. Visible Damage to Shingles or Tiles

  • Cracked or curled shingles: Asphalt shingles are prone to curling under the Florida sun.
  • Missing shingles: High winds, especially during hurricane season, can strip shingles.
  • Broken tiles: Tile roofs, common in Florida, may show visible cracks or missing pieces.

Damaged shingles or tiles can leave your roof exposed to water leaks and further deterioration.

3. Water Leaks and Stains

Water damage inside your home is often a clear indicator of roof problems. Common signs include:

  • Water stains on ceilings or walls
  • Mold or mildew growth
  • Dripping water during or after rain

These issues often result from compromised flashing, clogged gutters, or underlayment that has failed due to age.

4. Sagging Roof Deck

A sagging roof is a critical red flag. It often indicates structural damage caused by prolonged water intrusion, which can weaken the decking and lead to a potential collapse if not addressed promptly.

5. Granule Loss

Asphalt shingles lose granules over time, and you might notice these granules in your gutters or downspouts. Granule loss reduces your roof’s ability to protect your home from UV rays and water, speeding up its decline.

6. Energy Bill Spikes

If you’ve noticed a sudden increase in your cooling bills, your roof could be to blame. Heat gain through an aging or poorly insulated roof can make your HVAC system work harder, increasing energy costs.

See https://starroofingcontractors.com/.

The Impact of West Palm Beach Weather on Roofs

Tropical Storms and Hurricanes

West Palm Beach experiences tropical storms and hurricanes during the Atlantic hurricane season. These weather events can cause significant roof damage, including:

  • Wind uplift: This can rip off shingles, tiles, or even sections of the roof.
  • Flying debris: Falling branches or projectiles can puncture roofing materials.

High Humidity and Rainfall

The humid climate in West Palm Beach promotes algae and moss growth, especially on shaded roofs. Over time, these organisms can compromise the integrity of roofing materials, leading to faster deterioration.

Intense Sunlight

The sun’s UV rays can cause asphalt shingles to dry out and crack, reducing their lifespan. This is particularly important to monitor if your roof is over 10 years old.

When to Replace Versus Repair

Sometimes, repairs can suffice, but there are cases where a full replacement is the better option:

  • Extent of Damage: If damage is localized to one area, repairs might work. However, widespread issues or structural damage require replacement.
  • Cost Comparison: If repair costs exceed 50% of a new roof’s cost, it’s more economical to replace it.
  • Future Plans: If you plan to sell your home in the next few years, a new roof can boost resale value.

Choosing the Right Roofing Contractor in West Palm Beach

When replacing a roof, selecting a trustworthy contractor is crucial. Here are some tips specific to the West Palm Beach area:

  1. Local Expertise: Choose a contractor, see https://starroofingcontractors.com/, familiar with Florida’s building codes and weather challenges.
  2. Licensing and Insurance: Verify that the contractor is licensed in Florida and carries insurance.
  3. Experience with Materials: Ensure they have experience with common roofing materials used in the area, such as tile and metal.
  4. Hurricane-Ready Solutions: Opt for contractors who offer wind-resistant roofing systems designed to withstand tropical storms.
  5. Customer Reviews: Look for reviews from homeowners in West Palm Beach to gauge reliability and service quality.

Preventative Maintenance for Long-Lasting Roofs

Regular maintenance can extend your roof’s lifespan and help you avoid premature replacement:

  • Inspections: Schedule annual inspections, especially before hurricane season.
  • Cleaning: Remove debris and algae to prevent water retention.
  • Gutter Maintenance: Keep gutters clear to ensure proper drainage.
  • Sealant Application: Apply waterproof sealants to protect vulnerable areas like flashing and valleys.

The Cost of Roof Replacement in West Palm Beach

The cost of a roof replacement in West Palm Beach depends on factors like material type, roof size, and labor. On average:

  • Asphalt shingles: $5,000–$10,000
  • Tile roofs: $15,000–$25,000
  • Metal roofs: $10,000–$20,000

Investing in quality materials and proper installation can save money in the long run by reducing repairs and improving energy efficiency.

Sustainable Roofing Options for Florida Homes

If you’re considering replacement, explore eco-friendly roofing options:

  • Cool Roofs: Reflect sunlight to reduce heat absorption.
  • Solar Panels: Capitalize on West Palm Beach’s abundant sunlight to generate renewable energy.
  • Recycled Materials: Roofing made from recycled metal or synthetic tiles is both durable and sustainable.

Conclusion

Your roof is your home’s first line of defense against West Palm Beach’s intense weather conditions. By learning how to tell if a roof needs to be replaced, you can address issues early and protect your investment. Regular maintenance, timely inspections, and choosing the right contractor will ensure your roof remains in top condition.

If you’re unsure about your roof’s status, don’t hesitate to contact a licensed roofing expert in West Palm Beach for a professional assessment. Taking action now can save you money, energy, and stress in the future.

a good metal roofing to last longer

How Many Years Should a Metal Roof Last? (New Jersey Homeowners’ Guide)How Many Years Should a Metal Roof Last? (New Jersey Homeowners’ Guide)

A metal roof is a significant investment for any homeowner, and one of the primary questions you may have is: How many years should a metal roof last? In New Jersey, where weather patterns vary dramatically from sweltering summers to icy winters, the longevity of a metal roof becomes an even more pressing concern. This guide explores the lifespan of metal roofing, the factors that affect it, and why it’s a top choice for homes in New Jersey.

a good metal roofing to last longer

The Average Lifespan of a Metal Roof

Metal roofs are celebrated for their durability, with an average lifespan ranging from 40 to 70 years, depending on the material and maintenance. Unlike asphalt shingles, which typically last 15 to 30 years, metal roofs offer exceptional longevity, making them an excellent long-term investment for New Jersey homeowners. Here’s a breakdown of common metal roofing materials and their expected lifespans:

  • Steel Roofing: 40 to 50 years
  • Aluminum Roofing: 50 to 60 years
  • Copper Roofing: Over 70 years, with some copper roofs lasting over a century!

These lifespans make metal roofs particularly appealing in a state like New Jersey, where extreme weather events—such as nor’easters, heavy snow, and occasional hurricanes—can challenge the integrity of traditional roofing materials.

Key Factors That Affect the Lifespan of a Metal Roof in New Jersey

While the inherent durability of metal roofs is impressive, several factors influence their actual longevity:

  1. Weather Conditions in New Jersey New Jersey experiences all four seasons, which can take a toll on any roof. Metal roofs, however, are highly resistant to damage from:
    • Heavy snowfall: The slick surface of metal allows snow to slide off, preventing ice dams.
    • Strong winds: Metal roofs can withstand winds of up to 140 mph, making them ideal for coastal regions like Atlantic City.
    • Salt air near the Jersey Shore: Coastal homeowners should opt for aluminum or coated steel to avoid corrosion from salt air.
  2. Installation Quality Proper installation is crucial to maximizing a metal roof’s lifespan. Always hire a licensed roofing contractor in New Jersey with experience in metal roofing systems, see https://cjcommercialroofingnj.com/. Look for contractors certified by manufacturers to ensure warranties remain valid.
  3. Maintenance Practices Metal roofs are low-maintenance, but they still require some care:
    • Remove debris like leaves and branches to avoid scratches.
    • Check for loose fasteners after heavy storms.
    • Inspect and reseal seams or flashing to prevent water infiltration.
  4. Material Choice In regions like northern New Jersey, where snowfall is heavy, steel or aluminum roofs coated with a protective layer are ideal. Meanwhile, copper roofs are perfect for historic homes in towns like Princeton, blending aesthetics with unparalleled longevity.

Why Metal Roofs Are Perfect for New Jersey Homes

Beyond their impressive lifespan, metal roofs are an excellent choice for New Jersey homeowners due to their unique advantages tailored to local conditions.

  1. Energy Efficiency New Jersey summers can be humid and hot, especially in southern areas like Trenton and Camden. Metal roofs reflect solar heat, reducing cooling costs by up to 25%. Cool roofing coatings, which meet Energy Star standards, are particularly effective in cutting energy expenses.
  2. Environmentally Friendly As New Jersey continues to prioritize sustainability, metal roofing stands out as an eco-friendly option. Most metal roofs contain a high percentage of recycled materials and are fully recyclable at the end of their life cycle, aligning with New Jersey’s green initiatives.
  3. Aesthetic Versatility Whether you own a modern home in Hoboken or a colonial-style house in Morristown, metal roofs come in a variety of styles, colors, and finishes to suit your home’s architectural design.

Cost vs. Longevity: Is a Metal Roof Worth It in New Jersey?

While metal roofs come with a higher upfront cost compared to asphalt shingles, their longevity and low maintenance make them a cost-effective choice over time. Here’s a quick comparison:

Roof TypeAverage LifespanAverage Cost per Square Foot (Installed)Cost Over 50 Years
Asphalt Shingles20-30 years$3-$6$6,000-$12,000 (replaced twice)
Metal Roofs40-70 years$8-$12$8,000-$12,000 (one-time cost)

For New Jersey homeowners, especially those planning to stay in their homes for decades, the long-term savings on repairs and replacements make metal roofs a wise investment. For more, see https://cjcommercialroofingnj.com/.

The Role of Warranties

Reputable manufacturers often provide warranties ranging from 30 to 50 years on metal roofing products. In New Jersey, where weather extremes can put warranties to the test, these guarantees offer peace of mind. Some manufacturers even include coverage for rust, fading, and leaks, which is particularly useful in areas near the coast.

Common Misconceptions About Metal Roofs

Despite their benefits, metal roofs are sometimes misunderstood. Let’s address a few myths:

  1. “Metal roofs are noisy.” Modern metal roofs, when installed correctly, include insulation and underlayment that dampen sound, making them no noisier than other roofing materials.
  2. “They attract lightning.” Metal conducts electricity but does not attract lightning. Instead, it disperses energy safely, reducing the risk of fire.
  3. “They’re too expensive.” While the initial cost is higher, the long lifespan and energy savings make metal roofs more affordable in the long run.

Choosing the Right Metal Roofing Contractor in New Jersey

To maximize the lifespan of your metal roof, work with a roofing company that understands New Jersey’s unique climate and regulations. Look for contractors who:

  • Have local experience in towns like Newark, Edison, and Paterson.
  • Are familiar with state building codes.
  • Offer transparent pricing and warranties.

Conclusion: Is a Metal Roof Right for Your New Jersey Home?

So, how many years should a metal roof last? For New Jersey homeowners, a properly installed and maintained metal roof can provide 40 to 70 years of reliable protection. Its durability, energy efficiency, and environmental benefits make it an excellent choice for the Garden State’s diverse climate. Whether you live in bustling Jersey City or scenic Cape May, investing in a metal roof means peace of mind for decades to come.

When it’s time to upgrade your roof, consider the long-term advantages of metal roofing. Reach out to a trusted New Jersey roofing contractor today to discuss the best options for your home. With the right choice, you’ll enjoy a roof that withstands the test of time and weather.

a leaking pipe in need for repair

How to Temporarily Stop a Leaking Pipe: Quick Fixes and SolutionsHow to Temporarily Stop a Leaking Pipe: Quick Fixes and Solutions

If you’re dealing with a leaking pipe, it’s important to act fast to prevent water damage and other potential issues. A permanent fix is ideal, but it’s not always possible in an emergency situation. That’s where temporary fixes come in handy.

a leaking pipe in need for repair

“Temporary fixes can be a lifesaver when you’re dealing with a leaking pipe. They can help prevent further damage while you wait for a professional plumber to arrive or until you have time to make a more permanent repair. Some temporary fixes are quick and easy to implement, while others require a bit more effort.” said Dean Owens of Plumber Warragul.

It’s important to choose the right fix for your situation to ensure that it’s effective and safe. In the following sections, we’ll cover some of the most effective temporary fixes for a leaking pipe, so you can choose the one that’s right for you.

Preparing to Address the Leak

Assessing the Damage

Before you start, assess the damage caused by the leak. Look for signs of moisture, dampness, and water stains on walls, floors, and ceilings. Inspect the pipe to determine the location and extent of the leak. If the damage is extensive, it is best to call a plumber.

Tools and Materials Required

To temporarily stop a leaking pipe, you will need the following tools and materials:

  • Plumber’s tape or Teflon tape
  • Pipe cutter or hacksaw
  • Wrench
  • Nitrile gloves
  • Clean cloth or towel
  • Clamp or rubber patch
  • Bucket

Initial Steps Before Repair

Before you start repairing the leaking pipe, turn off the water supply valve. If you cannot locate the valve, turn off the main water supply valve. This will prevent further damage and make it easier to repair the leak.

Wear nitrile gloves to protect your hands from dirt and debris. Then, use a clean cloth or towel to wipe the pipe and surrounding area clean.

Use a pipe cutter or hacksaw to cut the damaged section of the pipe. Make sure to cut the pipe as straight as possible to ensure a tight fit.

Next, wrap plumber’s tape or Teflon tape around the threads of the pipe to help seal any leaks. Then, tighten the joint with a wrench until the leak stops.

Alternatively, you can use a clamp or rubber patch to cover the damaged area. Tighten the clamp securely using a screwdriver or wrench.

Finally, turn on the water supply valve and check for leaks. If the leak persists, it is best to call a plumber to avoid further damage.

Executing Temporary Repairs

If you notice a leak in your water pipe, you need to take immediate action to prevent further damage and costly repairs. Here are some temporary solutions you can use to fix a leaking pipe until a plumber arrives.

Using Epoxy Putty for Sealing Leaks

Epoxy putty is a reliable sealant that can be used to stop a leak temporarily. To use it, cut off a piece of epoxy putty and knead it in your hands until it becomes soft and pliable. Then, apply the putty directly to the leaking area and mold it into place. Make sure to cover the entire leak with the putty. Once applied, allow it to dry for the recommended time before turning the water back on. Epoxy putty can provide a temporary fix until a permanent repair can be made.

Applying Pipe Clamps and Rubber Gaskets

Pipe clamps and rubber gaskets are another effective way to temporarily stop a leak. To apply, turn off the water supply to the affected pipe and clean the area around the leak. Then, position the rubber gasket over the damaged area and place the clamp over the gasket. Tighten the clamp securely using a screwdriver or wrench. This method is quick and easy to install and can provide a watertight seal.

Employing Pipe Wrap and Tapes

Pipe wrap and tapes are also useful in temporarily fixing a leaking pipe. Teflon tape is commonly used to seal pipe joints and prevent leaks. To apply, wrap the tape around the threads of the joint in a clockwise direction. Make sure to wrap the tape tightly and evenly. Pipe wrap tape, also known as silicone tape, can be used to cover the damaged area and create a watertight seal. This tape is stretchy and adhesive, making it suitable for temporary pipe repair.

Installing Slip Couplings and Compression Fittings

Slip couplings and compression fittings are temporary solutions that can be used to fix a leaking pipe.

Slip couplings are used to repair a section of damaged pipe by slipping over the damaged area and securing it in place. Meanwhile, compression fittings are used to connect two pipes together and create a watertight seal.

These solutions are easy to install and can provide a temporary fix until a permanent repair can be made.

By using these temporary solutions, you can prevent further damage to your pipes and save money on costly repairs. However, it is important to note that these solutions should only be used as a temporary fix and not as a permanent solution.

If you are unsure about how to fix a leaking pipe or if the leak is severe, it is best to call a licensed plumber like Plumber Warragul, to assess the situation and make the necessary repairs.